Hitomi Shida - 250 Japanese Knitting Stitches
Here you can read online Hitomi Shida - 250 Japanese Knitting Stitches full text of the book (entire story) in english for free. Download pdf and epub, get meaning, cover and reviews about this ebook. publisher: Tuttle Publishing, genre: Home and family. Description of the work, (preface) as well as reviews are available. Best literature library LitArk.com created for fans of good reading and offers a wide selection of genres:
Romance novel
Science fiction
Adventure
Detective
Science
History
Home and family
Prose
Art
Politics
Computer
Non-fiction
Religion
Business
Children
Humor
Choose a favorite category and find really read worthwhile books. Enjoy immersion in the world of imagination, feel the emotions of the characters or learn something new for yourself, make an fascinating discovery.

- Book:250 Japanese Knitting Stitches
- Author:
- Publisher:Tuttle Publishing
- Genre:
- Rating:3 / 5
- Favourites:Add to favourites
- Your mark:
250 Japanese Knitting Stitches: summary, description and annotation
We offer to read an annotation, description, summary or preface (depends on what the author of the book "250 Japanese Knitting Stitches" wrote himself). If you haven't found the necessary information about the book — write in the comments, we will try to find it.
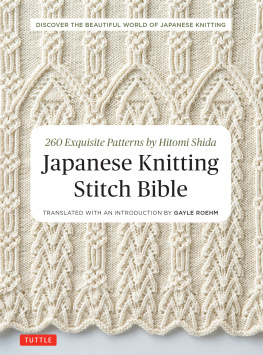
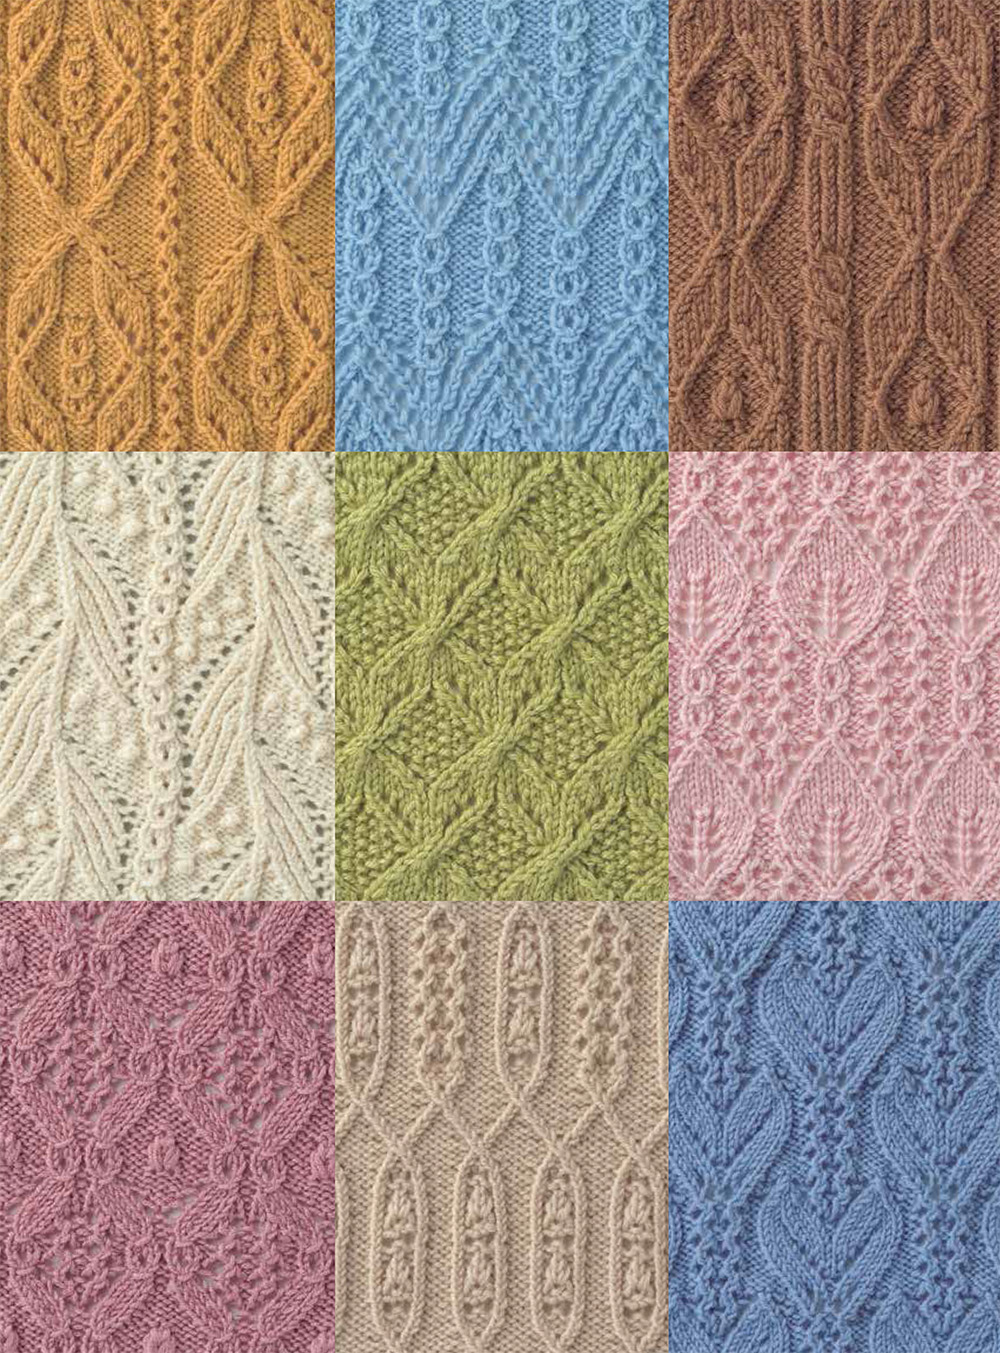
Hitomi Shidas previous work, the Japanese Knitting Stitch Bible was released by Tuttle in October 2017 and has already been purchased by thousands of avid knitters who are thrilled to discover a treasure trove of elegant and intricate new patterns. This book was Hitomi Shidas first effort and, like its successor is filled with her highly original and beautiful designs and variations on knitting classics.
Shidas stitch patterns have become a driving inspiration behind many modern Western knitting designs, and experienced knitters know this. They will purchase this book for the images alone.
In this beautifully presented stitch dictionary youll find:
Hitomi Shida: author's other books
Who wrote 250 Japanese Knitting Stitches? Find out the surname, the name of the author of the book and a list of all author's works by series.


250 Japanese Knitting Stitches — read online for free the complete book (whole text) full work
Below is the text of the book, divided by pages. System saving the place of the last page read, allows you to conveniently read the book "250 Japanese Knitting Stitches" online for free, without having to search again every time where you left off. Put a bookmark, and you can go to the page where you finished reading at any time.
Font size:
Interval:
Bookmark:
 Japanese Knitting Stitches The Original Pattern Bible by Hitomi Shida Hitomi Shida author of the Japanese Knitting Stitch Bible
Translated with an Introduction by Gayle Roehm  About this Collection For this collection, Ive used many of the stitches that first appeared in the garments I designed for my Couture Knits series. I also created some designs specially for this book, and added edgings, to make up a total of 250 stitch patterns. It was a good opportunity for me to look back at my work and think about it in new ways. Theres a long history of creating patterns from a single thread, from traditional designs to new ones developed by dedicated knitters. The world of knitting is widening greatly. Familiar patterns can take on whole new faces when the stitches are changed slightly, or a new flavor is added.
Its truly interesting to dig deeply into one stitch pattern. In addition, the impression of a stitch pattern changes with its surroundings, the way a picture frame enhances a picture. I tried here to develop edgings with individuality. One section of this book shows two knitted fabrics, with the same stitches arranged in different ways. Id be pleased if you use these examples as hints to create your own variations. I feel as if Im handing over these patterns that were born within myself, and Im looking forward to starting again, looking at the patterns in new ways.
I feel great happiness that my teachers and friends have given me the joy of knitting and a depth of technique. Thank you very much, and thanks also to those who took part in creating my books, from Couture Knits to this collection and beyond, and to those who produced all the samples. You did good work. Im full of gratitude to so many people for their help in completing this book. HITOMI SHIDA About this Book You hold in your hands a collection of 250 stitch patterns developed by the brilliant Japanese designer Hitomi Shida. Its actually her first collection, which was published in Japan in 2005.
For years, knitters have sought out the original book for its innovative sculptural stitch patterns. When it went out of print, used copies became hot items on the secondary market. Now at last, the original collection is again available for knitters and designers. Shidas second collection was published in English as The Japanese Knitting Stitch Bible (Tuttle, 2017referred to here as JKSB). This companion volume gives the knitter 250 more gorgeous stitches to choose from. About the author Hitomi Shida didnt set out to become a hand knitting designer.
She began training as a nurse, but her studies were interrupted by a serious bout of illness. During her long recovery, she was introduced to machine knitting, and qualified as an instructor. She later turned her attention to hand knitting. In 1990, she participated in a group show, which was her debut as a designer. She began taking on work for magazines and yarn companies, and published her first book of garment patterns in 1996. The next year, Shida began creating an annual Couture Knitting collection of fall and winter womens garments.
She added a spring/summer edition in 2009, as well as ongoing work for magazines and yarn companies. Shes now one of Japans best-known and most respected hand knitting designers, and her work defines Japanese knitting for many knitters. Be sure to read through the remainder of this introduction before starting to knit from this book. It includes important information about interpreting the charts and symbols, finding the pattern repeat, and using the stitch patterns in a knitted fabric. Chart reading basics The single most important thing to remember is this: the chart shows the right side of the work. Its a visual representation of what your knitting will look like when its done. Each symbol describes what the stitch will look like on the right side, not what you execute.
For example, to create a knit stitch on the right side, you purl on the reverse side. If youre knitting back and forth: On the right side, read the chart from right to left, in the same sequence that you work the stitches. On the reverse (or wrong) side, read the chart from left to right, and reverse the symbols, so that your stitches will show up correctly on the right side. That is, if you need a knit, work a purl. Aside from knits and purls, not many stitches are worked on the wrong side. The Guide to Symbols includes directions for reverse side rows, if applicable.
If only one definition is given, that particular symbol is only worked on right side rows. If youre knitting in the round: Read every row from right to left. Theres no need to reverse stitches. Symbol definitions Unlike other stitch pattern charts that you may have seen, Japanese charts normally do not provide a key to the symbols. The symbols are standardized, and every Japanese publisher uses the same symbol set. A Japanese knitter is expected to know them.
For western knitters, weve added definitions for every symbol in the book. As you work through the stitch patterns, youll notice that the symbols look a lot like the stitches they represent. Just like the overall chart, the symbols are visual representations of what the stitch should look like; theyre a sort of visual code. The symbol for knit 2 together, for instance, has two legs (two stitches are involved) and leans to the right (as the stitch does when complete). Basic stitch symbols may be combined, as well: knit 2 together with a purl dash (horizontal line) below it tells you to purl 2 together. Of the various stitch symbol systems in use around the world, the Japanese symbols look most like their corresponding stitches.
As you get used to them, youll probably wish all publishers would adopt this logical system. This collection includes two tables of symbols: The Guide to Symbols () is organized by type of stitch (such as cables) and number of stitches involved. Each symbol is cross-referenced to the stitch patterns in which it is used. Some definitions refer you to illustrations in the back. The Complex Symbols () were on a special page in the original Japanese version, because theyre unusual, complex and new to most knitters. The complex symbols are defined in this table and cross-referenced to the larger Guide to Symbols.
In most cases, the Guide to Symbols explains just one way to accomplish a stitch. Experienced knitters will notice that they may know another way to achieve the same result. One-over-one crossing stitches, for instance, can be done in several ways: with a cable needle, by switching the positions of the stitches, or by knitting the second stitch first. As long as you achieve the correct result (the top stitch slants in the correct direction), any method is fine. For consistency, Ive used the symbol definitions from Nihon Vogue, the original publisher, as found in Knitting Symbol Book (ISBN 978-4-529-05559-8). Blank boxes In almost all charts, youll see a number of blank boxes.
Check the bottom left corner of the chart to see how to read the blank. For instance:  tells you that a blank box should look like a knit on the right side. This means its purled on the wrong side. Lots of blank boxes indicate stockinette stitch.
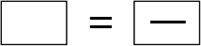
Font size:
Interval:
Bookmark:
Similar books «250 Japanese Knitting Stitches»
Look at similar books to 250 Japanese Knitting Stitches. We have selected literature similar in name and meaning in the hope of providing readers with more options to find new, interesting, not yet read works.
Discussion, reviews of the book 250 Japanese Knitting Stitches and just readers' own opinions. Leave your comments, write what you think about the work, its meaning or the main characters. Specify what exactly you liked and what you didn't like, and why you think so.