Carter, David. Eyewitness Handbook Butterflies and Moths. 1992. New York: Dorling Kindersley, Inc.
Fassett, Kaffe. Glorious Inspiration. 1991. United Kingdom: Sterling Publishing Co. Inc.
McGhee, Karen, and McKay, G. National Geographic Encyclopedia of Animals. 2007. Washington DC: Weldon Owen Inc.
Olson, Dennis L. Shared Spirits Wildlife and Native Americans. 1995. Nevis, MN: Northwood Press.
Pinder, P., Hodge, S., Dutton, E., and Newey, J. How to Draw Animals. 2011. Tunbridge Wells, UK: Search Press Ltd.
Wild Fibers Magazine. Vol. 11, issue 4 (front cover photo).
Zimiles, Martha R. American Treasury of Needlework. 1976. New York: Van Nostrand Reinhold Co.
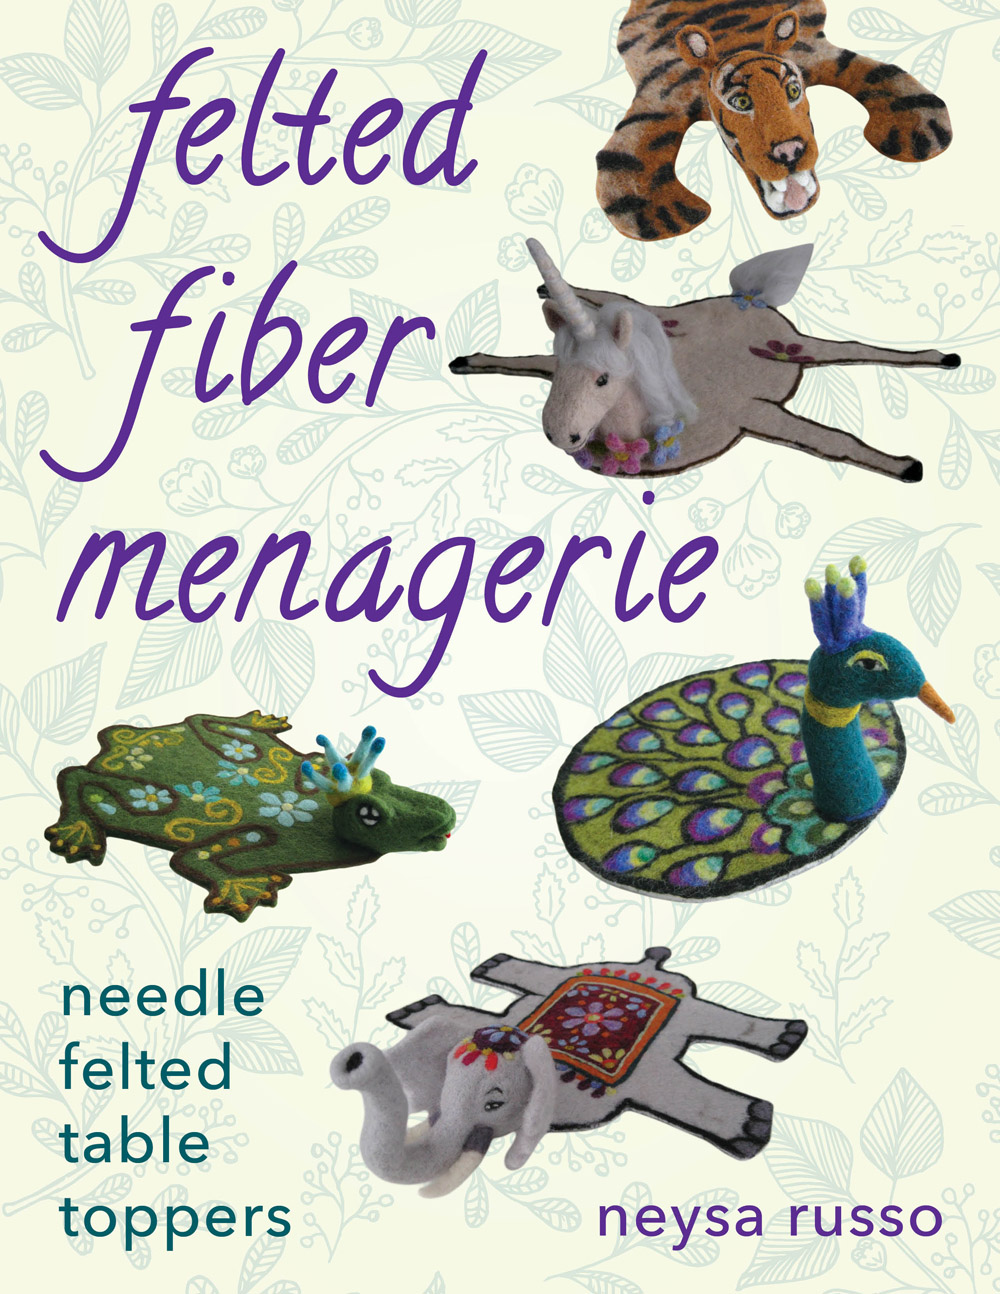
Felted Fiber Menagerie

Stackpole Books
An imprint of Globe Pequot
Distributed by
NATIONAL BOOK NETWORK
800-462-6420
Copyright 2018 by Rowman & Littlefield
Photography by Neysa Russo
AH rights reserved. No part of this book may be reproduced in any form or by any electronic or mechanical means, including information storage and retrieval systems, without written permission from the publisher, except by a reviewer who may quote passages in a review.
The contents of this book are for personal use only. Patterns contained herein may be reproduced in limited quantities for such use. Any large-scale commercial reproduction is prohibited without the written consent of the publisher.
We have made every effort to ensure the accuracy and completeness of these instructions. We cannot, however, be responsible for human error, typographical mistakes, or variations in individual work.
British Library Cataloguing in Publication Information Available Library of Congress Cataloging-in-Publication Data
ISBN 978-0-8117-1790-8 (paperback)
ISBN 978-0-8117-6751-4 (e-book)
 The paper used in this publication meets the minimum requirements of American National Standard for Information SciencesPermanence of Paper for Printed Library Materials, ANSI/NISO Z39.48-1992.
Introduction
T his book presents a diverse assortment of animal mug rug projects for both the beginner and the experienced needle felter. Because every creature abounds in uniqueness, each project will present interesting challenges in needling. You will learn how to sculpt using felting needles, and also gain insight into the basic principles of wet felting in a way that is simple and accessible. No animals are harmed to create these adorable mug rugs!
THE BASICS
Supplies
FELTING NEEDLES
The projects in this book use two types of felting needles, the star configuration for sculpting the head and the triangular configuration for decorating the flat body of each character. The barb configurations are barely discernible to the eye, even with a magnifying glass, so rely on a retailer to identify the needle for you. To distinguish one from the other, it might be helpful to mark the handle of one needle with nail polish. The work of the felting needle is done on the bottom inch of the needle, which is barbed. Hold the felting needle by pinching it between your thumb and finger and poke straight up and down. The barbs on the needle grasp the wool, and the poking motion forces the strands of fiber inwards where they entangle. It is important to insert and remove the needle at the same angle, since the needles are brittle and will break if mishandled. Always remember to secure your needles safely when you leave the work area.
Needling is a repetitive motion that could cause hand stress. There are several ways to minimize this.
Stretch your fingers often.
Use the correct needle gauge for the job.
Work on a flat surface with your elbow resting on the table.
Use a needling board that is only 1 inch thick.
NEEDLING BOARD
You must have a needling board under your project as you work so that the needle has a place to land safely as it penetrates the wool and pushes the fibers. The board used in these projects is blue board insulation, which is inexpensive and readily available at the local lumberyard. Since the barbs are located on the bottom inch of the needle, the needling board should be 1 inch thick. If the needling board is thicker than 1 inch, it may force your wrist upwards, creating an awkward needling position; if it is less than 1 inch thick, the needle may break if it hits the work table underneath. All needling boards degrade with use. You will notice that the needle barbs begin pulling bits of the board back up. When you start to see small pieces of board stuck to the back of the felt, the board needs to be replaced.
FINGER GUARDS
If you lift your project from the needling board to sculpt it, then finger guards are a must. Felting needles are sharp and painful and could cause infection if they penetrate the skin. Dimension manufactures a silicone fingertip guard that is less expensive than a box of bandages.
SCISSORS
A small pair of scissors with a sharp point is ideal for trimming tight corners and stray fibers. A larger pair of scissors will be needed to cut out the body. Because you will be trimming close to the edge, the larger scissors should also be sharp.
PERMANENT MARKERS
Markers are used for tracing the stencils or drawing freehand onto the pre-felt. They should be permanent to avoid smudging while you work and bleeding during the wet felting process. Use black for light-colored pre-felt and a metallic marker for dark-colored pre-felt.
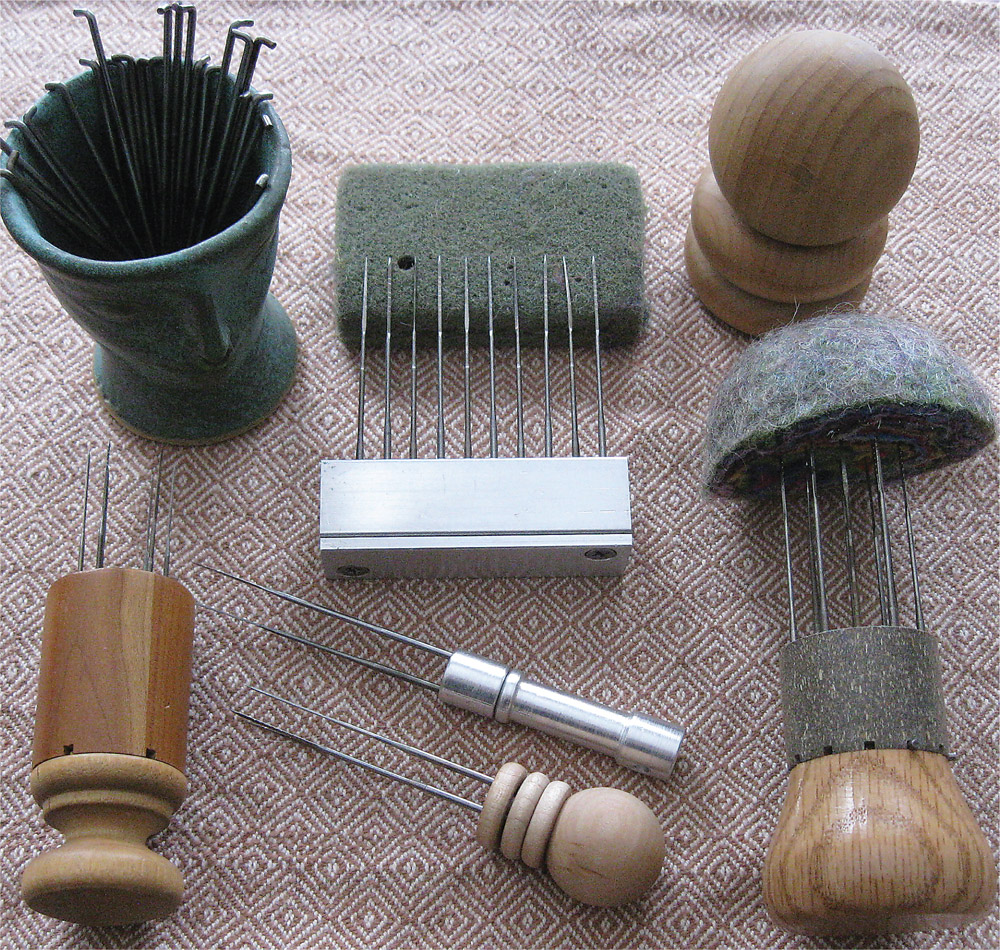
Felting needles are available in a variety of configurations.
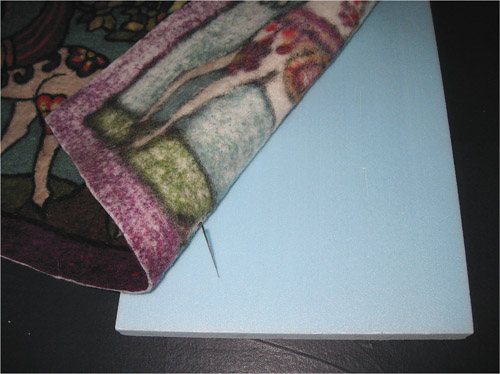
A needling board under your work protects you from the sharp needles as you push through the felt.
WOOL FIBER
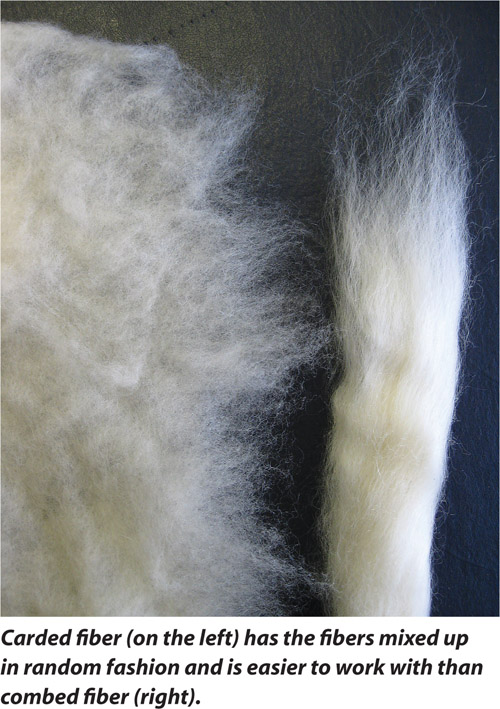
There are many types of needle felting wools available, in a wide range of colors. Wool is prepared in different ways, and beginners may be confused by the choices. Carded fiber is easier to work with, both for needling and for wet felting. The projects in the book use mostly carded fiber except for the bear, which is done using combed fiber.
Fiber glossary
Carded Fiber: Fiber that has been processed with hand cards. The process of carding wool mixes up the fibers, randomly organizing them. The teeth on the carding machine bend the strands of wool, making them receptive to entangling.
Batt: A sheet of carded fiber ready for felting. Layers may be lifted off or added on, to adjust for thickness, and bits may be pulled off easily for needling. This is the ideal preparation for rolling the fiber of the head and also for creating the wet felt bodies.










 The paper used in this publication meets the minimum requirements of American National Standard for Information SciencesPermanence of Paper for Printed Library Materials, ANSI/NISO Z39.48-1992.


