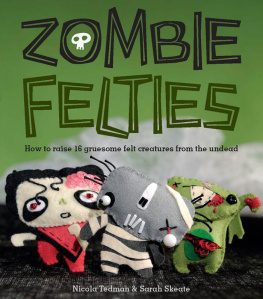
ZOMBIE FELTIES
How to raise 16 gruesome felt creatures from the undead
Nicola Tedman & Sarah Skeate

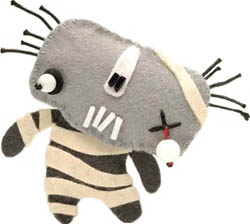
Zombie Felties
Copyright 2011 by Ivy Press Limited
All rights reserved. No part of this book may be used or reproduced in any manner whatsoever without written permission except in the case of reprints in the context of reviews. For information, write to:
ANDREWS McMEEL PUBLISHING, LLC
an Andrews McMeel Universal company
1130 Walnut Street
Kansas City, Missouri 64106
E-ISBN: 978-1-4494-1862-5
APPR
This book was conceived, designed, and produced by:
Ivy Press
210 High Street, Lewes
East Sussex BN7 2NS, UK
www.ivy-group.co.uk
Creative Director Peter Bridgewater
Publisher Jason Hook
Editorial Director Tom Kitch
Commissioning Editor Sophie Collins
Senior Designer Kate Haynes
Designer Joanna Clinch
Illustrator Melvyn Evans
Photographer Andrew Perris
Color origination by Ivy Press Reprographics
ATTENTION: SCHOOLS AND BUSINESSES
Andrews McMeel books are available at quantity discounts with bulk purchase for educational, business, or sales promotional use. For information, please e-mail the Andrews McMeel Publishing Special Sales Department:
Important!
Safety warning: Zombie felties are not toys. Many have small, removable parts and should be kept out of the reach of small children.
CONTENTS
Your Zombie Lineup
STARTING OUT
How to make sure your zombies look good
Despite their horrid appearance, Zombie Felties are quite easy to sew provided that you follow a few simple guidelines and pointers for making your first one or two. Be warned, though, not only are these zombies far too unsettling for small children to play with, but most also have plenty of sharp or tiny detachable pieces.

TOOLS
Use sharp scissors for cutting and snipping, and use the smallest embroidery needle youre comfortable with to add details and sew the felties together.
The craft glue that comes in a tube with a tiny nozzle dispenser is easiest to use; alternatively, use a glue stick and, when glue is needed for a very small area, scrape a bit off and use the point of a needle, matchstick, or toothpick to apply it accurately.
A disappearing marking pen is best for drawing around templates. These are popular with quilters and are available at most craft stores. They draw a line on fabric that simply disappears after a few days. You can also use it to mark out stitching or placement for adding details on the felt pieces.
TEMPLATES
You can scan and print or photocopy the pattern pieces on the template pages at 100 percent, then simply cut them out. If you dont have easy access to a scanner and printer or photocopier, trace the pattern pieces for the zombie you want to make onto tracing paper with a soft pencil. All the templates in the book are the correct size to make the zombies shown; none of them will need scaling up or down.
STUFFING THE ZOMBIES
Use a customized toy stuffing to fill your zombies: It is light, and its also easy to separate out the minute wisps for stuffing the dolls. Dont be tempted to use cotton balls or batting insteadtheyll clump and make for a lumpy little doll. Use something small and pointedwe suggest a matchstick or pointed tweezersto help you distribute the stuffing evenly in the tinier pieces.

SEWING AND EMBROIDERY
All the zombies are both embroidered and stitched together with embroidery floss. Standard floss comes in a small skein, with thread made up of six separate strands. You can pull the floss apart to get the thickness specified in the patterns. Youll find that the floss is used in single or double threads in most of the instructions, although more strands will occasionally be called for in specific patterns or stitches. To get the number of threads you want, cut a short length of floss, around 1216 inches (3040 cm) long, and simply separate the desired number of strands from the main piece, pulling gently from one end. Keep the other strands to use elsewhere. To secure the thread, either tie a small knot at the end of the floss, or make a tiny cross stitch (one stitch laid over another). Whichever method you choose, start from the wrong side of the felt piece on which you are working. All the patterns specify using an embroidery needle unless you are sewing on beads, in which case you should use a special beading needle. This has a very narrow head so that the beads slip over it easily.
If you arent used to embroidering, practice the stitches a few times on a felt scrap before working on a zombie. None of the stitches described are difficult, but one or twoFrench knots in particularcan take some practice to get perfect.

THE STITCHES
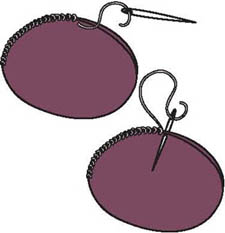
OVERSTITCHING
Overstitching is used to attach two pieces of fabric together. This isnt a decorative stitch, so always use thread that matches the color of the felt, and keep the stitches small and neat.
Take a strand of embroidery floss and align the two pieces of fabric to be stitched together. Bring the thread through from the wrong side of one of the pieces and make a small stitch at right angles to the edges of both felt pieces, going over both edges and taking the needle through both layers of felt.
Push the needle back through the felt, bringing it out a little farther along from where you started, and make a second stitch over the edges of both pieces of felt.
BACKSTITCH
This stitch makes a plain unbroken line.

Thread the needle with one or two strands of floss, as directed, then bring it up through the fabric at the point at which you want the line of stitching to start.
Make a stitch going in the opposite direction to the way you want your backstitch line to continue, and bring the needle back up through the fabric one stitch length away in the direction in which you want your stitching line to go.
Take the thread backward and push the needle through the point where the first stitch finished. Bring it out one stitch length in front of the thread. Continue until the length of the desired line of backstitch is complete. Fasten off.
