For Mady, with love.
This book is further dedicated to the readers of bakerella.com. Your enthusiasm and excitement for making these little treats inspires me every day. I hope you enjoy this book as much as I did writing it for you.
Welcome to Cake Pops! Im not a professional baker, and I dont have any formal training in chocolate or pastries or anything confectionery. But I do have a passion to learn and a desire to try new things. Ive always loved sweets, and my motto has always been the more chocolate, the better! But growing up, I never really experimented with anything other than packaged cake, cookie, or brownie mixes. It never even crossed my mind that I could or should try to bake from scratch. Yellow cake mix and chocolate frosting were the extent of my cake-baking adventures (and theyre still a favorite today).
On a whim in 2007, I took a two-hour cake decorating class. We learned how to make and tint homemade frosting, properly ice cakes, and use decorator bags and tips. You knowthe basics. Well, that class changed everything for me. I still remember how happy I was to be exposed to the world of cake decorating. Even now, that feeling is still with me and inspires me to keep baking. To branch out and expand my experiences. To try new things without being afraid of the outcome. Its only sugar, you know. Even mistakes can be sweet!
Several months after finishing the cake class, I started a blog to chronicle my baking attempts. I named it Bakerella (www.bakerella.com), the same as my user name on Flickr.com, where I was hosting my photographs. I didnt tell anyone about my site in the beginning. I started out with some of my favorite things to makeand cake balls were one of them. I was introduced to cake balls at a Christmas party by my best friends mother-in-law. One thing led to another, and over time I turned the bite-size balls of cake into cake pops and then developed them further into cupcake-shaped cake pops. The cupcake pops took the Internet by storm and caught the attention of The Martha Stewart Show. Before I knew it, my anonymous blog had catapulted me onto national TV to show Martha herself how to create the tiny treats. Needless to say, my friends and family were a little surprised.
Since the show, I have received so many wonderful e-mails and messages from readers about how the blog has inspired them to start baking. Readers began re-creating my cake and cupcake pops and sharing their photos with me. The excitement surrounding the pops made me want to experiment even more, which led to this book, where I share more than forty cake pop projects, plus techniques for creating your own.
So, get ready to experience cake as youve never seen (or eaten) it before. You wont find any traditional layer cakes or cupcakes in this book, but you will find ideas for amazingly creative bites of individually decorated cakes, and frosting.
Need something unique for a birthday party, baby shower, wedding, or upcoming holiday? The answer is right here. Let cake pops be the stars at your next event or party. But be careful: once you make them, you wont want to stop, and anyone who tries them probably wont let you.
Dont worry. You dont have to be a pastry artist or confectionery genius to make cake pops. You dont even need to be a great baker. With a few ingredients and common candy, you can transform any cake, even a store-bought one, into fascinating tiny treats.
Youll learn the methods behind the madness. Youll see how easy cake pops are to decorate. Youll learn techniques that will kick-start your creativity. Once you make your first cake pops, youll be so proud of what youve accomplished. I promise.
I hope you enjoy them and find the same passion as I have, no matter what the subject!
Are you ready to get started?
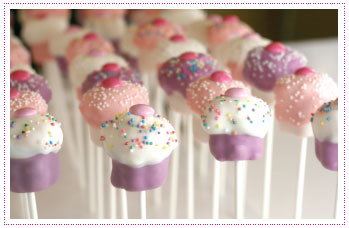
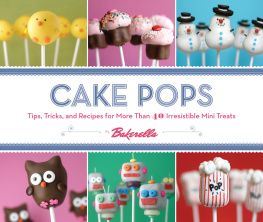
Cake pops, cupcake pops, cake balls, and bites. They all have the same things in common: cake, frosting, candy, and cute. But these arent ordinary cakes. They are tiny candy-covered confections made of crumbled cake mixed with frosting that you can mold into different shapes and decorate for any occasion. They are super-sweet, extremely moist, and completely covered in candy coating.
Over the next few pages, youll find easy instructions that will help you master each of the four methods of creating unique sweet treats. Get ready to impress your friends, your family, and even yourself.
The following how-tos are based on using a cake mix and ready-made frosting. Its a really easy way to learn the basics and achieve predictable, consistent results. Then, once you feel comfortable making and decorating your very own cake pops, youll have the knowledge to branch out with other cake and frosting recipes and get even more creative with custom flavors.
Or just stick with the mixes. I do.
Refer to for easy cake and frosting recipes from scratch.
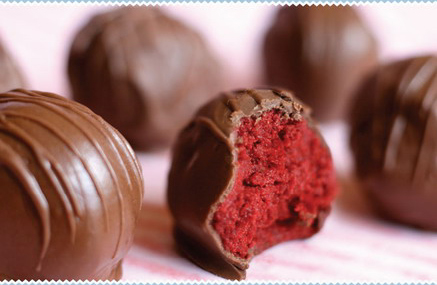
Cake balls are bite-size balls made of crumbled cake mixed with frosting and covered in candy coating. They are super-easy to make and form the basis of endless variations of decorated cake pops, cupcake pops, and cake bites.
Makes 48 cake balls
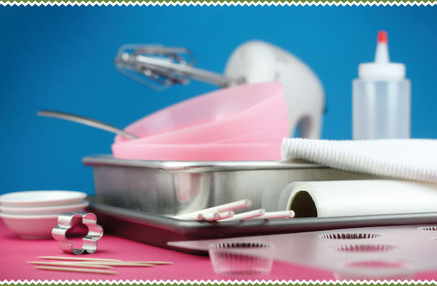
Youll need
18.25-ounce box cake mix
9-by-13-inch cake pan
Large mixing bowl
16-ounce container ready-made frosting
Large metal spoon
Wax paper
2 baking sheets
Plastic wrap
32 ounces (2 pounds) candy coating
Deep, microwave-safe plastic bowl
Toothpicks
Resealable plastic bag or squeeze bottle (optional)
Bake the cake as directed on the box, using a 9-by-13-inch cake pan. Let cool completely.
Once the cake is cooled, get organized and set aside plenty of time (at least an hour) to crumble, roll, and dip 4 dozen cake balls.
Crumble the cooled cake into a large mixing bowl. See You should not see any large pieces of cake.
Add three-quarters of the container of frosting. (You will not need the remaining frosting.) Mix it into the crumbled cake, using the back of a large metal spoon, until thoroughly combined. If you use the entire container, the cake balls will be too moist.
The mixture should be moist enough to roll into 1-inch balls and still hold a round shape. After rolling the cake balls by hand, place them on a wax papercovered baking sheet.
Cover with plastic wrap and chill for several hours in the refrigerator, or place in the freezer for about 15 minutes. You want the balls to be firm but not frozen.
If youre making a project that calls for uncoated cake balls, stop here and proceed to decorate the cake balls, following the project instructions.
The first time I tried a cake ball was at a Christmas party in 2007. The appearance of the balls was deceptivethey looked like peanut butter ballsand I almost passed them by. But then I was told they werent peanut butter balls at all, but cake balls. Well, the name alone sent me straight over to investigate. And Im so glad I did, because they have been a featured sweet at many family get-togethers since and the basis for my cake-pop craze.

