Acknowledgments
Big thanks to Jennifer Adams and the Gibbs Smith team for believing in me and helping me make this book a reality! Thank you to Kyle Dreier for your hard work, long hours, and creative expertise. Thank you also to Caroline Brewer and Rory White for putting the finishing touches on every shot. Thank you to David and Laura for your advice and remote kitchen expertise. Thank you to Katie Whitmore for capturing me at my best. Thank you to my taste-testers: Chris Whitmore, Tyler and Nicole Rhoden, and Henry. Lastly, thank you to the dedicated readers and fans of Pizzazzerie.com for your daily excitement.
Celebrating and hosting parties has been a love of mine since I set up my first tea party as a little girl. Entertaining friends and family brings together those we love to enjoy great food and even sweeter company. I am so excited to share this collection of party recipes for your own special occasions. Push-up pops are perfect for themed childrens birthday parties, spooky Halloween parties, summer picnics, Christmas parties, Easter gatherings, Valentines day parties, tea parties, baby showers, bridal showers, or for a push-up pop baking swap!
Tips and Techniques for Push-up Pops
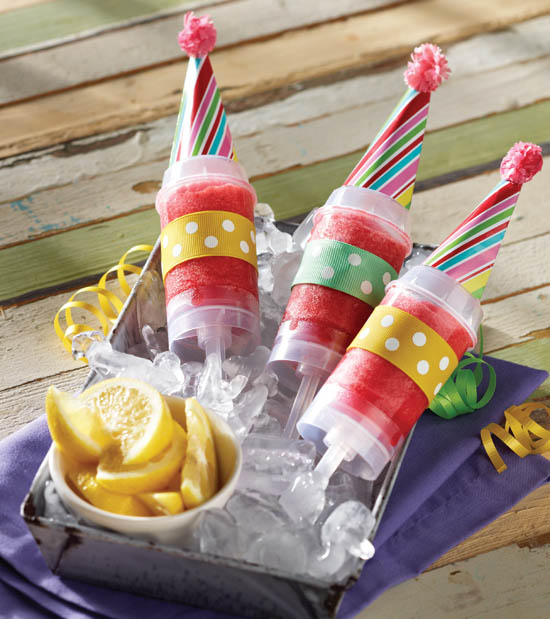
You might remember frozen push-up pops from your childhood, and now these sweet treats are back as the latest party trend.
There are no rules with push-up pops! From frozen novelties to cakes and pies, almost any dessert recipe can be transformed to fit in these little dishwasher-safe containers (for a list of places to buy them, see ). In this book, youll find a collection of fabulous sweet recipes for push-up pops. Following are some tools and equipment that will make creating your push-up pops as easy as can be.
Jelly Roll Baking Pan
A jelly roll pan is similar to a cookie sheet but with raised sides. Recipes in this book were developed using an 11 x 16-inch jelly roll pan. For cakes, cookies, and bar recipes, simply spread your batter or dough out to fill the jelly roll pan. Theres no need for a cookie cutter. Simply flip your push-up pop container over and use the container itself to cut and push out circles. Flip it back over to fill the push-up pop with your baked goods.
Frosting Tips
Many recipes in this book call for piping frosting, whipped topping, or various fillings. If you dont have a frosting dispenser or a pastry bag with tips, simply place your frosting or filling in a large, plastic ziplock bag. Fold down sides of the bag when filling it to avoid making a mess. Fold the sides up and cut a small hole in one corner of the bag. You are now ready to pipe and swirl your filling or frosting into the push-up pop molds. To pipe a pretty swirl, lift up in a circular motion as you squeeze the filling out.
Layering Tool
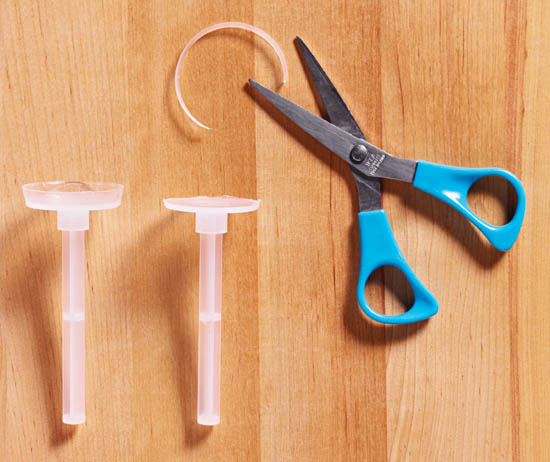
To help press down layers of a recipe (for example: cake, frosting, graham cracker crumbs), I created an easy tool from the push-up part of the push-up pop mold itself. Use scissors to trim the raised edge of the push-up piece so you are left with a flat round base on a stick that can be inserted into the push-up pop container to push down each layer as you build the filled push-up pop.
Displaying Your Push-Up Pops
To display your sweet treats, simply push the handle of your filled push-up pop mold down into floral foam placed in a vase or bowl. Hosting a rustic themed party? Place floral foam in wooden crates and cover with natural-colored crinkle paper. Throwing a tropical luau? Cover floral foam with shaved coconut.
Acrylic and plastic push-up pop stands can be found online (see ) or you can easily make your own by drilling small holes in wood. Then paint the wood to fit your party theme! Raise the wooden frames on pedestals to make room for the handles underneath.
Following are some helpful hints for baking.
Measurements
1/8 teaspoon = a pinch or dash
3 teaspoons = 1 tablespoon
2 tablespoons = 1 fluid ounce = 1/8 cup
4 tablespoons = 1/4 cup
1 pound = 16 ounces
1 cup = 8 fluid ounces = 16 tablespoons
1 pint = 2 cups
1 quart = 2 pints = 4 cups
1 gallon = 4 quarts = 16 cups
Baking Measurements
1/2 cup butter = 1 stick = 8 tablespoons
4 cups flour = 1 pound
2 cups sugar = 1 pound
1 pound brown sugar = 2-2/3 cups
1 pound powdered sugar = 3-1/2 cups
1 square chocolate = 1 ounce
1 cup chocolate chips = 6 ounces
1 cup whipping cream = 2 cups whipped
1 lemon = 1/4 cup lemon juice
1 orange = 1/3 cup orange juice
1/2 cup all-purpose flour and 1/2 cup cornstarch = 1 cup cake flour
Cake Push-up Pops
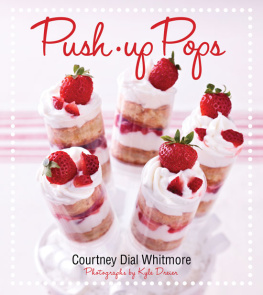
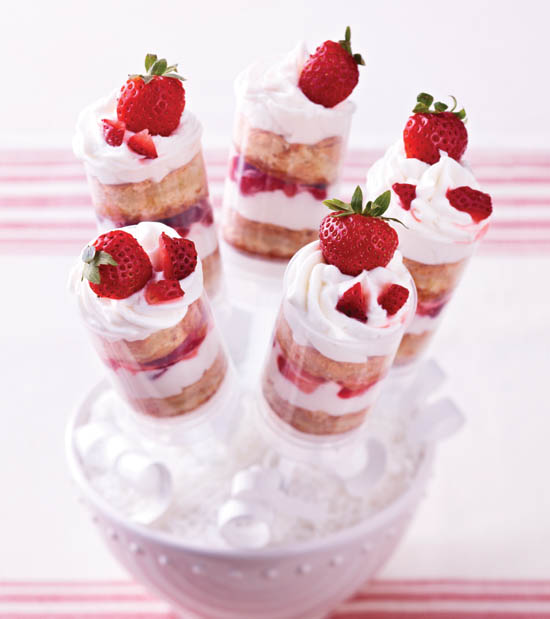
Strawberry Shortcake
Host a strawberry shortcake party with this sweet treat. Serve up a variety of strawberry goodies (chocolate-dipped strawberries, strawberry daiquiris, strawberry mousse) and encourage guests to bring their favorite strawberry recipe to share!
| 3/4 cup butter, divided |
| 1 box pound cake mix |
| 4 eggs, room temperature, divided |
| 1 (8-ounce) package cream cheese |
| 1 (16-ounce) box powdered sugar |
| 1 teaspoon vanilla extract |
| 2 pints strawberries |
| whipped cream topping |
Preheat oven to 350 degrees F. Melt 1/2 cup of the butter and combine with pound cake mix and 2 eggs. Mix with an electric mixer until ingredients are well blended. Spread into a greased jelly roll pan. Set aside.
Melt the remaining 1/4 cup butter. Soften the cream cheese in a microwave-safe bowl. Beat the cream cheese, remaining 2 eggs, powdered sugar, melted butter, and vanilla with an electric mixer until fluffy, 3 to 5 minutes. Pour over cake mixture in pan, sealing the edges. Bake for 45 minutes or until golden brown. Cool and cut into circles using the open end of a push-up pop mold.
Slice the strawberries or cut into small pieces. Start layering a push-pop mold with a circle of cake followed by a dollop of whipped cream topping. Add a layer of strawberries. Repeat layers. Garnish the top with strawberries. Chill until ready to serve.
Makes 12 push-up pops
Rainbow Cupcake Party

