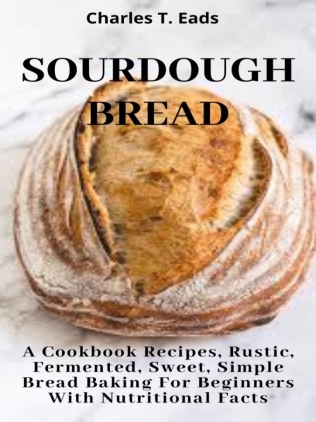
SOURDOUGH BREAD
A Cookbook Recipes, Rustic, Fermented, Sweet Simple Bread Baking For Beginners with Nutritional Facts
By
Charles T. Eads
Copyright 2020 By Charles T. Eads
All rights reserved. No part of this publication may be reproduced, transmitted, stored in a retrieval system, or distributed in printed or electronic form without the written consent of the publisher or author. Although care should be taken in the preparation of this book, the publisher and author are not responsible for errors or failures and cannot be held liable for any damage created by the use of the information therein.
LEGITIMATE NOTICE:
This book is copyrighted and is just for individual use. This book ought not to be revised or dispersed, sold, quote, or reworded without the assent of the writer or distributer.
Sourdough Varieties
Your Choice Is Limitless.......
TABLE OF CONTENTS
INTRODUCTION
For many of us home bakers, a good piece of sourdough bread feel like fighting for the world championship or an Olympic gold medal. It is the challenge of overcoming all challenges and it takes real commitment, but it is also something that can be fully achieved.
Are you ready to take on the challenge of making real sourdough bread? If so, or even if you're just curious what this is about, here is everything you need to know.
WHAT MAKES SOURDOUGH BREAD SOUR?
The sourdough bread is made entirely from wild yeast. With a strong, active sourdough culture of wild yeast, you don't need commercial yeast. Wild yeast is a little more convincing and works a little slower than commercial yeast. Therefore, sourdough bread is usually mixed, shaped, and baked over a day or even several days. This slow and long development time not only gives the wild yeast time to do its job but also helps to identify more complex and nuanced flavors in the finished bread that go far beyond those of an average loaf of bread.
While wild yeast is undoubtedly the star of this show, it's not really what makes the bread sour. The sour taste comes from the presence of two bacterias, Lactobacillus and Acetobacillus, growing alongside wild yeast in the sourdough culture and help, ferment the sugar in the dough.
So keep in mind that sourdough bread doesn't always taste bitter. The development of your main course and how you make your bread can make the bitter taste very pronounced or more subtle. The recipe here is balanced - it's a bit bitter, but it's offset by a nice selection of sweet, earthy, and yeast flavors.
Each Chapter Focuses on A Type Of Bread From Particular Region with Three Category each
A Blend Of Tasty Recipes
CHAPTER ONE
THE SOURDOUGH STARTER
A sourdough starter is needed before you can make sourdough bread. This is a flour and water culture to grow wild yeast and these bacteria. A ripe starter ensures a better rise and flavor enrichment in your sourdough bread.
You can make your main course in around five days. On the first day, mix flour and water into a dough and let stand at room temperature overnight. Wild yeast is very common and easy to get. For the next few days, you will have to feed the yeast and bacteria by pouring part of the culture and adding fresh flour and water. You will know it can be used to make bread if the crop turns very bubbly within hours of being fed and if it smells sour but fresh.
WHY SHOULD WEIGH THE INGREDIENTS
It is strongly recommended to weigh all of the ingredients when making sourdough bread. Not only is this more accurate, but ultimately easier. When weighing, all you have to do is toss the ingredients into the bowl and look at the scales. Also no guess as to whether one added the fourth or fifth cup of flour.
YEAST
Assume you already made the sourdough starter, so now let's make the yeast - this yeast is ultimately mixed into the batter. It is made with a tablespoon of your active starter and a certain amount of flour and water. A tablespoon of the starter may seem like little, but you will be surprised how quickly the yeast in that tablespoon will multiply and make the yeast bubble.
Make the yeast the night before you plan to mix the batter and leave it on the counter. The next morning it should be bubbly and smell a little sour. You can test your readiness by pouring a tablespoon into a cup of water. If it floats, it's done!
AUTOLYSIS
Once you've mixed the yeast with the rest of the flour and water, let it sit for at least 30 minutes or up to four hours. During this time, the flour will absorb the water and be fully hydrated, which will contribute to the formation of gluten in the next step. The enzymes in the flour also begin to break down the starches into simpler sugars that become the food for the yeast and bacteria in the yeast and make the bread tastier. After this resting step, add the salt. Salt is necessary for tasty bread, but it can inhibit activity during the autolysis step.
FOLD (DO NOT KNEAD) THE DOUGH
After trying many different sourdough recipes over the years, I've become a big proponent of the folding method of developing the gluten in the dough, rather than kneading in a stand mixer or by hand. Not only does the folding process require less work, but it also gives the finished bread crumb a better structure and network of holes (which is good in the artisan bread world!).
After autolysis, start folding the dough by taking part of the dough from the side, stretching it, and then folding it over the dough. Do this around the bowl several times, and then let the batter sit for about 30 minutes before doing it again. After a few rounds, the dough turns from hairy and lumpy to soft and elastic.
USE TEST BASKETS
The proofing baskets hold the shaped loaves in place during the final proofing before baking. You can buy and use a colander or mixing bowl. In both cases, line the basket or bowl with a clean tea towel and brush generously with flour. Rub the flour on the cloth with your fingers. It helps prevent dough from sticking to the bowl.
Fermentation baskets don't require a lot of maintenance. When you're done baking, scoop out the loose flour, let it dry on the counter, and then store it in a cupboard. If you bake often enough, you won't have to wash the tea towel. Allowing the flour to build will prevent the dough from sticking. However, keep an eye out for mold and always let towels and baskets dry completely before storing them again.
BAKING IN DUTCH OVENS
Dutch ovens are a boon for home bakers. You need a damp and humid environment for the first few minutes of baking to get a good rise in the dough and develop the crust, but doing these in household ovens is difficult and imperfect. Dutch stoves solve the problem. Dutch ovens trap the moisture that evaporates from the bread and create their humid environment. Once the initial baking phase is over, cover the pan to remove excess steam and let the bread continue to bake.


