THE COMPLETE SOURDOUGH COOKBOOK FOR BEGINNERS
Learn the Fine art of Fermented Bread and become a Master Baker
Table of Contents
Introduction
D ating back tens of thousands of years, Sourdough is the oldest type of leavened bread globally. And if it has something of a revival, it's neither modern nor a fad. Indeed, the only reasonably new thing about Sourdough is how it is talked of today since Sourdough was known as "bread" once upon a time.
The leavening (or rising) of dough has, for centuries, been a by-product of an essential process called fermentation. Fermentation sees natural bacteria and yeasts digesting the carbohydrates present in a batter made of flour and water, creating carbon dioxide bubbles that cause it to rise. The process also makes lactic and acetic acids, which account for the natural fermented bread's tangy, sour aroma and flavor.
Natural fermentation begins with a starter-a pre-fermented, highly active flour mixture that the baker cultivates and preserves. Once that starter is introduced into a higher quantity of flour, water, and salt, with all its yeasts and bacteria, it becomes an airy, tangy dough, which can be baked into what we now know as sourdough bread.
The Sourdough has one more important ingredient: work.
Baking with natural yeasts is not something that well translates precision ingredients, timings, and temperatures into the modern recipe format. It's much freer than that, an environmentally and personally special thing. For this reason, you can rarely get the results you want after a recipe. The early days' problem is that you are afraid if you had to step away from the method and unable to understand what it should be.
While baking can sound daunting in this way, it is an advantageous and exciting skill to learn. This will guide you away from the recipes and trust your intuition. Instead of a strict recipe, this cookbook has included all the basics of sourdough starter and the science behind its working so that you can make changes as you want to, knowing that it will not turn out as a disaster.
When you hate carbs but enjoy bread, Sourdough may be the answer to your wishes. However, not all bread is created equal. Sourdough bread goes through a long fermentation cycle that breaks down starches, so it is lower than other types of bread on the glycemic index. In a study comparing white bread, whole wheat bread, whole grain wheat barley bread, and white sourdough bread, the lowest levels of blood sugar and insulin in people who consumed sourdough bread were found. Also, their decreased glucose levels remained until the next meal.
For most people to eat more sourdough bread, they don't need much convincing. Reason enough is the dynamic taste, the crusty exterior, and the airy interior. But even if you're fond of sourdough bread, making it at home can be overwhelming, particularly if you've never taken care of culture before.
It is possible to buy sourdough loaves made traditionally, but they are most often sold at artisan bakeries and can be costly. Many of the bread in the grocery store branded as Sourdough is made with commercial baker's yeast, with a little sourdough added for flavoring.
Don't worry! Making sourdough bread at home isn't that hard. It is much easier to maintain a healthy sourdough culture than many people make it, and no-knead sourdough bread takes time but minimal effort.
Sourdough fans and other artisan food spend weeks brewing their perfect culture-some do it for health benefits, while others do it for the pure joy of making great bread. Sourdough bread provides a perfect alternative to regular bread. Its lower levels of phytate make it nutritious and more comfortable to digest.
Sourdough bread also tends to raise blood sugar levels less, making it a choice for those who track their sugar in the blood. Given anything, it's worth a try.
Part One: Six Days to Your First Starter
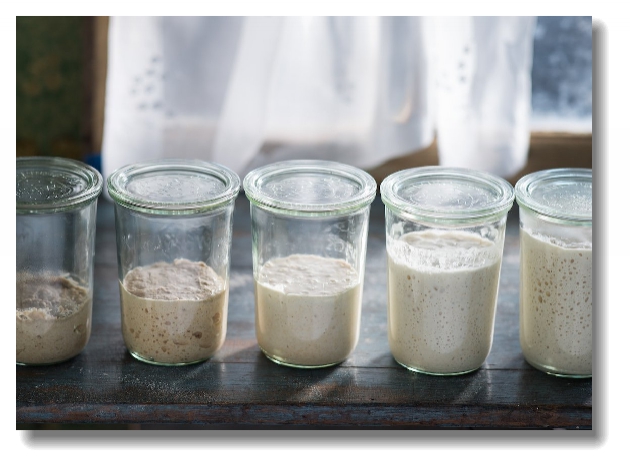
The First Six Days
To make a sourdough starter, you will mix flour and water, cover the mixture loosely, and allow yeast and bacteria in the air and on the flour itself to multiply. For the right yeast and bacteria populations to dominate in a new starter, you will need to feed it fresh flour and water every day for about six days. After that, the microbial populations will be established, you can make bread with your starter, and you can store the starter in the refrigerator and feed it less often. Feeding and maintenance are far more flexible than most sourdough books, and online resources would lead you to believe.
Please keep in mind that your starter in your kitchen may be a little faster or slower than this schedule, so dont worry if youre off by several days.
Day One
In a clean quart-size or larger jar, mix 60 grams of unbleached flour with 60 grams of unchlorinated water. This is approximately cup of flour and cup of water.
Stir the mixture into a uniform paste using a fork thoroughly. Then scrape down using a spatula on the sides of the jar.
Wrap a rubber band around the jar at the starter's top-level and loosely cover the jar without screwing on the lid. Leave the jar at room temperature.
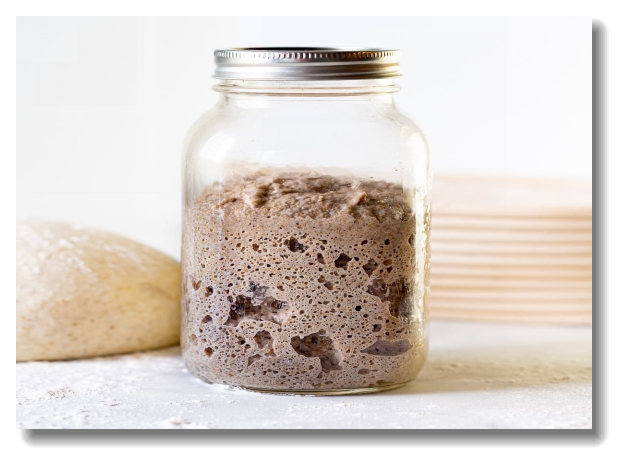
On day one, the starter is in the earliest stages of fermentation. The flour's sugars are becoming available to bacteria and yeast in the flour and in the air. You may see one or more bubbles on the surface of the starter as day one progresses.
Day Two
Note the appearance of your starter, both on the surface and through the glass of the jar. Smell your starter and listen to the crackling of released air when you stir it.
Add to your existing starter 60 grams of unbleached flour and 60 grams of unchlorinated water. Stir the mixture using a fork a uniform paste. Then scrape down using a spatula on the sides of the jar.
Move the rubber band around your jar to the starter's top-level and loosely cover the jar without screwing on the lid. Leave the jar at room temperature.
On day two, bacteria consume more of the sugars and starches and make bubbles in the mixture, but yeast activity is minimal. As day two progresses, you will likely see some expansion of the starter past the rubber band and multiple bubbles on the surface and against the sides of the jar.
Day Three
Note the appearance of your starter, both on the surface and through the glass of the jar. Smell your starter and listen to the crackling of released air when you stir it.
Add to your existing starter 60 grams of unbleached flour and 60 grams of unchlorinated water. Stir the mixture using a fork into a uniform paste. Then scrape down using a spatula on the sides of the jar.
Move the rubber band around your jar to the starter's top level and loosely cover the jar without screwing on the lid. Leave the jar at room temperature.
On day three, the starter is becoming more acidic, making the bacteria less active, but this lower pH will eventually support more yeast activity. Your starter will probably begin to smell a bit sour, look bubbly, and crackle when you mix at the beginning of day three. However, in the 24 hours after todays feeding, youll likely see fewer bubbles and minimal expansion past the rubber band.
Day Four





 The First Six Days