

AGE: 3+
Using old scraps of paper, card and packaging to make a new sheet of paper is not just satisfying and fun, it also teaches us how recycling works. This is a fairly lengthy project, which will keep bubbling along for a few days.
YOULL NEED
 Scraps of waste paper, card, newspaper or egg cartons
 Bucket
 Potato masher
 Towel
Towel
 1 or 2 sheets of parchment paper
 2 dish towels
 Rolling pin
Optional
 Food processor
 Knife or cookie cutter
 Food colouring or blackberries
 Flower petals
 Seeds
Seeds
 Small leaves
Home-made paper tends to be either grey or the colours of whatever scraps you are using. Try jazzing it up by adding food colouring, flower petals or leaves.
Tear your paper and card into tiny pieces, about 5 x 5cm (2 x 2in) and place in the bucket.
Cover the paper with water and let it soak for a few hours, overnight if possible. If you want to make coloured paper, add a few drops of food colouring to the soaking water (a handful of blackberries foraged from hedgerows also works well).
Keep shredding and tearing the paper into smaller and smaller pieces, and use a potato masher to smoosh it up. Add more water if necessary. Keep it pulpy, but not too wet, like very thick porridge. If you want to speed up the process, put the mixture in a food processor and give it a quick whizz to mush up the paper more finely. When its a smooth mulch with no bits in it, youre ready for the next step.
Place a towel on your work surface, with a square of parchment paper on top. This bit gets messy hurray!
Lift out a blob of your mixture about the size of a grapefruit. Place it on top of the parchment, cover with a dish towel and squeeze it to get some of the water out of the pulp.
Use your rolling pin to roll out your blob into a flat shape about 3mm (in) thick you may need to use another sheet of parchment on top of the blob to stop it sticking. If you want to add petals, seeds or small leaves to your paper, scatter them over the pulp as you roll it out. The rolling action will embed them in the paper.
Place a dry dish towel flat on top of the pulp and, using your rolling pin, roll over it to absorb as much water from the paper sheet as you can.
Leave your new piece of paper lying flat on the parchment and find a warm place for it to dry out; this can take days! If youre in a rush, put it in an oven on a low heat to speed things along.
When your paper is dry, use a knife or cookie cutter to trim it or cut it into a cool shape.
TIP
If you add seeds to the pulp, it becomes magic growing paper! When youre finished with it, place it on top of soil (either in your garden or a flower pot), water it and watch your seedlings sprout.

AGE: 3+
No party is complete without a selection of paper hats and making them yourself is so much fun. Cutting, folding and sticking your own hats might even be part of your celebrations.
YOULL NEED
 Paper
Paper
 Scissors
 Sticky tape, glue or stapler
 Fancy bits and pieces tissue paper, pompoms, feathers, ribbons, buttons and stickers
Use pretty paper, flashing metallics, disco glitters or powdery pastels if you want to create chic headgear or go low budget and simple by using brown parcel wrap or newspaper. This is where having a good comes in handy; your tiny beads, snips of fancy ribbon or colourful feathers will all find a home perched on your head.
Cone Hats
The easiest hats to make are simple cones. Create high, trumpet-like points or shallower shapes like limpets.
Cut a semi-circle out of your paper. To get a perfectly smooth shape, you could draw halfway around the edge of a large dinner plate.
Roll the semi-circle into a cone shape and use tape, glue or staples to secure it.
Add a spray of tissue paper strips at the top for added pizzazz or a line of pom-poms down the front for a silly clown effect. Glue on a brim to make a witchs hat or add decorations to go with the theme of your party. If you wish, add a length of ribbon to each side of the bottom edge of the hat so that you can tie them under your chin for security.
TIP
If you want to make a shallower hat, cut a complete circle and snip a straight line into the centre from the outer edge. Adjust it to the shape you want, and use tape, glue or staples to secure.

AGE: 3+
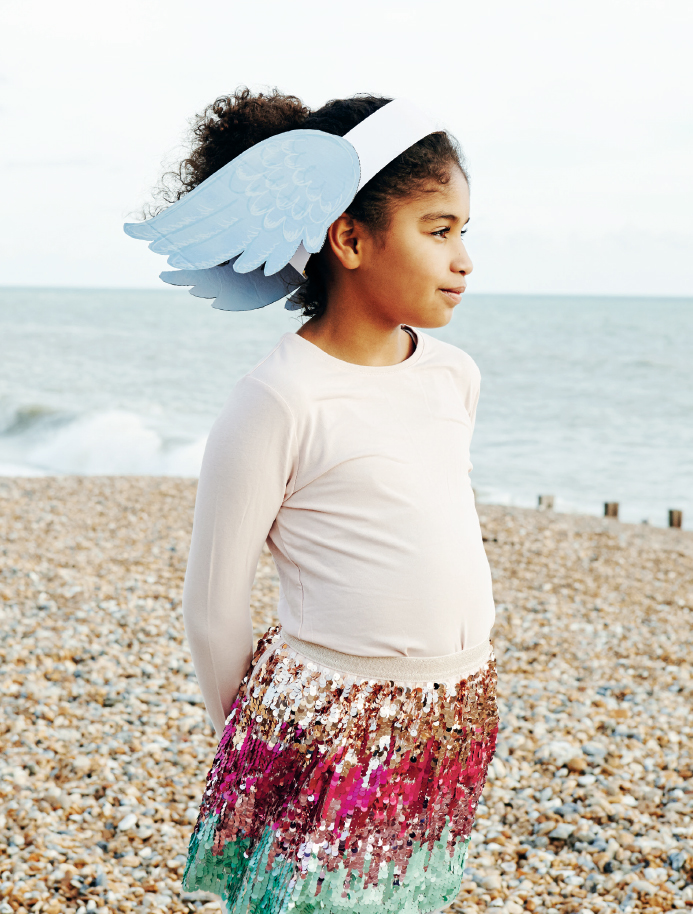
The versatile and super-simple nature of headbands means they suit all occasions. Its all about what you choose to deck yours with. You might make a midsummer floral band using pom-pom flowers, like the ones worn by Swedish girls. Or cut out leaf shapes to welcome in harvest time. Perhaps youll stick bunny ears on yours in spring, a unicorn horn or even a laurel wreath, Greek goddess-style. Ive chosen to make these with wings, like a Norse Valkyrie, the god Hermes or, perhaps, goofy Gaul Asterix. Use these instructions as the base for any headband you fancy.
YOULL NEED
 Paper
Paper
 Scissors
 Sticky tape, glue or staples
 Ruler
Ruler
 Card
Card
Optional
 Felt-tip pens or coloured pencils
 Decorations such as flowers, leaves, pompoms, cut-outs
First, cut your headband strip along the longest edge of your paper. Depending on what you want to stick on it, it should be roughly 5cm (2in) wide. Unless you have a very long piece of paper or a tiny head, youll probably need to combine two strips to fit.
Next page





 Scraps of waste paper, card, newspaper or egg cartons

