Corner-to-Corner Lap Throws
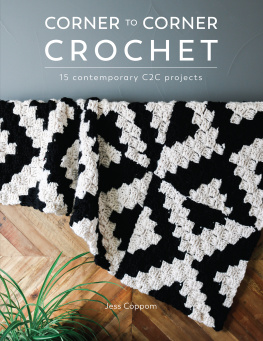
for the Family TM Welcome to the world of corner-to-corner (C2C) crochet. I am so excited to show you this fun and unique way of crocheting! Corner-to-corner crochet blankets are worked just as the name suggestsfrom corner to corner. By following a pixel graph instead of a written pattern, you can incorporate virtually any character or image you want into a crochet blanket. Add borders or connect smaller squares to create larger blankets. Unlike your typical single crochet graph afghan, the appeal of C2C is speed! These blankets work up much faster than your average project.
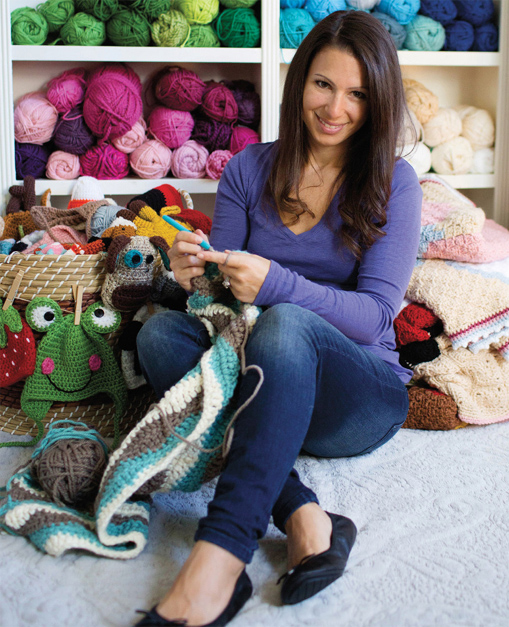
Meet designer Sarah Zimmerman: a yarn lover, crafter, blogger, wife and busy mom of three.
Sarah is a self-taught crocheter who picked up her first hook shortly after her second child was born. A graduate from the University of Washington with a degree in visual arts and a graphic designer by trade, Sarah has an eye for design and color that is reflected in her crochet projects. Her style can be described as fresh, cute and contemporary designs with a creative flair that appeals to all ages.
Sarah shares her crochet patterns, crafts and slow cooker recipes on her blog Repeat Crafter Me (www.repeatcrafterme.com).
Table of Contents
Table of Contents
Guide
Pages
When working a C2C blanket, you will follow a pixel graph made up of squares. Each row is worked diagonally beginning in the bottom right-hand corner. Each square in the graph represents a beginning chain-3 and additional double crochet stitches.
For the first half of the graph, you will add blocks to each row until you reach the longest diagonal in the graph. After working the longest row, you will begin decreasing. Decreases are made by slip stitching along the last square made. Basic Instructions The following sample pattern is a good place to start learning this technique. You will follow the Pattern Graph to make a square. The finished swatch is 5 inches square.
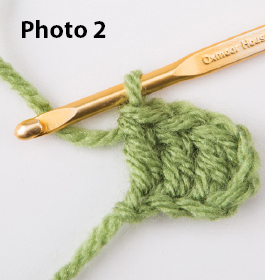
You can make several squares and sew them together for a great project! Pattern InstructionsRow 1 Following the Pattern Graph, ch 6 (see Photo 1), dc in 4th ch from hook. The sk first 3 chs represent the first dc. Dc in each of last 2 chs. You have now completed your first block (see Photo 2). 
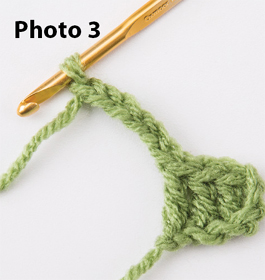
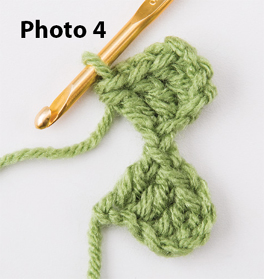
 Row 2 Ch 6 (see Photo 3), dc in the 4th ch from the hook and in each of the last 2 chs (see Photo 4).
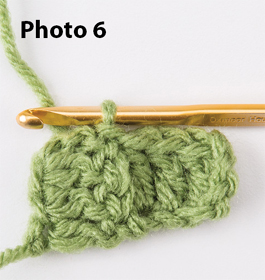
 Turn (see Photo 5), and sl st in the ch-3 on the first block (see Photo 6).
 Turn (see Photo 5), and sl st in the ch-3 on the first block (see Photo 6).
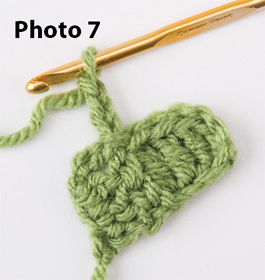
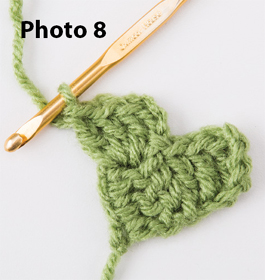
Ch 3 (see Photo 7), work 3 dc in the same ch-3 space. This completes the 2nd block and completes row 2 (see Photo 8). 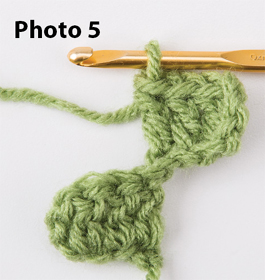
 Row 3 Ch 6 (see Photo 9), dc in the 4th ch from the hook and in each of the last 2 chs, turn (see Photo 10).
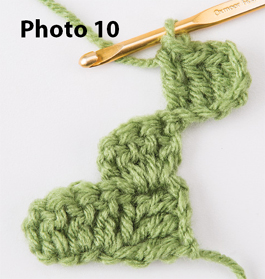 Sl st in the ch-3 sp on the next square. Ch 3 and work 3 dc stitches in the same ch-3 space (see Photo 11). Sl st in the ch-3 sp on the next square.
Ch 3 and work 3 dc in the same ch-3 sp. You have now completed the 3rd diagonal row (see Photo 12). 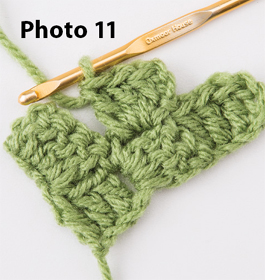
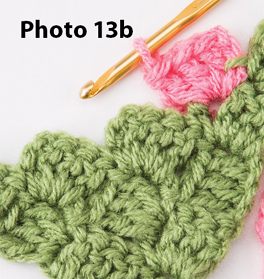
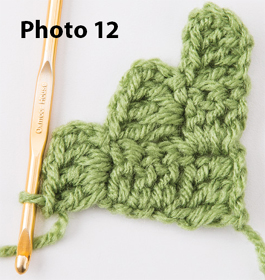 Changing Color Change color when starting a new block by slip stitching with the new color (see Photos 13a and 13b).
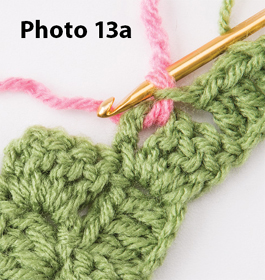
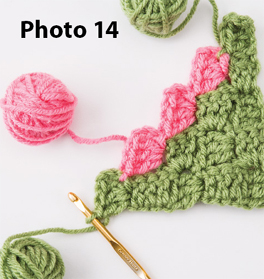
 Using bobbins or small balls of yarn can also be helpful when working with several color changes (see Photo 14). Leave bobbins or small balls of yarn attached until the section is finished.
  Do not fasten off old color.
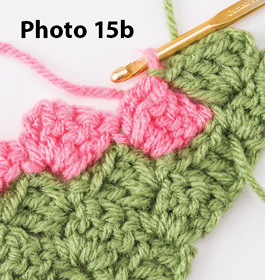
Carry the yarn from the previous row when possible (see Photos 15a and 15b). 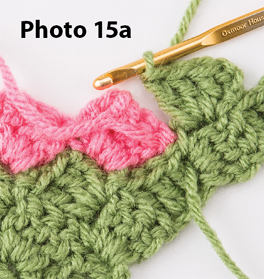
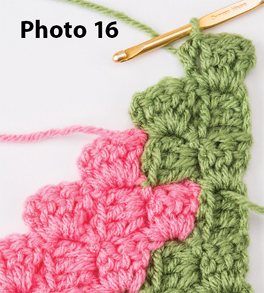
 Rows 47 Continue working in the pattern, following the Pattern Graph and using the technique you just learned, until you have completed row 7. Decreasing When you crochet the last block in the longest diagonal of your chart (Row 7 in the example), you will reach the halfway point of your blanket. Each row after this point will contain one fewer blocks than the row before. Row 8 To begin the next row, sl st in each dc of the last block made on Row 7 and in the ch-3 sp on the same block (see Photo 16).
  After working the last block of the row, sl st in the ch-3 sp on the last block of the previous row, turn, and sl st in each dc of the block just worked.



 Meet designer Sarah Zimmerman: a yarn lover, crafter, blogger, wife and busy mom of three.
 Row 2 Ch 6 (see Photo 3), dc in the 4th ch from the hook and in each of the last 2 chs (see Photo 4).
 Turn (see Photo 5), and sl st in the ch-3 on the first block (see Photo 6).


 Row 3 Ch 6 (see Photo 9), dc in the 4th ch from the hook and in each of the last 2 chs, turn (see Photo 10).
 Sl st in the ch-3 sp on the next square. Ch 3 and work 3 dc stitches in the same ch-3 space (see Photo 11). Sl st in the ch-3 sp on the next square.
 Changing Color Change color when starting a new block by slip stitching with the new color (see Photos 13a and 13b).
 Using bobbins or small balls of yarn can also be helpful when working with several color changes (see Photo 14). Leave bobbins or small balls of yarn attached until the section is finished.
  Do not fasten off old color.
 Rows 47 Continue working in the pattern, following the Pattern Graph and using the technique you just learned, until you have completed row 7. Decreasing When you crochet the last block in the longest diagonal of your chart (Row 7 in the example), you will reach the halfway point of your blanket. Each row after this point will contain one fewer blocks than the row before. Row 8 To begin the next row, sl st in each dc of the last block made on Row 7 and in the ch-3 sp on the same block (see Photo 16).
  After working the last block of the row, sl st in the ch-3 sp on the last block of the previous row, turn, and sl st in each dc of the block just worked.