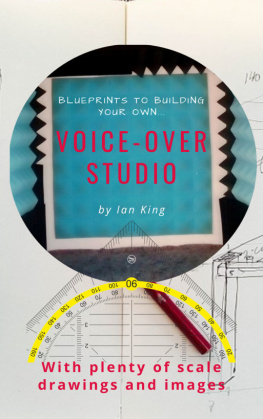
Blueprints to Building Your Own VoiceOver Studio.
Forunder $500.
By IanKing
2019dotandtittle publishing

eBookISBN: 9780463349151
Smashwords Edition Copyright 2019 Ian King.
Published by: dotandtittle publishing
Allrights reserved. No part of this book may be reproduced ortransmitted in any form or by any means, electronic or mechanical,including photocopying, recording, or by any information storageand retrieval system, without permission in writing from thecopyright owner.
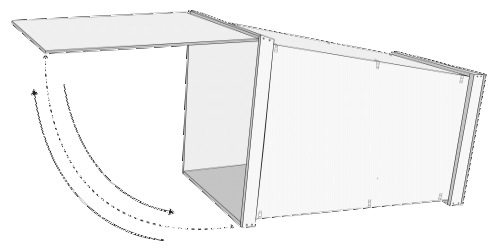
Table of Contents:
s
WELCOME:
Thisbook is a manual on how to build your own studio for VoiceOverwork and narration. It is a technical book, therefore, I suggestthat you read it completely through to begin with before you goahead and build your own VoiceOver Studio.
Itmay sound confusing at first, but stick with it and all the pennieswill fall into place for you.
Also, for your convenience if you are not familiar withMetric Measurements (which is what I use throughout this manual), Ihave included a convertingeach and every measurement I have used into Imperial measurements(Inches).
Thereis a world of opportunity a stones throw away from you; in fact,once you are sitting in front of your PC or LAPTOP, you are staringinto a gold field and all you need to do is pick a spot and startdigging. You will need tools, of course, and the mine where youchoose to start harvesting will determine the tools that you willneed.
Thisbook is a guide to developing the tools you need for PROFESSIONALVOICEOVER WORK. This field is huge! You supply the talent and Illshow you what to do with it. But there is no point in digging thesefields if your talent is not here. Youll obviously need goodarticulation and confidence in your vocal abilities. Youllprobably need some proper training too, but this is not what Imoffering. Im giving you practical guidance on how to build a spaceto work from, at a very low cost.
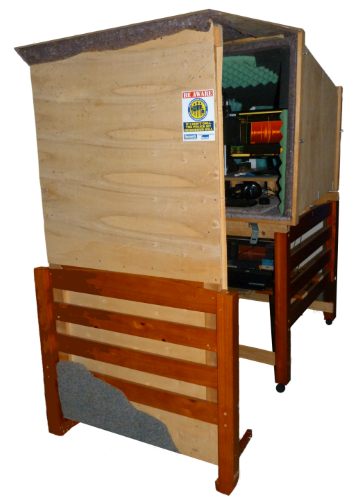
Thekey thing to always bear in mind with voice acting and audio worksis to fight the chief enemy of recordings and that is noise.Electronic humming, fan noise, bumps, bangs, bad weather, echoesand lawnmowers you name it. So, Ive developed a small recordingspace that gives you plenty of room to gesture wildly within as youarticulate that most dramatic audio book, yet you can still get upclose and personal with the microphone to create your own take onthe Voice of God for that movie trailer you might be cast for.And dont forget youll need to share that space with someequipment. This Home Studio Space, or Booth, is solid and welldesigned with these considerations in mind.
Illclarify other things you will need to consider as you read thisbook and undertake this project, so you know what to expect. Mybook is filled with photos, plans with specific measurements, anddetailed instructions and guidance.
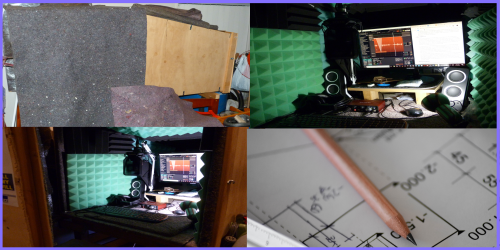
First, though, is the why we need to consider the enemy ofquality recordings, and why we must battle it so vehemently. Imtalking about that NOISE!
NOISE: This comes in many waveshapes, forms and sizes but,whichever way they come, all of them will destroy your recordingsand render them unacceptable.
Thereare external noises like cars running up and down your street,dishwashers cycling through a load, people talking and babiescrying. All these need to be reduced somehow. But try telling yourwhole street to be silent while you are performing your recordingsGood luck!
Thenthere are internal noises you need to get rid of too, keeping themout of your recording space, like computer fan noise, hummingcaused by electricity problems, echo sounds, or boxysoundingresults and so on. Internal noise is a significant concern inrecording which is why the Personal Studio is specifically designedto assist you in achieving professionally acceptableresults.
ThisPersonal Studio has a minimum of three walls of defence:
1)Insulation to REPEL external noise
2)Absorption to, well, absorb and treat internal noise
3)Design to also reduce internal/external noise, leaving you with acleaner and clearer result.
Illexpand on these three:
i)Insulation. The 12 mm plywood walls usedto construct the studio are lined with an insulating, mufflingshield that you can likely get for free, much of the time. Visitsome whiteware or brownware stores (fridges, TVs) and evenfurniture stores to source sheets of polystyrene 1525 mm thick.The bigger and thicker the sheets the better.
ii)Absorption. You cannot cheat on theseimportant elements; for proper absorption, you need proper industrystandard Acoustic Foam Panels which are not overly expensive. Eggcartons or mattress foams do not have the right properties to dealeffectively with noise and use of them will lead to a boxy ortacky sound, or a sound that is lifeless and limp, leaving yourrecordings undesirable to the professional end consumer, and theyare your audience who ultimately pay you for your work.
iii)Design. The design of this studio istapered and of a specific size for various reasons I will brieflytouch on.
Imagine a pond that you throw a stone into. What happens tothe waters surface once the stone has made contact? Of course, itproduces little wakes and ripples. These wakes and ripples are verymuch like sound waves. Notice what happens to these lil crittersas they spread out and eventually hit the edges of the pond. Theybounce back, dont they? And then begin travelling in anotherdirection (often, right back into your recording mic).
Whenwe bring this information into the perspective of what we aretalking about here... audio waves! These are the very things weneed to eliminate as much as possible.
Atapered shell design has several advantages:
a) Ittakes up less space, and it looks prettier than a boring, squarebox.
b)The tapered walls are not parallel, thus forcing those lilbounceback critters to travel longer and further distances beforehitting another surface and therefore changing direction againthis resulting pattern of wavetravel eliminates much of thoseamplification troughs and peaks of sound wavesintensity.
c)The front (where you will be moving your arms and hands, andoperating your equipment) becomes a useful working space, whereasthe rear (end) of your studio is neither wasting space nor addingweight to the final product.
Unfortunately, some slappedtogether homerecording spaces forrecording audio books and voiceover work in general can leave aboxy, irritating noise that can be difficult to listen to overextended periods of time. That is the reason this design is sobrilliant! Its not very expensive to build, it does a magnificentjob of supporting your voice talent, and it gives you a place toproduce an excellent final result.
Belowis a list of things you will need with approximate costs.Everything I have specified below has design in mind.
Plywoodpanels: 3 panels 1200 mm x 2400 mm x12 mm thickness. Approximately $75
(3sheets $25 per sheet). You may also use Custom Wood panelsinstead. They are heavier, but also more dense.
Smoothsawn timber planks: two ofthem about, 70 mm x 25 mm x 1800 mm.
Next page
