CONTENTS
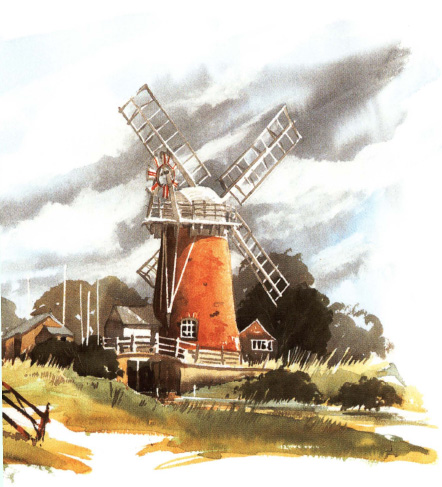
Horsey Mill, Norfolk
29 41 cm (12 16 in)
Often walking around a subject can give you a better view as shown in this study of Horsey Mill.
To fully understand the methods of the Norwich School, I have evolved a unique stage-by-stage method which has helped hundreds of aspiring watercolourists master the techniques of this style. There is no such thing as the correct method, but there are some basic simple rules that can help to give you an understanding of this very challenging medium, thereby creating brilliantly lit, evocative paintings easily and cheerily. This book contains all you need to know to achieve this in your own painting. Watercolour painting has become a way of life to me. It has taken me to beautiful places and has always been stimulating, providing me with hours of pleasure and a career in fine art, teaching and television. You are about to become part of it. Welcome to the world of watercolour.
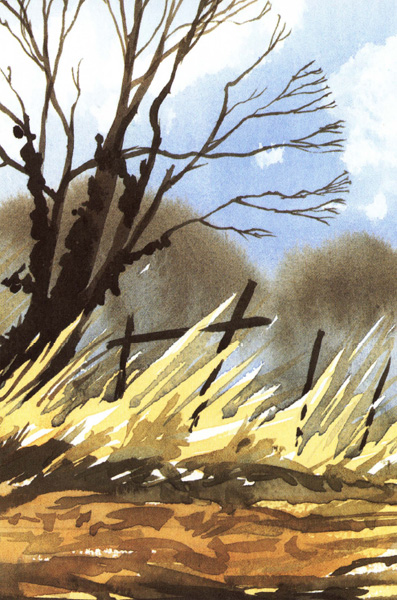
Winter Furrows
23 23 cm (9 9 in)
The simplest subjects often make the best paintings. Using a soft wet in wet background technique with a more detailed foreground, this simple tree makes a lovely fresh study.
Having decided that you want to paint in watercolour, whats your next step? For many of us, its a visit to our local art shop, an Aladdins cave where we will spend hours of our precious time and lots of hard-earned money. I suggest that you read the next chapter before you buy any art materials, but the best advice is always to keep them simple and get only what you need. You must also master a few basic watercolour techniques, which are explained in detail in the following pages. Then you will be ready to start painting.
In order to paint successfully, you need some essential items of equipment. The less equipment you start with, the easier the whole process will become. You will learn very quickly how to use your equipment and materials if you keep them simple. There is no point in buying a lot of expensive items that you may never use.
If you set your palette out as shown here, it will keep your colours clean. Never put reds and blues next to your earth colours keep them well apart.
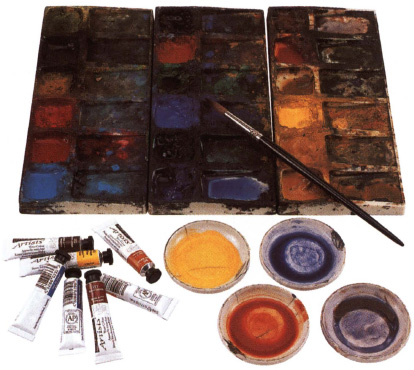
First of all, you will need some watercolour paints, which have been specially developed by artists working with manufacturers for over 200 years. Any old paint will simply not work. The initial outlay on basic materials needed will probably surprise you, but you cant paint without the right equipment any more than you can play golf with a cricket bat.
Initially, you will need only about eight colours. Tube paints are the easiest to use and are cheaper than solid colours, which are really designed for painting outdoors. There are two basic types of watercolour paint: Students colours and Artists colours. The difference is that Students colours are bulked out with extenders whereas Artists colours are virtually all pigment.
The Students range will cost you far less and virtually every art shop will stock them. When youre starting out, they are more than adequate. You will learn how to mix colours together, and how to apply washes. The colours you create with Students colours will not be as bright or as dark as Artists colours, but while youre learning this will not really matter. As you progress and colours begin to run out, replace them with the more expensive Artists colours.
Which colours?
The initial outlay for a whole palette of paints would be enormous so buying one or two at a time makes sense. Earth colours (Raw Sienna, Yellow Ochre, Burnt Sienna and Burnt Umber) are better purchased in larger 14 ml tubes as you will use a lot of these. With other colours, such as Cadmium Yellow, a small 5 ml tube is sufficient. Paints often go hard in the tube before you ever get round to using them up, and they seem to last for years!
Beginners palette
As a beginner, you will need some transparent colours and some opaque colours. The usual beginners palette (see the illustration opposite) is the same as that of most landscape artists although they will add a few more colours. Your palette should always have some earth colours as a base, together with some blues, which are mixed with the earth colours to make your greens. You dont need blacks or whites. In most boxes of colours, there is usually a Chinese White. You dont need it hand it in at your local police station now! You might want to keep the black, even though you will hardly ever use it.
Some other colours you might like to add to this basic palette include the following: Coeruleum, Hookers Green, Paynes Grey, Alizarin Crimson and Neutral Tint. It is worth bearing in mind that the more colours you have on your palette, the more confusing the mixing will become. Mastering your mixing is the first real hurdle you need to cross in order to paint well.
BASIC COLOURS
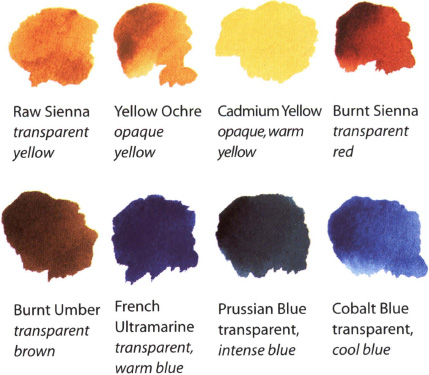
As a beginner, you dont need to buy a lot of expensive paints. The eight colours shown here will be sufficient and can be mixed to create other colours.
Unlike paints, your brush selection will be better if you invest in quality. There are thousands of brushes out there to buy. Just bear in mind that you only need about five, so its worth spending that little bit more on them; they will do the job better and certainly last longer.
Natural hair has barbs on it and it is these barbs that hold the paint, so the more natural hair the better even though they are more expensive than man-made fibres. Nylon brushes have smooth fibres and therefore do not work so well.
However, most brush manufacturers now offer a range that are a mixture of natural hair and nylon fibres. These are less expensive than pure sable hair and, frankly, when youre starting out, they will do just as well. The exception is a large sky brush, which is usually made from squirrel hair.
Natural hair is a ready meal for moths, so you will need something in which to keep your brushes. I use a bamboo mat which protects their delicate tips and allows them to breathe. This is important; if you put your brushes away wet and sealed up, they will soon become mouldy and will be ruined.
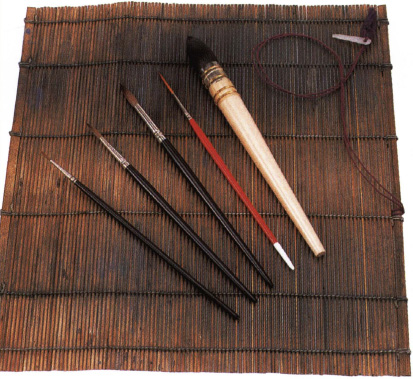
A bamboo mat is ideal for keeping your brushes safe and protecting the tips. Always wash your brushes well after use and then allow them to dry thoroughly, tip upwards, before rolling them up in the mat. The brushes shown here are (from left to right): round brushes Nos. 2, 4 and 8, a rigger and a large squirrel mop brush.
Other items you will need are some masking fluid, waterproof ink, watersoluble pencils, artists sponges, masking tape, some tissue (for blotting), drawing pencils and plastic erasers. All these items are worth purchasing together with a standard drawing board.
After several weeks of painting, you may well feel that you need some more equipment. Many of these items, you can easily make yourself. For example, a mahlstick is extremely useful when you are painting, and you can make your own from a macram bead and a short length of dowel.

