How To Crochet - A Guide For Newbies
Sarah Taylor
Published by Crafty Creations, 2012.
While every precaution has been taken in the preparation of this book, the publisher assumes no responsibility for errors or omissions, or for damages resulting from the use of the information contained herein.
HOW TO CROCHET - A GUIDE FOR NEWBIES
First edition. October 23, 2012.
Copyright 2012 Sarah Taylor.
ISBN: 978-1519925558
Written by Sarah Taylor.
10 9 8 7 6 5 4 3 2 1
Introduction
I am not going to give a long introductory section to talk about the history of crochet or anything like that. If you're like me you simply want to get started on learning how to crochet, which is the reason you bought this book. [By the way, if you really want to know about all the history, then there is heaps of information online which you can find by doing a search on Google or your favorite search engine!]
So, without further ado, let's get started with the basics and get you up and running.
Getting Started: The Basics
I found it best to learn the basics by using a medium thickness yarn (Worsted or Aran weight) and a fairly large crochet hook (US size 9 to 10 ,/5.5 to 6.5 mm) to practice with until you master the stitch formations. Once you have learned these you will be able to crochet just about anything.
The instructions are given based on right-handed folks, so I must apologize to all the left-handers who are reading this. However, as crochet involves using both hands fairly equally, you may be just as comfortable using your non-dominant hand to hold the hook. Just get started and find out which is best for you - there is no right or wrong way to do this!
How To Hold The Crochet Hook
How you choose to hold your crochet hook is entirely your decision, depending on what feels most comfortable when working the different crochet stitches. There are two methods which are the most popular; one is the pencil hold and the other is the knife hold.
As you'd expect from the names of these methods, you hold the crochet hook in a similar way to holding either a pencil or a knife!
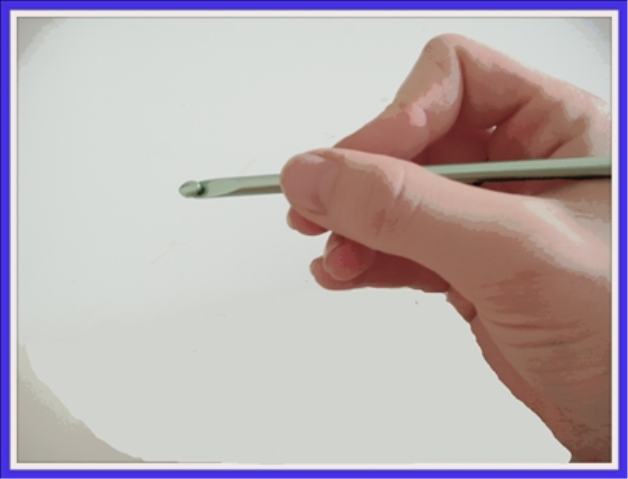
When using the pencil hold, the crochet hook rests over the top of your hand like this:-
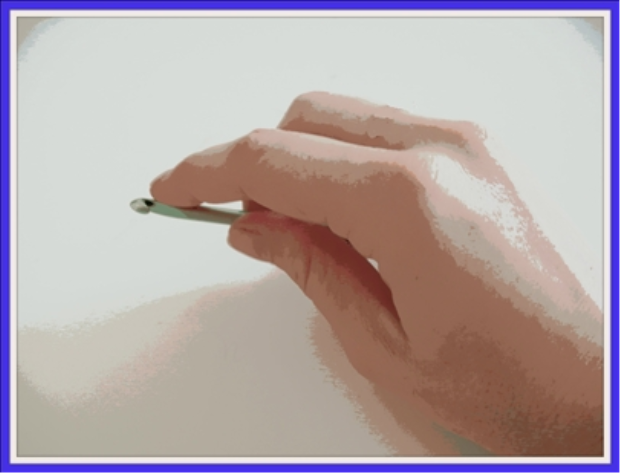
When using the knife hold, your hand covers the crochet hook like this:-
How To Hold The Yarn
Again, how you hold the yarn is matter of personal preference, depending on how it feels most comfortable for you to perform the different stitches.
As a guide for getting started, you may wish to try the following suggested way of holding the yarn:-
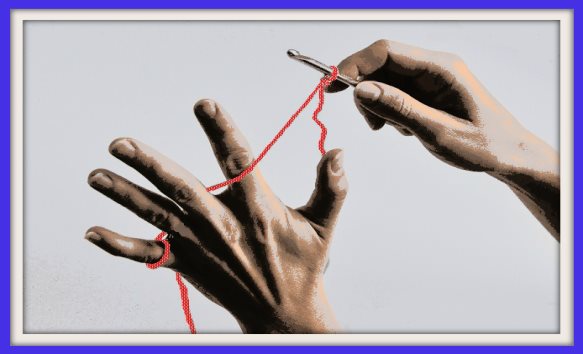
Holding your crochet hook in your right hand with a starting loop already made, hook the working end of the yarn around your little finger on your left hand, pass the working yarn under the next two fingers, then over the top of your index finger as shown in the image below:-
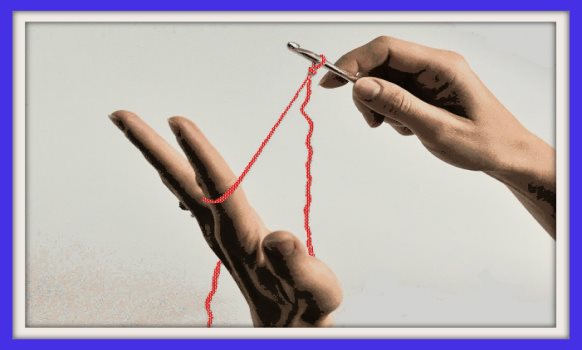
Next, turn your hand anti-clockwise to the left, keeping your index finger raised to keep the tension on your yarn as shown in the image below:-
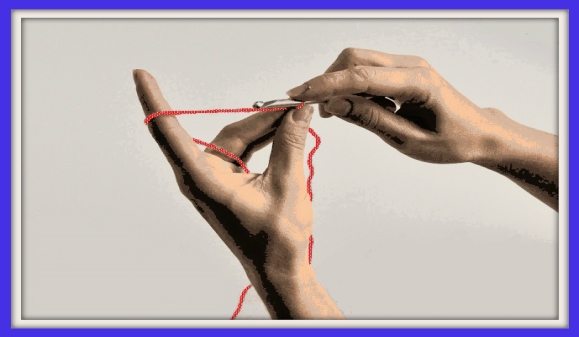
Now hold the crochet hook using the pencil hold or the knife hold, and you are ready to start crocheting.
The Starting Loop
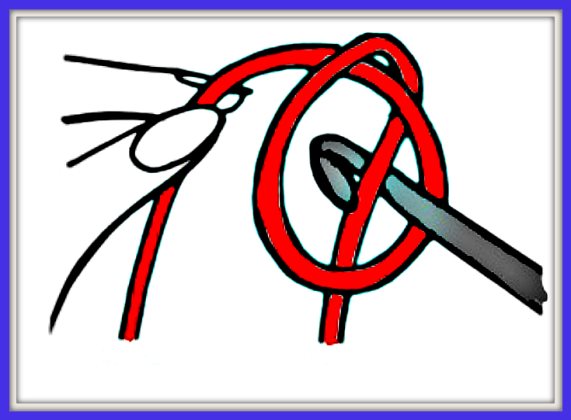
Start off by making a loop with your yarn and holding it in your left hand. Holding the hook in your right hand using the pen hold or knife hold, use the hook to draw the yarn through the loop as shown in the picture above, and then tighten the ends to form the starting loop on the crochet hook. (You don't want to pull the ends too tight - leave enough slack for the hook to pass through the loop easily).
Chain Stitch
Chain stitch is one of the easiest and most widely used stitches to use as a foundation row (cast on) for your crochet projects.
Begin with your starting loop on your crochet hook, then wind the working yarn around the hook anti-clockwise keeping it close to the hook end:
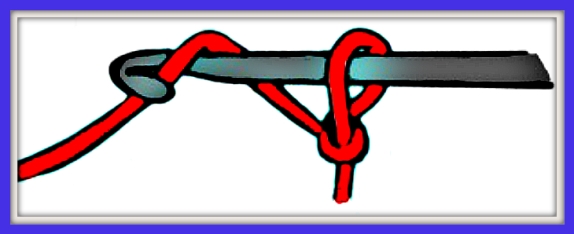
Use your hook to draw the working yarn through the starting loop to form your first chain stitch, then repeat the process to make as many chain stitches as required for your foundation row.
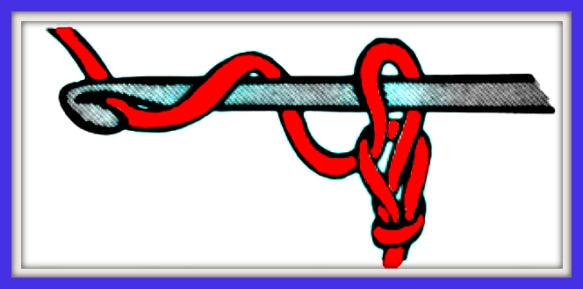
You need to make the chain stitches loose enough to be able to push the hook through them quite easily otherwise it will be very difficult to work with. Try to maintain an even tension for each stitch to ensure the stitches are the same size. Practice the chain stitch - you will soon work up a rhythm and be ready to add any of the following basic stitches to your base chain.
Try starting off with a base chain of say 20 chain stitches and then work your way through the following instructions. The first row of crochet into your base chain can be challenging for anyone; it is fiddly and if your chain stitches are too tight it will be virtually impossible. So, start off with fairly loose chain stitches and stay calm (!) - once the first row is completed it is all plain sailing, so stay with me on this. 
Single Crochet
Step 1 Start by inserting your hook through the second chain stitch from your crochet hook (leaving the first chain stitch empty makes for easier working and acts as a 'turning' chain).
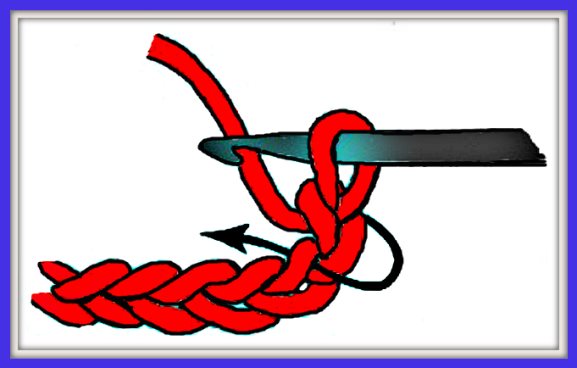
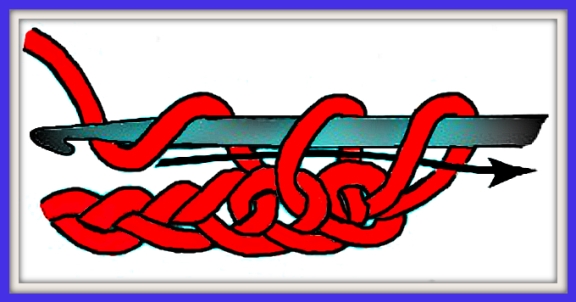
Step 2 When the hook is through the stitch, wind the working yarn anti-clockwise around the hook keeping the yarn close around the hook part, and then pull the working yarn through the base chain stitch. You will now have two loops on your crochet hook.
Step 3 Wind the working yarn anti-clockwise around the hook just as you did before, then pull the yarn through both of the loops on the hook. This completes your first single crochet stitch.
Next page
