Why This Book?
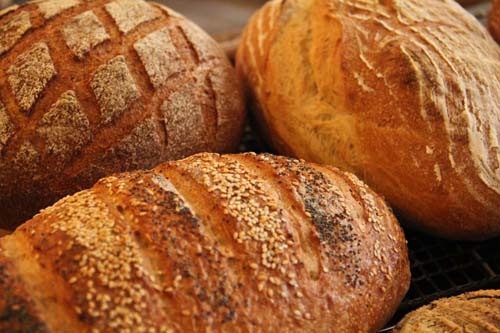
Low gluten breads and heritage breads made with ancient forms of wheat flour are very different things, requiring quite different baking techniques. However, what they have in common, and the reason we have put them together in this book, is that they offer people with sensitivities to gluten and normal wheat an opportunity to enjoy really great bread.
The other significant reasons for baking heritage breads are political, ethical and practical. Growers of heritage grains urgently need to be encouraged, to support sustainable agriculture and land management practices, to prevent the genetic erosion produced by massive monoculture, and to ensure food security for the future. Whatever your views on the reasons, our climate is clearly changing. A broader range and mix of grains, suited to different soil profiles / microclimates, will help develop our resilience and re-establish the know-how we left behind when farming became 'big farma' - not agriculture but corporate culture. We don't need Monsanto to fake stuff for us; the seed libraries are stuffed with specimens of ancient grains that would restore a healthy diversity to our landscape and foodscape. The problem is that our beleaguered farmers are not legally allowed to grow them. It's madness. Growing grains to suit their environments would reduce the need for petrochemical fertilisers and pesticides that can only be prejudicial to long-term health and will eventually, come peak oil, run out anyway. Bread is politics! It was political for the ancient Egyptians, the ancient Greeks and the ancient Romans. Today it matters more than ever, which is one of the reasons we set up The Artisan Bakery School.
Baking Low Gluten & Heritage Breads
By The Artisan Bakery School
All contents copyright Penny Williams and Dragan Matijevic 2014
***

***
This book cannot be copied, reprinted or redistributed for sale by any mechanical, electronic or other means. The design, photographs and text remain the properties of the authors.
The information contained in this text has been verified and documented as carefully as possible. No warranties of any kind, either expressed or implied, as to the accuracy of this information or its suitability for a particular purpose, are made. The Artisan Bakery School disclaims any and all said or implied warranties, and does not make any warranty or guarantee, or make any representation whatsoever, said or implied, regarding the use or result of any information or services provided by this document. The authors and The Artisan Bakery School will not assume any liability for any loss or damage of any kind, arising out of or caused by, directly or indirectly, the use of this information.
***
Smashword Edition
***
Pendragan Publishing
Old Home Cottage
Sparkwell
Plymouth PL7 5DQ
United Kingdom
First Edition 2014
Making Rye Breads
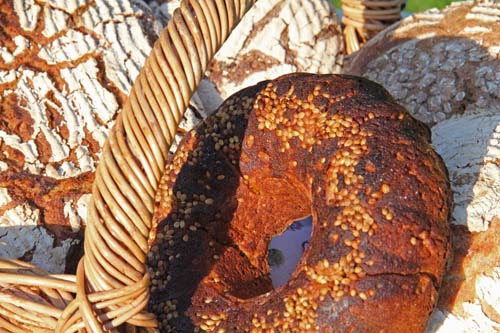
Breakfast without rye bread is unthinkable in many northern European cultures, and the variety of recipes out there is astounding.
Rye flour is low in gluten, make it a better choice for people with gluten sensitivity, and the high-fibre digestive benefits are good for us all. Because it is low in gluten, and by nature low-rise, there is no point kneading it so it is a surprisingly easy bread to make.
We use a light rye or a medium rye flour, but you can experiment with wholemeal rye, just remember it will be even more dense and need more water. Give the dough enough time to rise slowly, be creative with your additions - caraway, cumin or ground coriander are traditional favourites, while dried fruit or nuts add extra interest and you cant fail to produce a loaf with character and depth. Perfect with ripe brie, or blue cheeses, and any kinds of smoked or pickled treats.
The following recipe shows our Seven Steps for making a 100% rye sourdough. If you don't have a rye starter yet, click on How to Make Your Rye Starter in the Table of Contents. It takes about 5 days, but very little effort - all the work is being done by the yeasts setting up their colony!
Recipe for 100% sourdough rye with caraway and figs
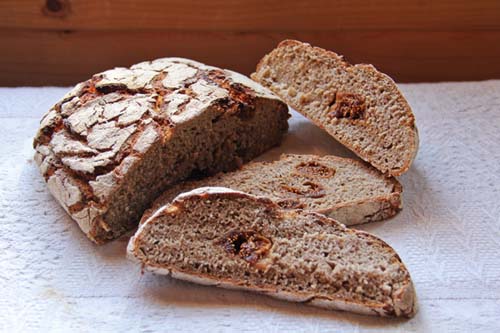
1,082g / 2lb 6.1oz raw dough for one oversize large loaf!
Light Rye Flour 400g / 2 and 1/3cup
100% Rye Leaven 400g / 2 cups
65% Water 260g / 1 cup and 3 Tbsp
3% Salt* 12g / 2 tsp
2% Caraway 8g / 1 tsp
Dried figs, halved, stalks removed 100g / 1 cup
*higher percentage because youre also salting the leaven in the final dough
7 Steps to Rye Bread
Step 1: Prepare your leaven
Step 2: Mixing
Step 3: Rise the dough
Step 4: Measuring and shaping the loaf
Step 5: Proving your loaf
Step 6: Decorating
Step 7: Baking
Step 1: Prepare Your Leaven
8 to 12 hours before your bread-making session (i.e. the night before), take the starter from the fridge.
Note: grams and cups measurments do not match.
Take out 20% of your desired leaven quantity. In our recipe for 400g/2 cups of leaven you would take out 80g/1/2 cup of starter. Feed your starter with 190g/1 cup of water and 130g/1 cup of flour. Mix until smooth.
Replenish the remaining starter and put it back in the fridge. Feed it with 40g/1/4 cup of flour and 60g/1/4 cup of water.
Cover the leaven with a cloth or even better, a shower cap, and leave it to ripen for about 8 to 12 hours.
By the end of its fermentation, the leaven should have peaked and then dropped - you will see a tidemark on the sides of the bowl. It should still be bubbly, smelling quite pungent (rye leaven has to be stronger and more acid than wheat leaven), and taste quite tart. You can test by dropping a blob of it in warm water if it floats, its ready.
Step 2: Mixing

1. Add flour, salt and caraway seed to the leaven bowl.
2. Mix, dont try to knead. Its best to use just one hand
3. This is an exceedingly sticky mixture you will know it is done when you cant see any flour left on the bottom of the bowl.
Tips:
When you mix rye dough, you are trying to hydrate the high level of pentosans (water absorbing carbohydrates) in it fully, which makes the dough stickier. Trust the recipe, don't give in to the temptation to add more flour to the dough. If there is too much flour in a rye dough it will turn into a heavy brick-like loaf, while wet sticky doughs transform into moist, chewy, light loaves.
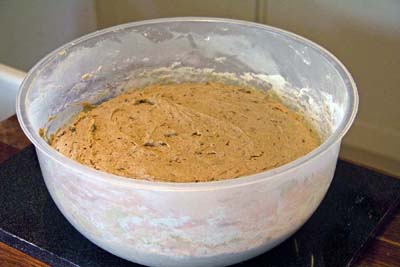
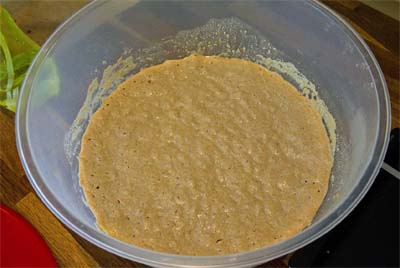
Different rye flours from different producers will have different water absorption rates. Bear in mind that the dough when thoroughly mixed should be very wet but not runny. It will be a bit like heavy cake mix (as in the picture above).
Step 3: Rise the Dough
