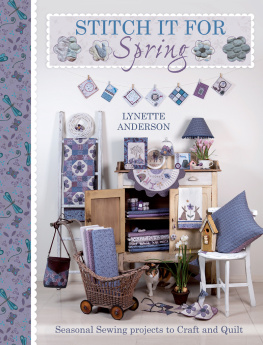
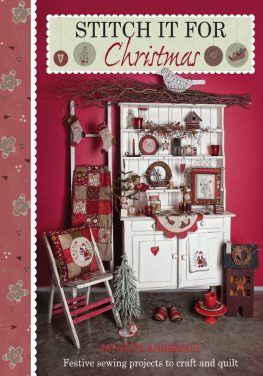
Stitch it for Spring
LYNETTE ANDERSON

Introduction
Spring for me is the promise of things to come, a riot of colour arriving after a bare, wintery world. I love the buds that first appear, watching as they get fatter and fatter with colours that cannot wait to burst out and show themselves, either in the blossom on the trees or the bulbs from the earth.
It was with great delight that I drew and stitched the projects in this book, drawing on my childhood memories and using fabrics from my Wildflower Wood fabric collection. As a child I lived in the country and played with my brother in the woods near our home. I loved learning the flower names from my mother and made friends with the wild creatures that lived there. I remember planting daffodils with my mother along the edge of the driveway to our country home and trying to be patient while I waited for the seasons to pass until it was time for them to burst into life. If the season is right when I drive past my childhood home I look for those daffodils we planted together so long ago.
The projects in this book are both practical and decorative, combining patchwork, appliqu and decorative stitching in charming designs. You can choose from a range of lovely ideas for your home: perhaps the delightful Birdhouse Blossoms Picture or the gorgeous Garden Delights Table Centre or the Spring Flower Quilt. If you are seeking quick little gifts for friends and family the Night Owl Purse, the Night and Day Charms and the Sweet Rabbit Tea Towel may be just what you are looking for. And why not make something just for yourself? The Dreaming Tree Journal and the stylish Hexagon Handbag are bound to be much admired.
Whatever you chose to make, my wish is for you to enjoy stitching the projects within this book, and that your family will enjoy them for many years to come.
Dedication
Mum, thank you for teaching me the names of the birds and flowers when I was a child and for all the encouragement through the years.
General Techniques
This section describes the basic techniques you will need to make and finish off the projects in this book, from transferring designs to binding a finished quilt. Beginners should find it very useful.
SEWING AND PRESSING
Patchwork or pieced work requires accurate seams. For really accurate piecing sew a bare 14in (6mm) seam, as this will allow for thread thickness and the tiny amount of fabric taken up when the seam is pressed.
Generally, press seams towards the darker fabric to avoid dark colours showing through on the right side. Press joining seams in opposite directions so they lock together and make the flattest join. Press (dont iron) and be careful with steam as this can stretch fabric.
JOINING STRIPS
Sometimes fabric strips need to be joined together for borders or binding. Joining them with a diagonal seam at a 45-degree angle will make them less noticeable, as will pressing the seams open
FIG 1

MAKING BIAS BINDING
Bias binding is made from fabric strips cut on the cross grain (bias) direction of the fabric, which makes the strips more flexible.
One Fold the fabric in half diagonally and crease lightly. Open out and cut strips 114in (3.2cm) wide diagonally across the fabric. Join the strips to the length required.
Two Fold and press about 14in (6mm) of fabric towards the wrong side along the entire length.
USING TEMPLATES
The project templates are given full size in the Template section. Trace the template on to paper or thin card, cut out and use as a pattern to cut the shape from paper. Before cutting out check whether a 14in (6mm) seam allowance is needed, which it will be if using a needle-turn appliqu technique.
Reversing templates
Templates being used for fusible web appliqu will need to be reversed (flipped). You could place a copy of the template on to a light source with the template right side down rather than up and trace it this way. You could also trace the template on to tracing paper, turn the tracing paper over and trace the template again on to paper.
TRANSFERRING DESIGNS
Designs can be transferred on to fabric in various ways. I use a light source, such as a light box, a window or a light under a glass table. Iron your fabric so it is free of creases. Place the design right side up and then the fabric right side up on top, taping it in place. Use a fine-tipped fabric marking pen or a pencil to trace the design. If the marks might show later then use an erasable marker, such as an air-erasable or water-soluble one.
ENGLISH PAPER PIECING
This type of patchwork is also called English patchwork and uses templates, usually made of paper or thin card. Fabric pieces are wrapped around the template and tacked (basted) to it. The patches are then hand sewn together and the papers removed.
One From a master template, create enough paper templates for the project. When cutting out the fabric pieces you need to allow for a 14in (6mm) seam all round. Make one master template but this time add a 14in (6mm) seam allowance all round and use this to cut out your fabric pieces.
Two Follow and pin a paper template to a fabric shape and fold the seam allowance over the edges of the template, tacking (basting) in place through all layers. Keep the fabric firm around the paper shape and tuck in all points neatly. Repeat with all the fabric pieces.
Three Place two fabric shapes right sides together, aligning edges and use small whip stitches to sew them together through the folded fabric but not through the paper (). Place a third fabric shape right sides together with the second and sew together. Continue building the design in this way. Once all stitching is finished remove the tacking and the papers.
FIG 2
A

B

C

D

E

MAKING YOYOS
Yoyos are sometimes called Suffolk puffs. They are really easy to make and add a lovely three-dimensional touch to patchwork and appliqu.
One Using a fine-tipped pencil or fabric marking pen, draw around a circular template on the wrong side of your fabrics. Cut out on the line (the seam allowance is included in the project template).

