Contents
Guide
INTRODUCTION
I first came across Harry Potter when the third book came out, and I was instantly enchanted by the world created by J.K. Rowling. Reading the books, and enjoying all the films as they came out, my only regret was that I wasnt under 11 years old, waiting for the owl to arrive with my Hogwarts letter! Still, I got to share the wizarding world with my children when they were young, and I regularly watch the films with my husbandthe perfect Sunday afternoon entertainment.
So, designing all these characters in crochet was a treat and a challenge. They come in all shapes and sizes, from Hedwig to Hagrid, with a range of different wizard robes and hats. I hope youll enjoy making them as much as I enjoyed creating them. Just get out your wandI mean crochet hookand start making magic!
ABBREVIATION CHART
BLO | back loop only |
ch | chain or chains |
dc | Double crochet |
dcbob | Bobble stitch |
FLO | front loop only |
FO | Fasten off |
hdc | Half double crochet |
inc | increase |
invdec | invisible decrease |
LS | Loop Stitch |
PM | place marker |
rnd | round |
sc | single crochet (U.S.), double crochet (U.K.) |
sc2tog | single crochet 2 together (U.S.), double crochet 2 together (U.K.) |
sl st | slip stitch |
SP | spike stitch |
st | stitch or stitches |
YO | yarn over |
NOTES ON TOOLS & MATERIALS
Yarn
These figures have been made using double knitting weight yarn (3: light), but you can also use worsted weight yarn (4: medium). It is best to use the same weight of yarn throughout a project, and to stick to the same brand of yarn if possible. The amounts given in each pattern are approximate and may vary depending on the type of yarn used, so make sure you get enough yarn to complete each project. The patterns work best if you use acrylic yarn or acrylic with some wool content.
Stitch Markers
These are sometimes necessary to mark specific stitches for orientation later. Also, because most amigurumi is worked in a continuous spiral without joining, you will need a stitch marker to keep track of your rounds. There are special split-ring markers for crochet, but safety pins or paper clips work just as well.
Stuffing
I recommend polyester fiberfill, as it is easily available and economical, and makes resilient, washable toys. Stuffing settles over time, so (unless instructed otherwise) stuff pieces firmly so they will maintain their appearance for a long time.
A pair of tweezers come in handy when you need to stuff narrow pieces or through small openings.
Pins and Needles
Round-headed sewing pins are helpful when positioning and sewing parts together. A blunt yarn needle is needed to weave in yarn ends and join pieces.
Embroidery Floss
Embroidery floss is loosely twisted from six thin cotton strands. For embroidery, always start with separating the individual strands (even if you need to use all six), this will produce flatter, smoother stitches.
Plastic Eyes
Plastic safety eyes are available in all sizes and colors. The pattern will indicate how many stitches apart the eyes should be. To secure the eyes, put the eye shaft through the stitches then secure it with the anchor on the inside of the head.
CROCHET STITCHES & TECHNIQUES
SLIPKNOT
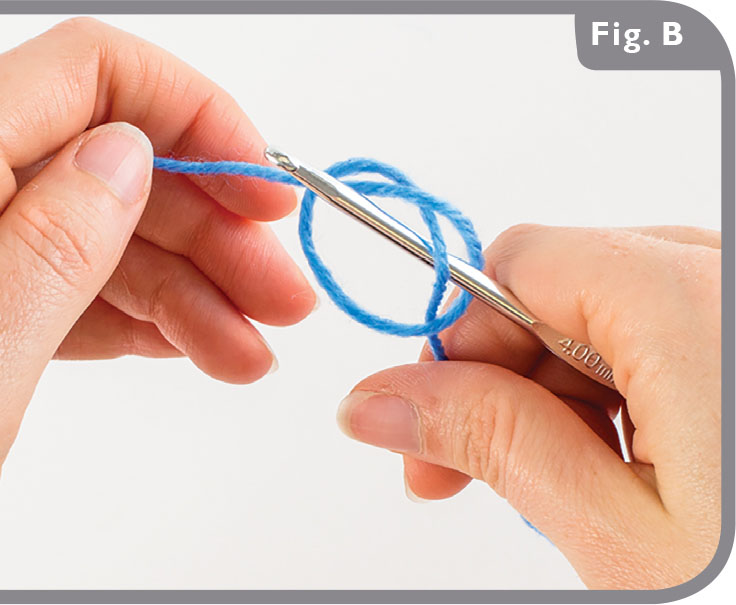
Most crochet starts with a slipknot. To begin, make a very loose knot with your yarn () and pull the end of the yarn that is connected to the skein through the loop to make the slipknot on your hook.
YARN OVER (YO)
To make a crochet stitch you need to pass the yarn over the hook from back to front.
CHAIN STITCH (CH)
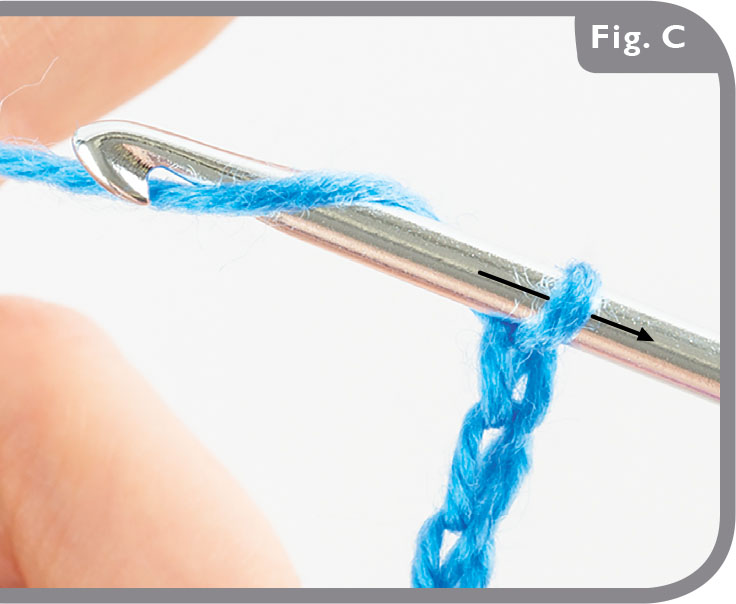
To make the chain stitch, YO, catch the yarn with your hook, and pull it through the loop on your hook () .That makes one chain stitch. Remember that the loop that remains on the hook does not count as a chain stitch.
WORKING INTO THE CHAIN
If you look closely at the chain you have created, you will notice that the front side of the chain resembles a series of sideways Vs and the back side of the chain is a series of small ridges. () Skip the chain closest to the hook and on the next chain stitch insert the hook between the V and the ridge.
WORKING INTO STITCHES
The first step every time you create a stitch (unless otherwise specified) is to insert your hook under both the sides of the V on the stitch.
FRONT LOOP ONLY (FLO)
When this is indicated in the pattern, you will insert the hook into only the front loop of the stitch (the one closest to you).
BACK LOOP ONLY (BLO)
When BLO is indicated, work the hook through only the back loop of the stitch (the loop farthest from you).
SINGLE CROCHET (SC)
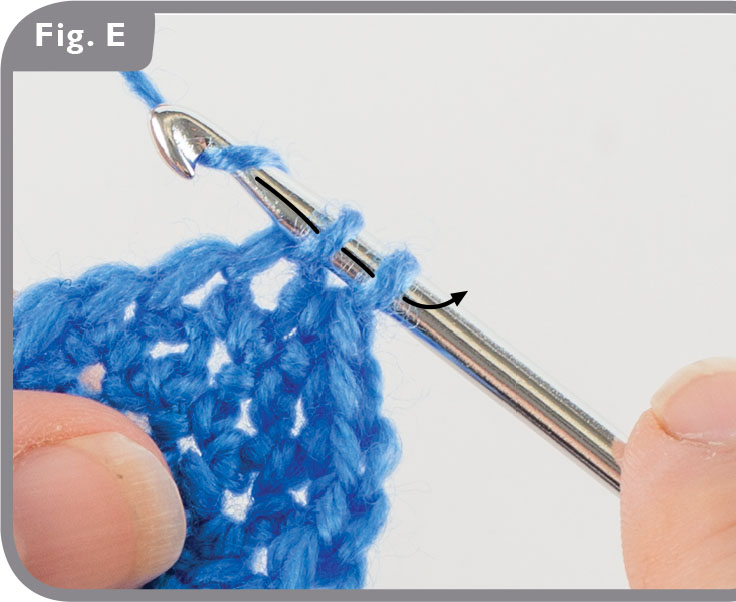
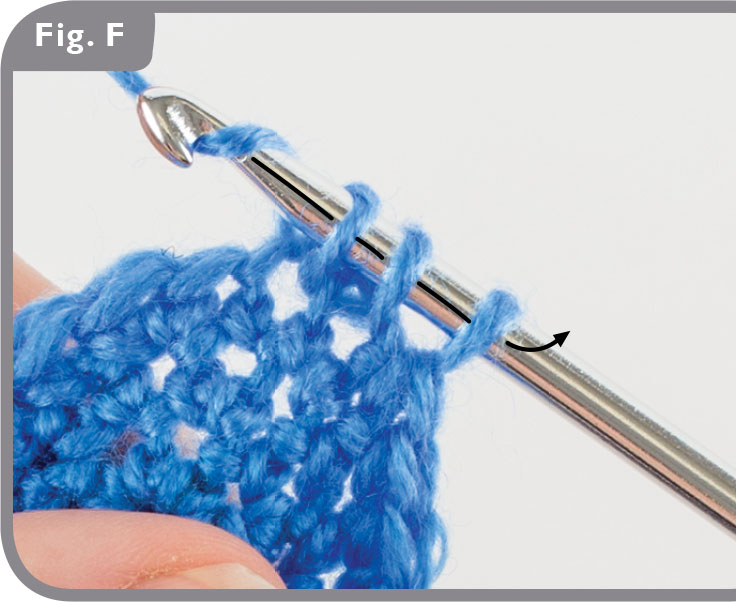
This is the basic crochet stitch and the most commonly used stitch in amigurumi. To create it, push your hook through the chain or stitch, YO, pull yarn through loops, YO, and pull through both loops on the hook () .
INCREASE (INC)
To make your work larger, work two stitches in the same stitch.


![J K Rowling - Harry Potter [Complete Collection]](/uploads/posts/book/117015/thumbs/j-k-rowling-harry-potter-complete-collection.jpg)

