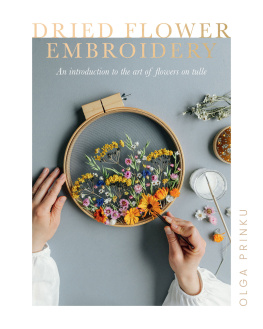
Im so excited to be able to share my new craft with you. I call it flowers-on-tulle or dried flower embroidery its like traditional embroidery, but using flowers, foliage and other natural plant-based materials as your thread. I came up with the idea in 2016, and the knowledge and techniques Ill share with you in these pages are the result of my experiments since then.
Perhaps youve skimmed through the images in this book and youre thinking this looks complicated will I be able to do it? If so, let me reassure you that when I started, I had no training or expertise just enthusiasm and curiosity. What Ive always enjoyed is crafting and making. If thats also true of you, thats all you need.
Im not a trained botanist or a florist, unless you count a summer job in a flower shop but I do love plants, and I have a sense of wonder about the natural world. I dont come from a background in couture all I knew about embroidery when I started on this journey was a couple of stitches I dimly remembered learning at school about 20 years earlier.
Im not a trained artist either. Even now that my flowers-on-tulle creations have been exhibited in galleries, I feel awkward using the word to describe myself. I do have a degree in graphic design, and that training has helped me with creative ideas and aesthetics. Ill share some of my thoughts on design principles alongside describing the practicalities of the techniques.
Flowers-on-tulle embroidery came from my love of making combined with my obsessive habit of bringing nature into my home. It could be a bare branch ripped from a tree by the wind in the springtime Id put it in a vase, and marvel as the flowers blossomed. It could be a piece of driftwood washed up on one of the beaches near my home in North Yorkshire perhaps Id add a sail and make a driftwood boat. In winter, I love to make decorative wreathes with any greenery I can find.
It was this wreath-making that led me to the idea of flowers-on-tulle embroidery. One day I used a garden sieve, or riddle the tool for getting small stones out of soil as a frame to weave my greenery around. I tucked the ends of the stalks into the wire mesh to keep the stems in place. That set me thinking about tulle fabric, and embroidery hoops and flowers. And I started down the path that led to the book youre now holding in your hands.
A LITTLE BIT ABOUT ME
Im originally from the Republic of Moldova, which was still part of the Soviet Union during my childhood. Moldova is a small but beautiful country, known for its vineyards and rolling hills. It has a rich heritage of hand embroidery and weaving, using colourful geometric and floral patterns. In the photo opposite Im wearing a shirt hand-embroidered by my grandmother thats typical of traditional Moldovan dress.
Like many children growing up in Moldovas capital city, during the long summer holidays I was sent to the countryside to stay with relatives.


Id help my aunt to grow vegetables in her kitchen garden, and forage for wild mushrooms with my cousins. Looking back, I can see thats where I got my passion for being in nature.
As for where I got my love of making, I must have picked it up from the adults around me towards the end of the Soviet Union and in the years that followed, people had to be good at improvising as the shop shelves were often empty. I still remember my mothers horrified reaction when I proudly showed her a dress Id made for my doll, not realizing shed be upset that Id cut a sleeve off a dress to get the fabric.
After moving to the UK with my husband, I studied graphic design as a mature student at the Cumbria Institute of the Arts, with weekend walks in the nearby Lake District. I also took the opportunity to do lots of night classes in various forms of making, from upholstery to bookbinding, jewellery and screen printing. Later, when I was pregnant with my son, I learned how to knit so I could make him a chunky woollen winter hat and Christmas stocking. Encouraged by friends, I opened an online shop to start selling them.
Its funny how life takes you in unexpected directions. When I first opened an Instagram account, it was to promote my knitted goods. I made wreaths to style them, and I soon noticed they started to generate interest; that led me to more experiments with flowers and eventually to flowers-on-tulle embroidery.
TRIAL AND ERROR
When I first stretched tulle fabric over a hoop and threaded flowers into it, I used fresh flowers tiny ones Id picked from the garden. I soon discovered a problem, and with hindsight it should have been obvious: when flowers dry, they shrink. So Id create a design I was really pleased with, and then when the flowers dried it would look awful as there would be gaps in unpredictable places.
So I learned to concentrate on dried flowers. I didnt know it at the time, but dried flowers were just starting to come back into fashion. Its easy to see why theyre beautiful, timeless and sustainable. Theres a growing trend for them to be used in a variety of crafts and decorations. That was great news for me, as it meant I could more easily find a wide range of dried flowers for sale online.
I also learned how to dry plants myself. I started by observing how the flowers I initially used fresh would dry on the hoop. Primroses and poppies, for example, would shrink but still keep their shape and colour. I experimented with drying flowers using silica, and pressing them see my .
Of course, not everything Ive tried has worked, but experimenting is part of the fun and Ive discovered you can come a surprisingly long way with curiosity, patience and a touch of stubbornness!

Ive divided this book into two parts. In the first part Ill introduce you to all the know-how you need to get started with flowers-on-tulle embroidery the essentials about tools and materials, how to work with dried plants, techniques and design principles.
If you come from an embroidery background, youll already know how to work with tulle fabric and embroidery hoops. If youre a keen forager, gardener or florist, you might already be familiar with everything I have to say about plants, flowers and methods to preserve them. So feel free to skim over any pages that look like theyre telling you things you already know. But even if you have a rich crafting background, Id still recommend you read through the whole book there might be ideas that trigger your own thoughts about doing things differently.
If youre not sure where to source the tools and materials, I offer some suggestions at www.hardiegrant.com/uk/quadrille/driedflowerembroidery .
In the second part of the book, Ill take you step by step through 15 projects. These include decorative items that you can display on your walls as works of art, and more practical objects homewares and wearables. Many of the tips apply equally to different projects, so again Id suggest you look through all of them before you embark on one of them.
Id recommend you start with one of the hoop projects. They require only the basic tools, and you can easily re-use the hoop if youre not happy with your first attempt. They will allow you to become comfortable with the basic techniques of attaching the flowers. You can also treat the hoops as testing grounds to develop designs for more complex projects.
Next page
