 Copyright 2013 by David Woodroffe First published in the United Kingdom by Robinson an imprint of Little, Brown Book Group. All rights reserved. No part of this book may be reproduced in any manner without the express written consent of the publisher, except in the case of brief excerpts in critical reviews or articles. All inquiries should be addressed to Skyhorse Publishing, 307 West 36th Street, 11th Floor, New York, NY 10018. Skyhorse Publishing books may be purchased in bulk at special discounts for sales promotion, corporate gifts, fund-raising, or educational purposes. Special editions can also be created to specifications.
For details, contact the Special Sales Department, Skyhorse Publishing, 307 West 36th Street, 11th Floor, New York, NY 10018 or . Skyhorse and Skyhorse Publishing are registered trademarks of Skyhorse Publishing, Inc., a Delaware corporation. Visit our website at www.skyhorsepublishing.com. 10 9 8 7 6 5 4 3 2 1 Library of Congress Cataloging-in-Publication Data is available on file. Cover illustration by David Woodroffe Print ISBN: 978-1-5107-2864-6 Ebook ISBN: 978-1-5107-2865-3 Printed in China ContentsIntroduction In this book you will find some great ideas and colourful designs for lots of different kinds of paper aircraft. Some are more difficult to make than others, but if you follow the step-by-step instructions, you will get there in the end.
If there are a few frustrating, finger-numbing, folds-that-just-wont-crease moments along the way, then it will only serve to make the end result more satisfying and enjoyable! Although the finished flyers all look fabulous, the vast majority of them are quite simple to make. This isnt rocket science, after all, but it is aviation and all of the models actually fly. Some of the aircraft are best at stunts, some fly better at speed and some excel in a long, sedate glide. They have all been flown successfully by our paper test pilots Chief Test Pilot/Designer David Woodroffe and his co-pilot Ray Rich. Their proving ground was in the stairwell outside their office, much to the amusement of everyone else in the building. because its fun. because its fun.
Before you get stuck into the fun of folding and flying, however, take a few minutes to read the Pre-Flight Briefing on . Not only does it give you some useful tips on paper plane construction and flying techniques, it also points out the important fact that, if you intend to use the actual pages of this book to make your aircraft, you must start from the back of the book. Otherwise, you will end up destroying the instructions for a design you have not yet built. Once you have gone through the Pre-Flight Briefing, you are cleared for take-off! Pre-Flight BriefingMAKING THE PLANES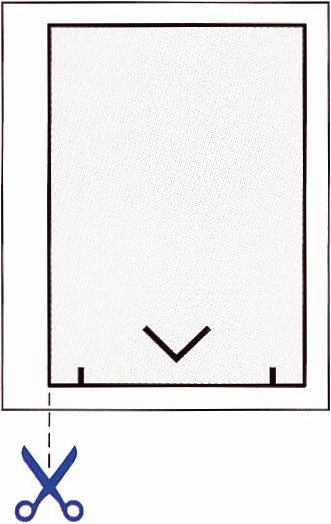 You will need a pair of scissors to cut out each plane from a photocopy of the page. If you are using the actual pages of the book to make the planes you should start from the back of the book, otherwise you will lose the left-hand page instructions if you start from the beginning.
  Mountain fold
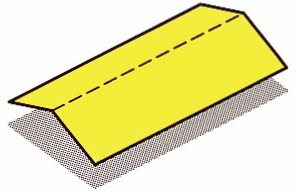
 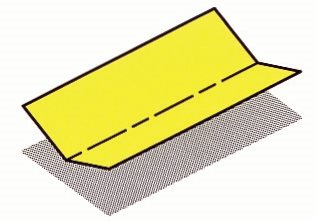 Valley fold Folds are made as follows: dashed lines indicate that the paper should be folded away from you (mountain fold), and long dash-short dash lines indicate that the paper should be folded towards you (valley fold).
  Mountain fold
  Valley fold Folds are made as follows: dashed lines indicate that the paper should be folded away from you (mountain fold), and long dash-short dash lines indicate that the paper should be folded towards you (valley fold).
Crease all folds well. Some folds may become quite thick in the later stages of construction, especially when folding the plane in half and folding down the wings, and these will need extra attention. FLYING THE PLANES Most of the planes will fly best indoors, either in a large room or corridor. Large stairways where the plane can be launched from the top can make great flying areas. You can fly them outdoors too if conditions are calm but be prepared to lose some over the fence, as its always the best flyers that escape! If the plane has a keel hold it there to launch it. 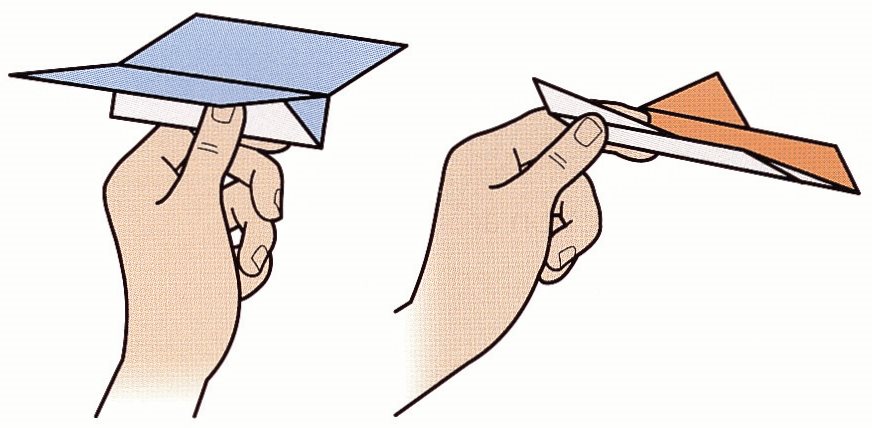 Most planes fly best from a gentle launch so just push the plane away from you and release.
 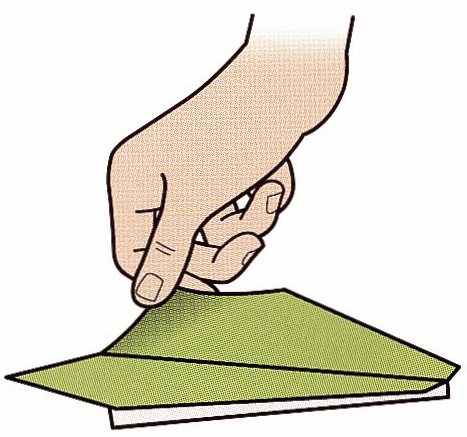 Just like a real plane, a paper plane needs small adjustments to make it fly properly.
  Just like a real plane, a paper plane needs small adjustments to make it fly properly.
To achieve an ideal long, straight glide the plane may need to be trimmed. Some of the planes in this book have rear elevators that need to be raised by folding them up, while others will need to have the rear edges of their wings slightly curved up between thumb and finger. Do this if the plane has a tendency to dive. If the plane banks to the left or the right try raising the rear edge or elevator on the opposite side to the way the plane goes. You can also experiment by bending them down instead of up. Another way to make sure that the plane flies straight is to check the dihedral of the wings.
The dihedral angle is formed by the open V shape created when the outer edge of the wing is higher than the inner edge. You will need to hold the plane with its nose pointing towards you and look along its length to see this.  If a draught or gust of wind causes the plane to pitch to one side then the plane will bank in that direction and crash. But if the wings are set with a dihedral then the wing that drops down has a greater area of lift than the side that goes up and so the plane rights itself.
 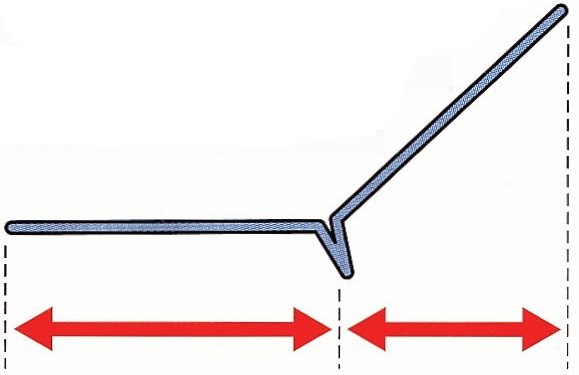 If a plane still refuses to fly evenly check its symmetry. Look along the length of the plane again and see if the front-on shape of one wing is a mirror image of the other.
If it isnt, then carefully shape one of the wings between thumb and fingers to match the other. Some of the planes have tail fins, upturned wing tips or both. These also help the plane to fly straight.





 Copyright 2013 by David Woodroffe First published in the United Kingdom by Robinson an imprint of Little, Brown Book Group. All rights reserved. No part of this book may be reproduced in any manner without the express written consent of the publisher, except in the case of brief excerpts in critical reviews or articles. All inquiries should be addressed to Skyhorse Publishing, 307 West 36th Street, 11th Floor, New York, NY 10018. Skyhorse Publishing books may be purchased in bulk at special discounts for sales promotion, corporate gifts, fund-raising, or educational purposes. Special editions can also be created to specifications.
 You will need a pair of scissors to cut out each plane from a photocopy of the page. If you are using the actual pages of the book to make the planes you should start from the back of the book, otherwise you will lose the left-hand page instructions if you start from the beginning.
  Mountain fold
  Valley fold Folds are made as follows: dashed lines indicate that the paper should be folded away from you (mountain fold), and long dash-short dash lines indicate that the paper should be folded towards you (valley fold).
  Most planes fly best from a gentle launch so just push the plane away from you and release.
  Just like a real plane, a paper plane needs small adjustments to make it fly properly.
  If a draught or gust of wind causes the plane to pitch to one side then the plane will bank in that direction and crash. But if the wings are set with a dihedral then the wing that drops down has a greater area of lift than the side that goes up and so the plane rights itself.
  If a plane still refuses to fly evenly check its symmetry. Look along the length of the plane again and see if the front-on shape of one wing is a mirror image of the other.