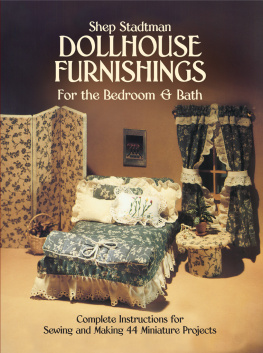
DOLLHOUSE FURNISHING
for the Bedroom & Bath
Complete Instructions for
Sewing and Making 44 Miniature Projects
Shep Stadtman
DOVER PUBLICATIONS, INC.
New York
Copyright 1984 by Shep Stadtman.
All rights reserved.
Dollhouse Furnishings for the Bedroom and Bath: Complete Instructions for Sewing and Makim 44 Miniature Projects is a new work, first published by Dover Publications, Inc., in 1984.
Edited by Laura Marturana.
Book design by Carol Belanger Grafton.
Artwork by Janette Aiello.
Library of Congress Cataloging in Publication Data
Stadtman, Shep.
Dollhouse furnishings for the bedroom and bath.
(Dover needlework series)
1. Doll furniture. I. Title II. Series.
TT175.5.S7 1984 745.5923 83-6222
eISBN-13: 978-0-48616-401-4
Manufactured in the United States by Courier Corporation
24590X10
www.doverpublications.com
Acknowledgments
With love to my husband Jerry for his invaluable encouragement. With sincere appreciation to my family for helping me in so many ways; to my friends Faye Hyman, Joan Melzer, Claire Shostak, Marcia Segal and Hisako Sekijima for theii artistic creations, and to my dear grandchildren, Jeffrey Lee Resnik and Olivk Kristina Resnik, for making me see this small dollhouse world through theii large eyes.
Dedication
To my daughter Susan F. Resnik,
love and a million thanks for giving me
these exciting creative years,
and for enabling me to meet so many people,
make new friends and fill my time
in a way I never dreamed possible.
Contents
Introduction
In November of 1976, I received an early morning call from my daughter with a Mama, help request. Would I design and sew accessories for her miniature town house? A creative artist, Susan could not sew and was unable to find high quality miniature bed and bath accessories. Bedspreads, curtains, towels and such were generally tossed on a shelf, she explained, or in a basket on the counter for customers to rummage through. They were often wrinkled and soiled from handling. My interest was sparked, so I agreed to give it a try.
The project proved to be delightful and a week later, a custom boutique delivery was sent to my daughter. I love it. Start your own businessit would be terrific, was her reaction, and so I began Sheps Designery
My own thoughts about a designer collection were geared toward the discerning collector; I felt that my designs had to be newer and more innovative than anything on the market, and so I made sure that my creations were imaginative, contemporary and available nowhere else on the market. The designs were always attractively boxed or wrapped in plastic, and miniature collectors loved them. I felt quite encouraged when a well-known miniatures shop in New York City placed a substantial order, but when the I. Miller Shoe Salon on Fifth Avenue at 57 th Street in New York City displayed my designs in their windows, I knew that Sheps Designery was on its way to becoming a mini-household word.
Now, with this book, I would like to offer my collection to the public so that many more miniature houses can be filled with these designs. But this book wouldnt be complete without a word of encouragement to any woman with the dream of having her own businesstake the step now! You will never know what you have missed unless you try it.
CHAPTER
Miniature Woodworking
Whether you want to duplicate the luxurious room settings shown here, experiment with an original fantasy or reproduce rooms in your own home, you must do first things firstyou need the furniture before the quilt, curtains, rugs or any other decorating accessory. You can go out and buy the furniture you will need or you can create your own originals.
This chapter will guide you through working with wood on a small scale so that you can make miniature furniture even if youve never driven a nail, used a saw or sanded a rough edge! In fact, most of the tools in your toolbox will not help you make miniaturesthey are too big. One reason that this craft is so popular is because you can make the pieces on your kitchen table using a toothpick and glue instead of a hammer and nails! The following pages combine a general lesson in miniature woodworking with general directions for the pieces in this book. But before you start any project, remember: Read all the directions, organize the steps of your project, gather all your materials and equipment to your working area and measure everything twice!
Equipment
When making miniatures, keep in mind that common household objects can frequently take the place of specific tools. For example, an emery board can sand all but the most detailed softwood shapes, and a single-edged razor blade can saw through many types of wood. You will save time and money by using a Q-tip as a paintbrush, rubber bands as clamps or a toothpick to spread glue.
I have consciously omitted power tools because they are not necessary for the production of many miniatures, including the pieces in this book. However, a power handsaw, such as a jigsaw or saber saw, would save time when cutting the plywood.
CUTTING
X-ACTO Knife: This knife uses different blades to cut various woods and thicknesses. It is probably the most frequently used cutting tool for making miniature furniture.
Scissors: Use sharp household scissors to cut straight and slightly curved balsa-wood shapes. Sharp embroidery scissors are useful for more intricate softwood cuts.
Razor Blades: A single-edged razor blade is useful when straight-cutting balsa and other softwood shapes.
Small Handsaw: Use a coping, tenon or dovetail saw to cut hardwoods, including the basswood and plywood needed for most of the pieces in this book.
Wooden Block: Make all cuts on a wooden block to prevent damage to your work surface.
JOINING
White Glue: Use white glue such as Elmers Glue-All or Sobo to join wood to wood or wood to fabric. Apply glue sparingly with a toothpick, and wipe away excess glue with a damp cloth.
Small Clamps: Small clamps will help hold pieces together while glue dries or while you are doing additional work that requires two free hands.
Tape: Tape might be the best way to hold small or irregularly shaped pieces together while gluing. Masking tape will work best.
Clothespins: Spring or regular clothespins can be used in place of small clamps.
Rubber Bands: Use rubber bands to hold pieces together in instances where the methods described above might not work, such as for the bed frames in this book.
Epoxy: Use epoxy to join metal to metal or metal to wood. Epoxies are made by mixing two substances together and letting the mixture dry for 5 minutes to 48 hours, depending on the job.
Nails: For miniature woodworking, use the smallest nails you can find, which are also called brads. They are sold in boxes of about 50.
Hammer: Use a small tack or pin hammer to nail components together. Hold the hammer by the end, not the middle, of the handle.
MEASURING
Ruler: A cork-backed steel ruler will not slip on wooden surfaces. For most miniature projects, a 12 ruler is fine. A hobby and craft ruler with increments to  would be a great help and is available in craft shops.
Pencil: Use a very sharp lead pencil to mark cutting lines on the wood. A dull point will make a thicker line, which might throw dimensions off to a noticeable degree.



 would be a great help and is available in craft shops.