Contents
Guide
Introduction
There are few gifts more meaningful than a homemade ornament around the holidays. Thats why Ive included 21 fun and rewarding designs for you to master on your scroll saw. Some, like my Geometric Ornaments (), are intermediate-to-advanced. Be patient, cut carefully, and change blades oftensoon, youll be turning out baubles at a speed to rival Santas workshop!

| Sue Mey lives in Pretoria, South Africa. To see more of her work, including a wide variety of patterns and pattern-making tutorials available for purchase, visit and other outlets. |
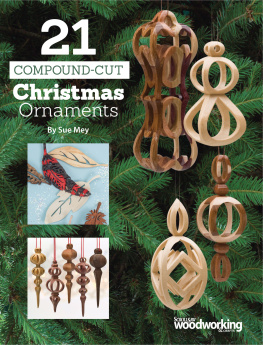
21
COMPOUND-CUT
Christmas
Ornaments
By Sue Mey

2019 by Sue Mey and Fox Chapel Publishing Company, Inc., 903 Square Street, Mount Joy, PA 17552.
21 Compound-Cut Christmas Ornaments is an original work, first published in 2019 by Fox Chapel Publishing Company, Inc. The patterns contained herein are copyrighted by the author. Readers may make copies of these patterns for personal use. The patterns themselves, however, are not to be duplicated for resale or distribution under any circumstances. Any such copying is a violation of copyright law.
Print ISBN 978-1-4971-0102-9
eISBN 978-1-6076-5928-0
The Cataloging-in-Publication Data is on file with the Library of Congress.
To learn more about the other great books from Fox Chapel Publishing, or to find a retailer near you, call toll-free 800-457-9112 or visit us at foxchapelpublishing.com.
We are always looking for talented authors. To submit an idea, please send a brief inquiry to acquisitions@foxchapelpublishing.com.
For a printable PDF of the patterns used in this book, please contact Fox Chapel Publishing at customerservice@foxchapelpublishing.com, with 9781497101029 and 21 Compound-Cut Christmas Ornaments in the subject line.
Contents
Feather & Leaf ORNAMENTS
Indulge your inner free spirit with these nature-inspired creations
Cut by Jon Deck, Bob Duncan, and Kaylee Schofield
T hese leaf and feather designs are inspired by some of my finest childhood memories of exploration through forests (and backyards) unknowntraipsing home with pockets full of these small treasures. Where I live, the jacaranda trees look like clusters of green feathers!
These compound-cut ornaments require a bit of concentration to make, but in the end, theres a huge payoff. Attractive hardwoods, like oak or cherry, lend themselves to the feather and leaf designs, but you could also cut them from a bland wood and finish with stain or acrylic paint. Remember that, when cutting the side-view pattern, you will be cutting wood about 2" (5.1cm) thick, so choose your wood accordingly.
Cutting and Finishing
Cover the blank with blue painters tape. Photocopy the pattern and fold on the dotted line. Apply temporary bond spray adhesive to the back of the pattern, align the fold with the corner of the blank, and press it into place.
Drill holes for each fret. Use a drill press.
Make the cuts on one face. Use a #3 skip-tooth blade. I start with the frets on the front of the feather or leaf and work outward. Then cut the perimeter.
Remove the dust with a vacuum and tape the waste wood back in place with clear packaging tape.
Rotate the blank 90. Then cut the remaining face. Use a #7 skip-tooth blade.
Remove the pattern from the blank, and carefully sand away any blemishes or bumps. Finish with semigloss spray lacquer or Danish oil. Display as desired; I fed a small piece of colored ribbon through the central vein of each ornament and hung them on my tree.
Materials & Tools
Materials
Wood, such as cherry, lacewood, or oak, " (1.9cm) thick: 2" x 5 " (5.1cm x 14cm)
Spray adhesive: temporary bond
Sandpaper
Tape: clear packaging, blue painters
Finish, such as semigloss spray lacquer or Danish oil
Colored ribbon
Tools
Scroll saw blades: #3, #7 skip-tooth
Drill press with bits: assorted small
Vacuum
The author used these products for the project. Substitute your choice of brands, tools, and materials as desired.

Feather Ornament Patterns

Leaf Ornament Patterns

Amazing 3-D Ornaments
Whimsical hanging designs can be made from solid or laminated wood

T hese ornaments can be made from a solid piece of wood and painted or stained, or finished naturally. To give them a unique look, glue up your blank using thin strips of contrasting wood.
I cut my stock slightly oversized and sanded it down to 1 " (4.5cm) square. For straight blade-entry holes and neat inside cuts, the blocks must have perfectly straight edges at a 90 angle to each other. If you are not laminating your blank for a multi-colored ornament, you can skip right to step three.
PREPARING THE BLANK
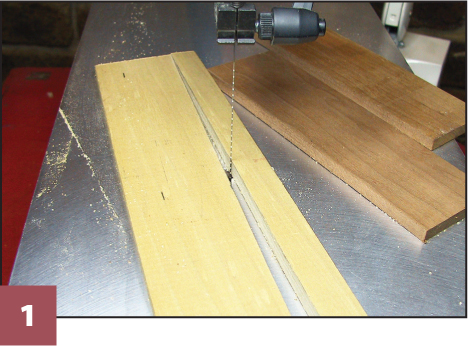
Cut the strips to size. I cut an assortment of " to " (6mm to 1cm)- thick wood into 1 " (4.8cm)-wide strips. Cut the strips into 5 " (14cm)-long pieces. Shorter pieces can be used for smaller ornaments.
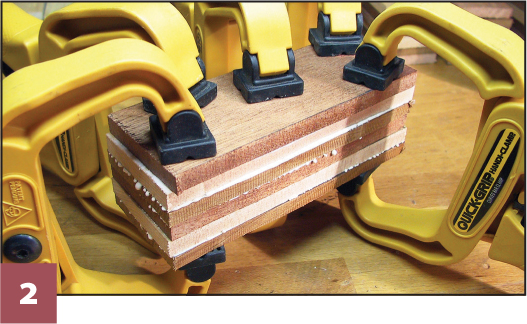
Glue the strips together. Mix and match the strips of wood for unique color combinations. The stack should be about 2" (5.1cm) thick. Apply wood glue between the layers and clamp the strips together until the glue dries.
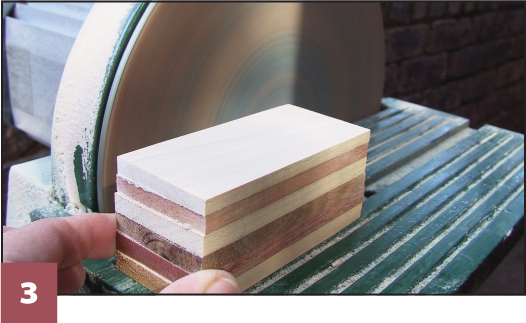
Prepare the blank. Sand or trim the blank down to 1 " (4.5cm) square. I use a disc sander, but you can use a table saw or your method of choice. It is critical for the sides to be flat and square to each other.
MAKING THE ORNAMENT

Drill the blade-entry holes.

