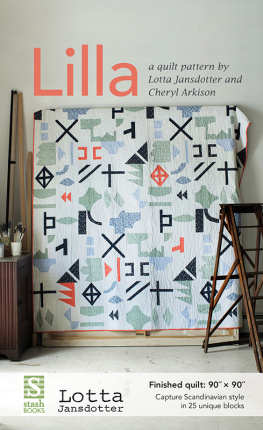
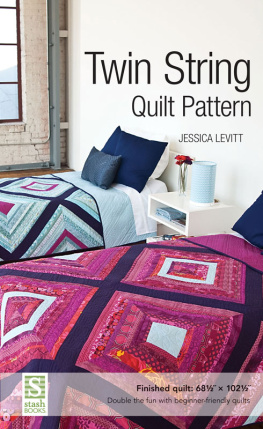
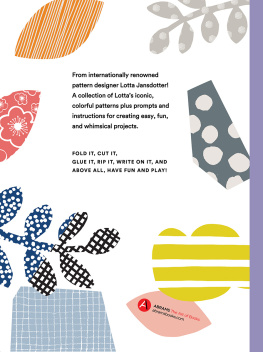
Publisher: Amy Marson Creative Director / Editor: Gailen Runge Technical Editors: Gailen Runge and Debbie Rodgers Design Direction: Kristy Zacharias Cover Designer: April Mostek Page Layout Artist: Casey Dukes Production Coordinator: Tim Manibusan Production Editor: Jennifer Warren Illustrator: Kirstie L. Pettersen Cover photography by Lotta Jansdotter Published by Stash Books, an imprint of C&T Publishing, Inc., P.O. Box 1456, Lafayette, CA 94549 Lilla Quilt Pattern Finished block: 9 9 Finished quilt: 90 90 Inspired by motifs from the Lilla fabric line and cut paper designs, this quilt is both graphic and organic. There are 25 block patterns in this quilt. Make 1 or all 25! For a lovely baby quilt, make 1 of each block. 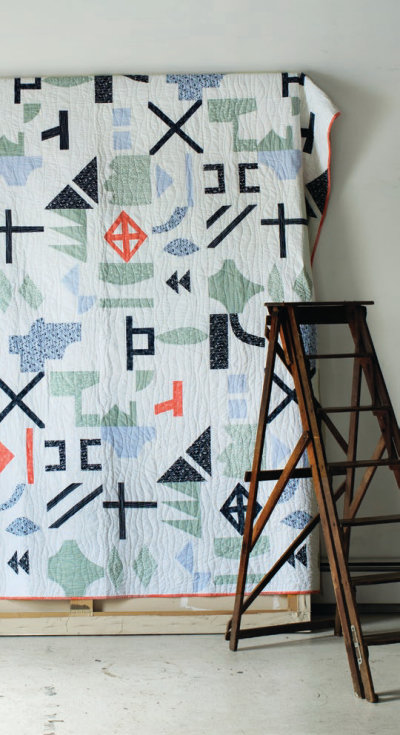 The patterns are a combination of improv and precision piecinga good balance of techniques.
  The patterns are a combination of improv and precision piecinga good balance of techniques.
New to improv? All the guides are here to ensure good results. Feel free to make any combination of blocks. There are no hard-and-fast rules about having to use all 25 blocks in this exact formation. Block placement isnt set in stone either. Likewise, feel free to rotate the blocks as you desire. Playing with contrast can totally change the look of the quilt.
Use a dark background and light feature. Change up the colors. The materials list gives you the option of using one feature fabric or using eight main feature fabrics plus one highlight fabric. MATERIALS REQUIRED Background fabric: 8 yards Feature fabric: 5 yards or To recreate the original quilt: You will need 8 colors. A ninth color, Color 9, is used randomly throughout the quilt.  Color 1: yard
  Color 2: yard
  Color 3: 1 yard Batting: 98 98
  Color 4: 1 yards
  Color 5: yard
  Color 6: 1 yard Backing: 8 yards
  Color 7: yard
  Color 8: yard
  Color 9: 1 yards for binding and highlighted blocks Binding (if not taken from Color 9): yards Lilla by Lotta Jansdotter The original quilt features certain prints from the Lilla fabric line by Lotta Jansdotter for Windham Fabrics.
  Color 1: yard
  Color 2: yard
  Color 3: 1 yard Batting: 98 98
  Color 4: 1 yards
  Color 5: yard
  Color 6: 1 yard Backing: 8 yards
  Color 7: yard
  Color 8: yard
  Color 9: 1 yards for binding and highlighted blocks Binding (if not taken from Color 9): yards Lilla by Lotta Jansdotter The original quilt features certain prints from the Lilla fabric line by Lotta Jansdotter for Windham Fabrics.
If youd like to reproduce the quilt exactly, you can use this list. COLOR 1 (CELEDON42410-6): yard COLOR 2 (INDIGO42409-1): yard COLOR 3 (PERIWINKLE42409-4): 1 yard COLOR 4 (CELEDON42409-6): 1 yards COLOR 5 (INDIGO42411-1): yard COLOR 6 (INDIGO42408-1): 1 yard COLOR 7 (CELEDON42408-6): yard COLOR 8 (PERIWINKLE42408-4): yard COLOR 9 (CORAL42411-8): 1 yards Technique Overview A few techniques are used repeatedly throughout the construction of this quilt. Use this technique overview to guide you through the basics, and refer back to it as necessary when making the blocks. Layered Curves Always cut your fabric larger than the desired unfinished block size. Add 1 for every curve you are going to cut and sew. For example, if you want a 9 9 unfinished block size and 2 curved seams, then you need to cut your fabric approximately 11 11.
Layer your 2 pieces of fabric right sides up, not right sides together. Pin if needed. With scissors or a rotary cutter, make your first cut. If you are right handed, it is often easiest to cut from the bottom right; if you are left handed, it is often easiest to cut from the bottom left. You can make cuts ranging from a gradual curve to a half circle with this technique.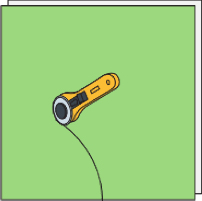 Swap the pieces so that you are sewing background to feature. If you only need 1 block, set aside the excess fabric.
Save the pieces you cut off to use in other blocks. 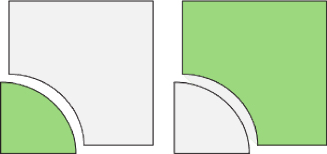 Note: If you only need 1 seam and 1 block, you can cut the feature fabric smallerabout the size of the curved piece you wantto avoid additional scrap making.
 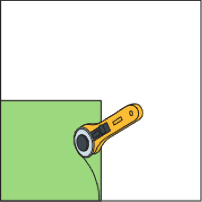 With right sides together, place your background piece on the bottom and your feature piece on top. Start with the feature piece about down from the edge of the background piece. Sew a few stitches; then gently move the fabrics to line up again. Only line up 1 in front of the needle at a time.
Repeat as many times as necessary to go down the seam. No pinning is required! 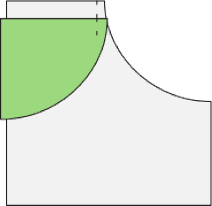 The pieces will line up until you go to sew them. Because you didnt add seam allowances when you cut, the edges of the fabric wont line up when you sew. Thats okay. Thats why you added extra to your cut size.
 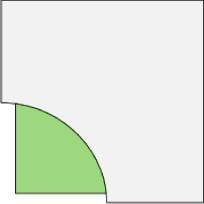 Press.
  Press.
Unless you have a harsh curve, it should press nicely to either side. Use your discretion according to the contrast in your fabrics. If you are cutting a second curve, repeat the process. You can use the smaller piece of the background fabric removed in Step 3 instead of cutting a new piece. 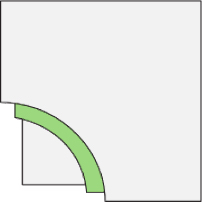
Next page


 The patterns are a combination of improv and precision piecinga good balance of techniques.
  Color 1: yard
  Color 2: yard
  Color 3: 1 yard Batting: 98 98
  Color 4: 1 yards
  Color 5: yard
  Color 6: 1 yard Backing: 8 yards
  Color 7: yard
  Color 8: yard
  Color 9: 1 yards for binding and highlighted blocks Binding (if not taken from Color 9): yards Lilla by Lotta Jansdotter The original quilt features certain prints from the Lilla fabric line by Lotta Jansdotter for Windham Fabrics.
  Swap the pieces so that you are sewing background to feature. If you only need 1 block, set aside the excess fabric.
 Note: If you only need 1 seam and 1 block, you can cut the feature fabric smallerabout the size of the curved piece you wantto avoid additional scrap making.
  With right sides together, place your background piece on the bottom and your feature piece on top. Start with the feature piece about down from the edge of the background piece. Sew a few stitches; then gently move the fabrics to line up again. Only line up 1 in front of the needle at a time.
 The pieces will line up until you go to sew them. Because you didnt add seam allowances when you cut, the edges of the fabric wont line up when you sew. Thats okay. Thats why you added extra to your cut size.
  Press.