Please use caution and common sense when working on DIY projects. Always follow manufacturers instructions and wear the appropriate safety gear, especially when using power tools. Old paint and finishes may contain lead, so take the necessary measures to keep you and your family safe. For detailed information, visit http://www.epa.gov/lead/.
Text and photography 2012 by Marian Parsons
All rights reserved. No portion of this book may be reproduced, stored in a retrieval system, or transmitted in any form or by any meanselectronic, mechanical, photocopy, recording, scanning, or otherexcept for brief quotations in critical reviews or articles, without the prior written permission of the publisher.
Published in Nashville, Tennessee, by Thomas Nelson. Thomas Nelson is a registered trademark of Thomas Nelson, Inc.
Photos of the author taken by Jody McKitrick.
Thomas Nelson, Inc., titles may be purchased in bulk for educational, business, fund-raising, or sales promotional use. For information, please e-mail SpecialMarkets@ThomasNelson.com.
Scripture quotations are taken from the Holy Bible, New Living Translation, copyright 1996. Used by permission of Tyndale House Publishers, Inc., Wheaton, Illinois 60189. All rights reserved.
ISBN 978-1-4003-2088-2
Printed in China
12 13 14 15 16 RRD 6 5 4 3 2 1
ACKNOWLEDGMENTS
S O MANY WONDERFUL PEOPLE have supported me through this journey of writing my first book. I would like to specifically thank: My family, of course, for all of their love.
The gift book team at Thomas Nelson, for seeing my potential and making this book a reality.
My editor, Michelle Prater Burke, for bringing out the best in my words and photographs.
Charlene Mindte, aka Mini Mustard Seed, for taking such great care of Marshall and Calvin when I needed to work and for being my hand model.
Jami Clune, Dee Kasberger, Lisa Leonard, Laura Dreyer, Cindy Austin, Ann Drake, Kristi Abernathy, Alice and Jay, and Christi Wilson for creating some of the beautiful accessories, artwork, and pillows in my home.
Karen Watson, Barb Blair, Shaunna West, Donna Williams, and all of the DIY Divas for their friendship, advice, and encouragement.
Jody McKitrick for taking beautiful photos of me for this book.
All of my blog readers, fans, and friends for following my adventures through every blog post. This book may not have happened without their subscriptions, comments, and clicks.
Last, but certainly not least, I am so thankful to the Lord for creating me, saving me, shaping me into who I am today, and using me despite all my imperfections.
CONTENTS
S OME GIRLS GET GIDDY over a new pair of shoes or an outfit that redefines their image. I get giddy over room makeovers. And finding an amazing piece of furniture at a yard sale. And sewing curtains from scratch. Shall I go on? I cant help it. I love every aspect of it. With a little bit of work, time, and money, an entire home can be transformed into a beautiful space.
When my enthusiasm and passion for decorating bubbles over in a conversation, I often get a response like, I wish I knew how to decorate. I dont really have a flair for that kind of thing. The idea that youre either good at creating a beautiful home or you arent seems to be prevalent today. Were constantly bombarded with images of gorgeous rooms in shelter magazines, on TV, and all over the home-decorating blog world. Its easy to feel like everyone is good at it but you. Like everyone is living in an after space and youre sitting around in your before, hoping a celebrity designer with a crew and a truck full of sweet furniture will show up on your doorstep to do a complete home makeover.
Beautiful homes start with inspiration and a willingness to try.
I am not denying that it would be awesome for that crew to swoop in and create a dream home in three days (and you then get to cry tears of joy about it on national television), but there is so much satisfaction and self-discovery (some tears as well) that come when you transform your home. No need to look back over your shoulder. Im talking to you. You can create a beautiful home. Now, dont start rattling off excuses about your failed attempts at sewing in middle-school home economics or think things like, Im not a creative person. You can create a beautiful home. It doesnt matter if youre right-brained, left-brained, type A, or whatever. Think of it this way: God is the creator of all things, and we are made in His image, so surely there is a creative side to all of us. Working on your home might be the best way to bring out that creativity.
Lets now redefine what a beautiful home is. Its not about big budgets and magazine-quality perfection; its about making the best of what you have and finding contentment despite what you dont. Its not about keeping up with the hottest trends, style setters, or the neighbors; its about creating a space that feels inviting, is functional for your family, and shows off the style and interests of the people who live there. When boiled down, thats it. Doesnt that seem like a more achievable standard? You dont need a huge budget, a degree in interior design, or a boatload of DIY (do-it-yourself) experience. You dont need to start with a dream home. Your journey can start today, with what you already know, what you have, and whatever time your schedule allows.
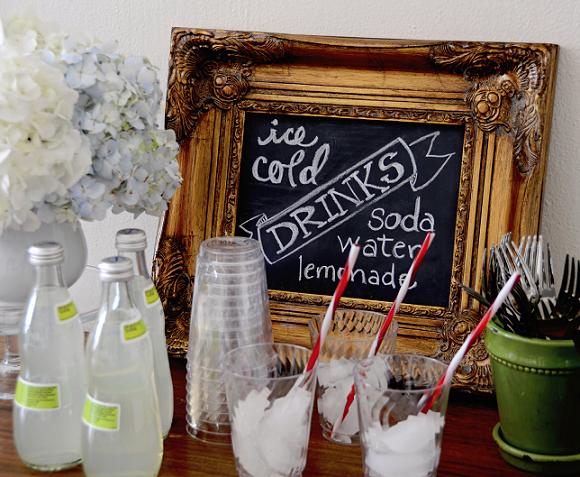
So lets not waste any time and dive right into a project. Do you have a frame? Any frame. Big, small, any finish, missing the glass, whatever. With a frame and a few inexpensive supplies from the hardware store, you can make your very own custom chalkboard.
Chalkboard Tutorial
I love using chalkboards in decorating. Theyre playful yet classic as well. I use them to display poems, verses, songs, menus, or just doodles. Choose a gold leaf frame for a formal look, warm wood for a classic style, or a brightly painted lacquer frame for a modern take.
What youll need:
A picture frame
A piece of hardboard or Masonite cut to fit inside the picture frame
Chalkboard spray paint
Chalk
A hammer and small nails
Step 1: Paint Chalkboard
Using long, smooth strokes, spray the smooth side of the hardboard or Masonite with chalkboard spray paint. Apply two or three coats, allowing ample drying time between coats.
Next page
