Lynne Edwards - 9 Classic Quilt Blocks
Here you can read online Lynne Edwards - 9 Classic Quilt Blocks full text of the book (entire story) in english for free. Download pdf and epub, get meaning, cover and reviews about this ebook. year: 2013, publisher: David & Charles, genre: Home and family. Description of the work, (preface) as well as reviews are available. Best literature library LitArk.com created for fans of good reading and offers a wide selection of genres:
Romance novel
Science fiction
Adventure
Detective
Science
History
Home and family
Prose
Art
Politics
Computer
Non-fiction
Religion
Business
Children
Humor
Choose a favorite category and find really read worthwhile books. Enjoy immersion in the world of imagination, feel the emotions of the characters or learn something new for yourself, make an fascinating discovery.

- Book:9 Classic Quilt Blocks
- Author:
- Publisher:David & Charles
- Genre:
- Year:2013
- Rating:5 / 5
- Favourites:Add to favourites
- Your mark:
9 Classic Quilt Blocks: summary, description and annotation
We offer to read an annotation, description, summary or preface (depends on what the author of the book "9 Classic Quilt Blocks" wrote himself). If you haven't found the necessary information about the book — write in the comments, we will try to find it.
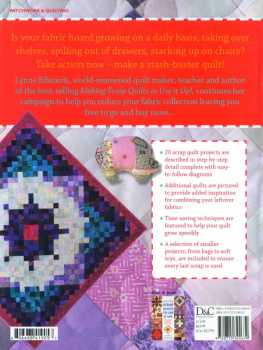
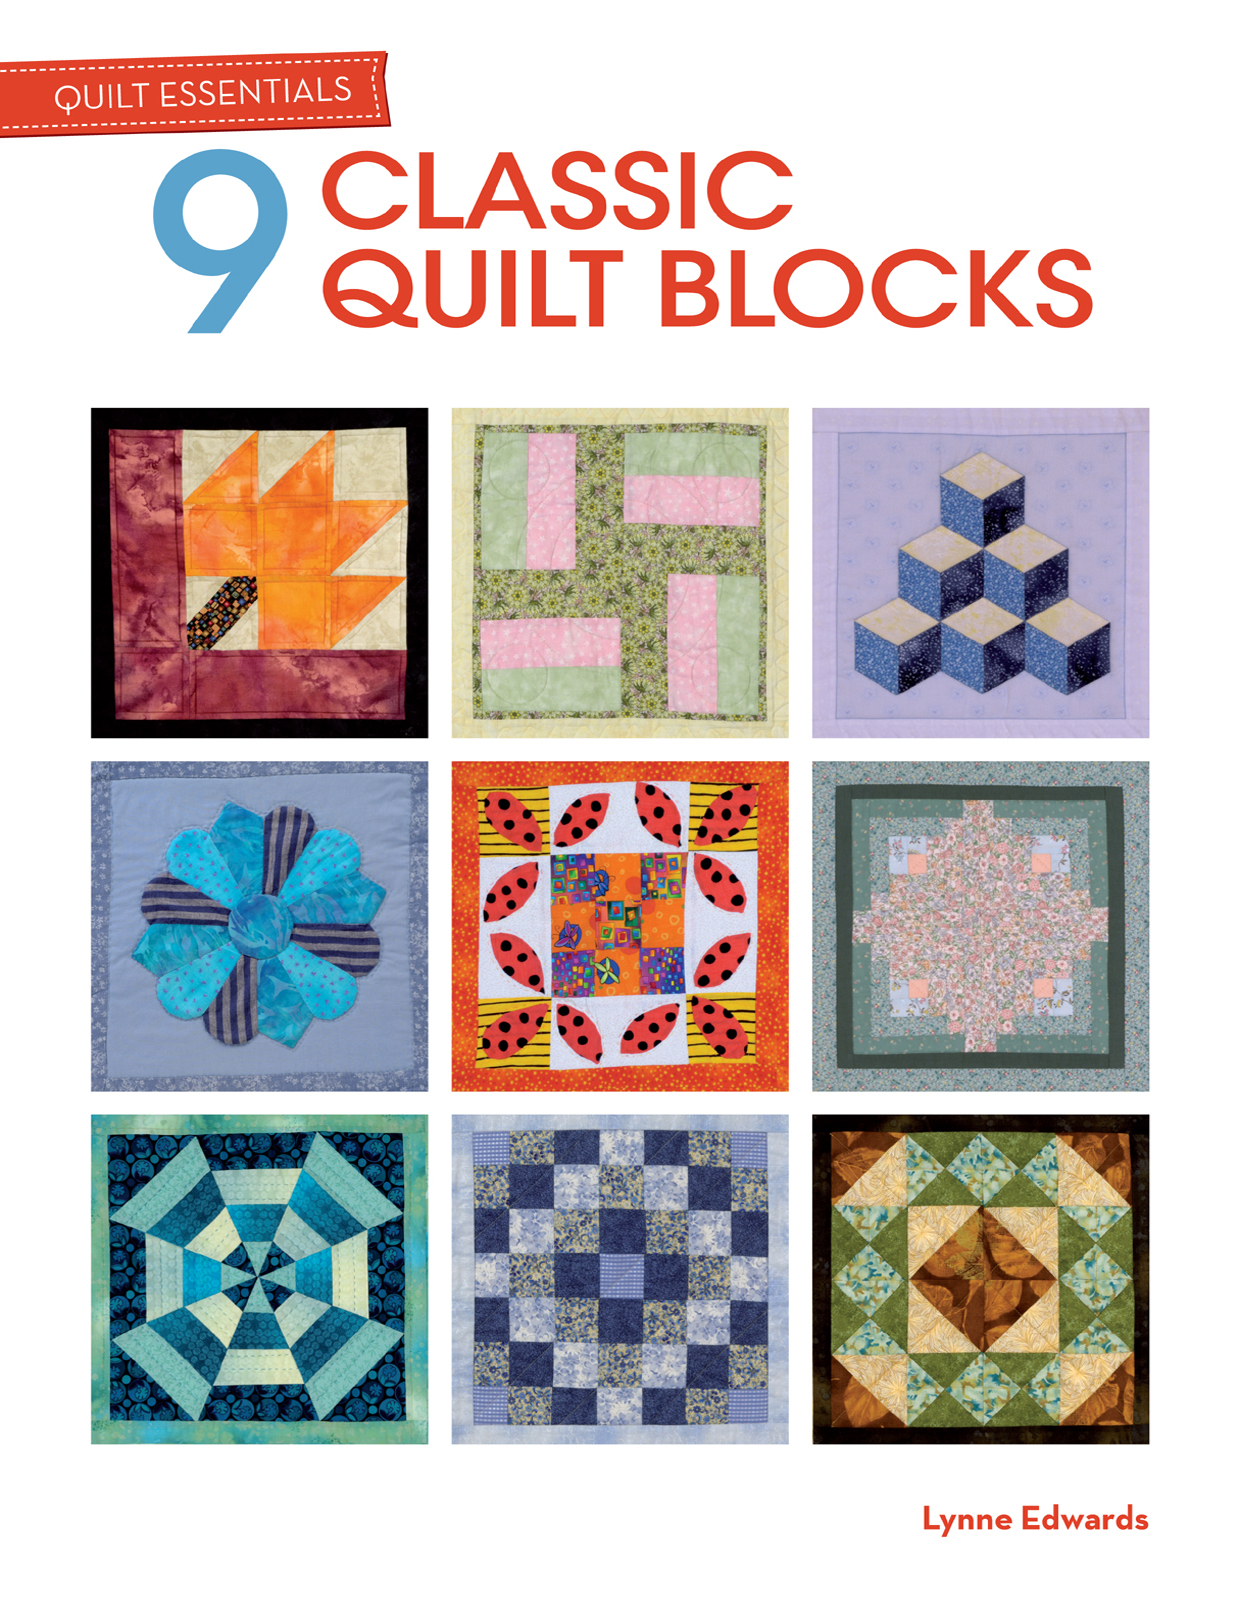
A collection of classic sampler quilt block patterns from quilting expert Lynne Edwards. Features step-by-step instructions for creating nine classic quilting blocks which can be quilted as you go. Includes techniques for finishing, quilting, and how to turn blocks into a sampler quilt or wall hanging. Choose from classic quilt blocks including Rail Fence, Honey Bee, Trip Around the World, Log Cabin, Dresden Plate, Quick Triangles, Spiders Web, Tumbling Blocks, and Maple Leaf. A great introduction to the world of quilt block piecing.
In recognition of her contribution to arts and crafts, Lynne was awarded an MBE, a Member of the Order of the British Empire.
Lynne Edwards: author's other books
Who wrote 9 Classic Quilt Blocks? Find out the surname, the name of the author of the book and a list of all author's works by series.


9 Classic Quilt Blocks — read online for free the complete book (whole text) full work
Below is the text of the book, divided by pages. System saving the place of the last page read, allows you to conveniently read the book "9 Classic Quilt Blocks" online for free, without having to search again every time where you left off. Put a bookmark, and you can go to the page where you finished reading at any time.
Font size:
Interval:
Bookmark:
The Rail Fence design is made by sewing together three long strips of different fabrics and then re-cutting this band into squares. The squares are arranged and joined together to make the block. This block can be used very effectively to make a larger quilt, turning the blocks through 90 degrees each time so that the strips make a pattern of steps running diagonally across the quilt.

For this block you need three fabrics. Fold the fabrics into narrow strips and place them next to each other on a flat surface so that you can see how effective they look together. Alternatively, cut four strips of each fabric 1/2 in 1 1/2 in (1.3cm 3.8cm) and arrange them in various combinations until you get the best effect.
1 From each fabric cut one strip 2in (6.3cm) wide and 28in (71.1cm) long (or two strips each 14in/35.5cm long). Stitch the three strips together using a scant in (6mm) seam. Try not to stretch the strips but guide them gently. Alternate the direction you sew the strips to keep the band straight not slightly rippled (). Press the band from the front with the seams all in one direction.

Fig 1
2 Place the band horizontally on the cutting board, lining up the top edge with one of the horizontal markings on the board. Measure the width of the band it should be 6in (16.5cm). Using the rotary ruler and cutter, trim one end of the band to straighten it and cut four sections each 6in (16.5cm) long, to make four squares (). Note: if your band does not measure 6in (16.5cm), even if it is only in (3mm) out, take the measurement you have and cut the four squares to match it. This way you will have true squares, even if they are slightly more or less than intended. You can make adjustments later on if necessary.
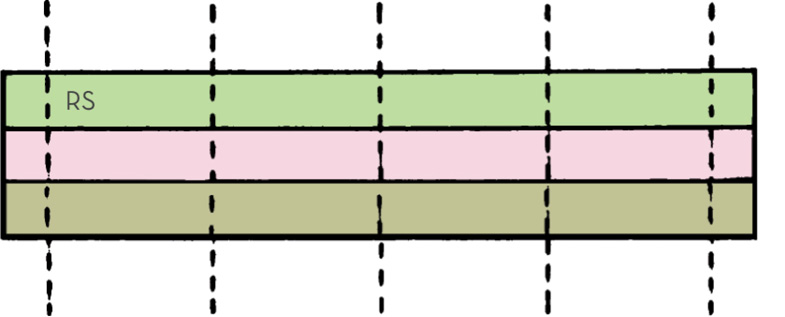
Fig 2
3 Arrange the four squares to make the block design (). Pin and machine stitch the top two squares together with a in (6mm) seam. If the two edges do not match exactly, pin and stitch with the shorter edge on top, as this will stretch slightly as you stitch and should ease the problem. Press the seams to one side from the front of the joined squares.
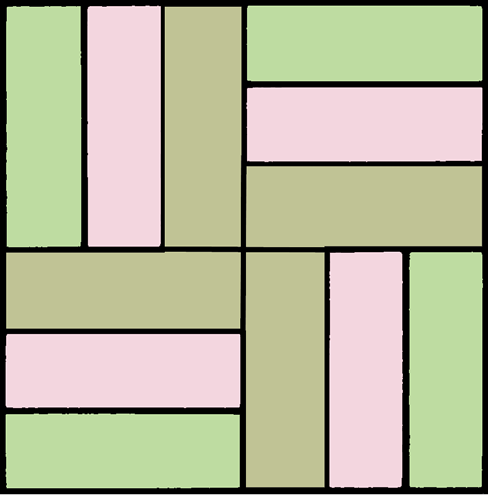
Fig 3
4 Pin and machine stitch the second pair of squares. Press the seams in the opposite direction to the first half ().
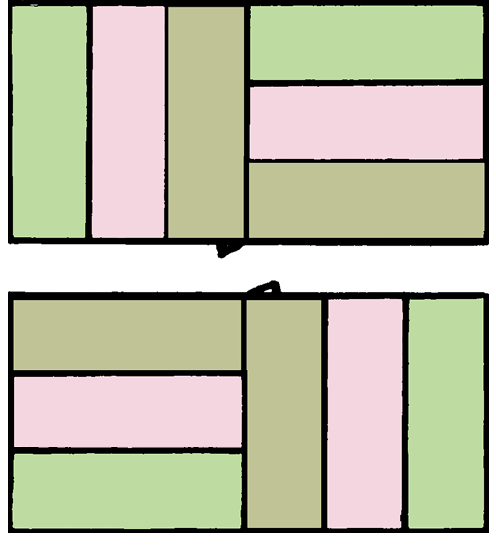
Fig 4
5 Join the two halves by stitching across with a in (6mm) seam, taking care to match the centre seams. Pressing the centre seams of each half in opposite directions will help match them accurately (). Pin diagonally to help keep both sets of seam allowances flat while stitching. Press the final long seam to one side or open.
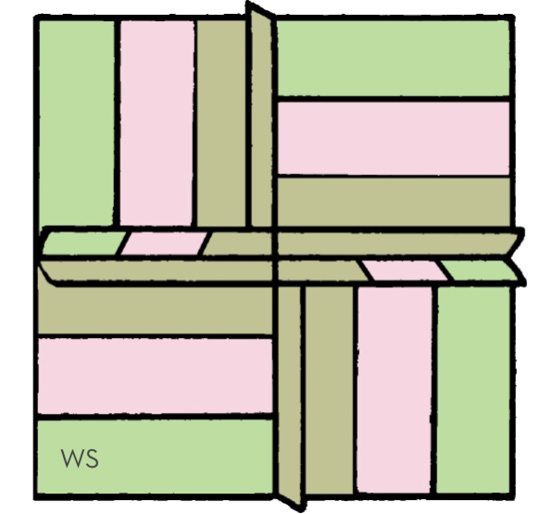
Fig 5
6 Trim the block to an exact 12in (31.7cm) square. Add framing sashing strips if desired. For a finished block of 14in (35.5cm) square, cut two strips 1in 12in (3.2 31.7cm) and sew to the sides of the block. Press seams outwards. Cut two strips 1in 14in (3.2cm 35.5cm) and sew to the top and bottom of the block and press.
Honey Bee can be worked by hand or machine and incorporates some hand appliqu. It is one of those classic blocks that could be repeated several times in a sampler quilt, giving a chance to play with colour combinations.
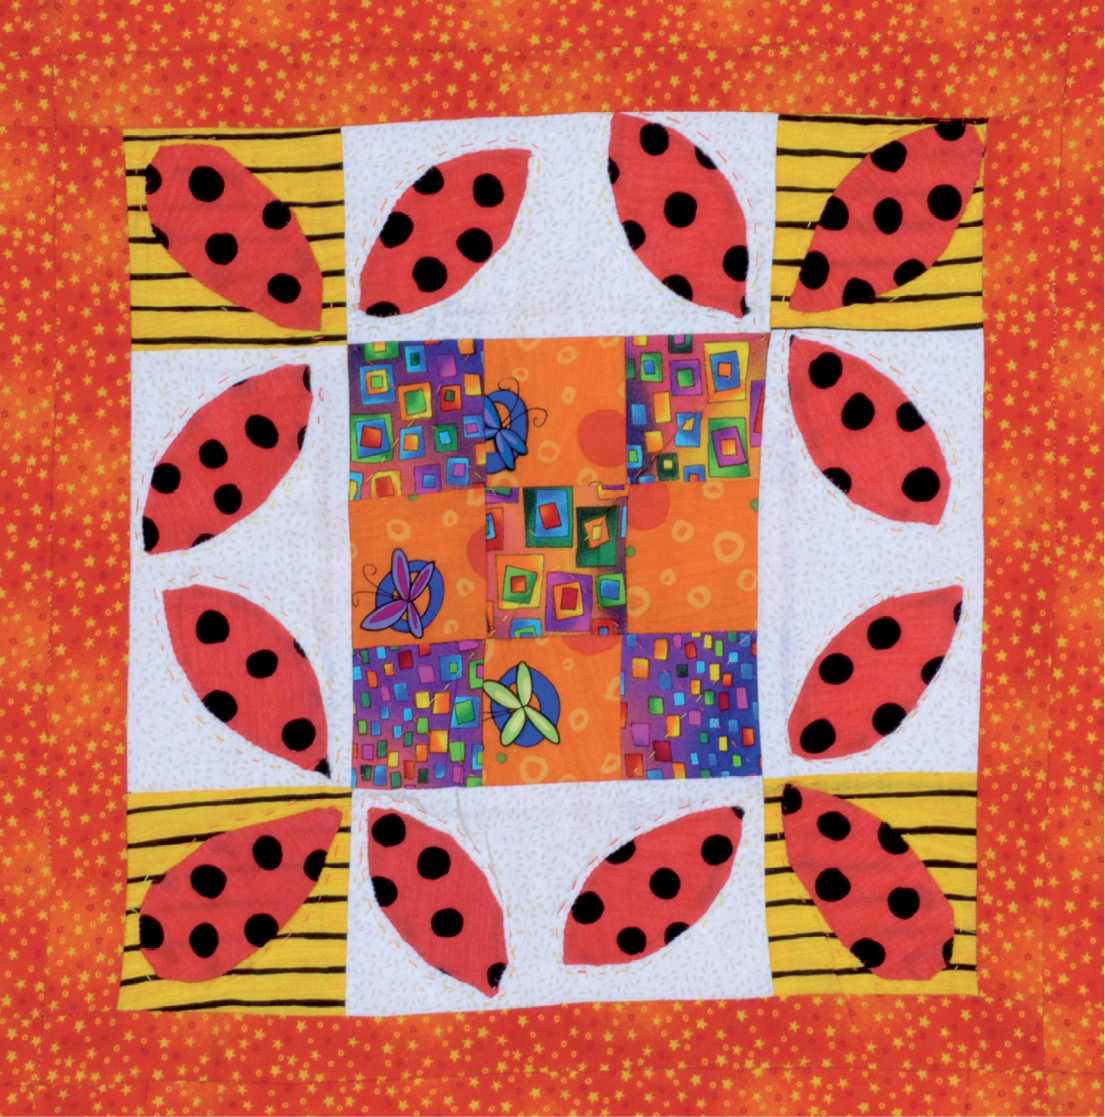
Three or more fabrics are used in Honey Bee, so it is a good design for using up scraps. The curved appliqu shapes are meant to represent bees and the centre nine-patch probably the bee hive. Choose the fabrics to suit your quilt, referring to other blocks you may already have completed to see what is needed for balance.
1 This block is machine pieced, with in (6mm) seams. Cut out nine squares measuring 2 in (6.3cm) 2 in (6.3cm) five in one fabric, four in another. Cut four rectangles measuring 6in (16.5cm) 3 in (8.9cm) and four squares measuring 3 in (8.9cm) 3 in (8.9cm). Seam allowances have been included in these measurements.
2 Assemble the central Nine-Patch square by stitching three rows of three squares each. From the front, press the seams towards the darker fabric ().

Fig 1a
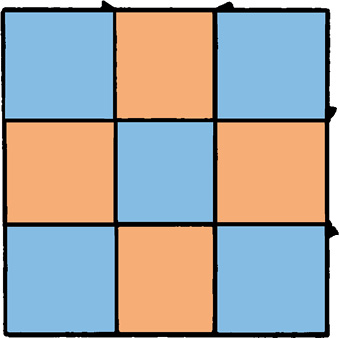
Fig 1b
3 Now, on either side of the Nine-Patch join on the two side rectangles or B shapes ().
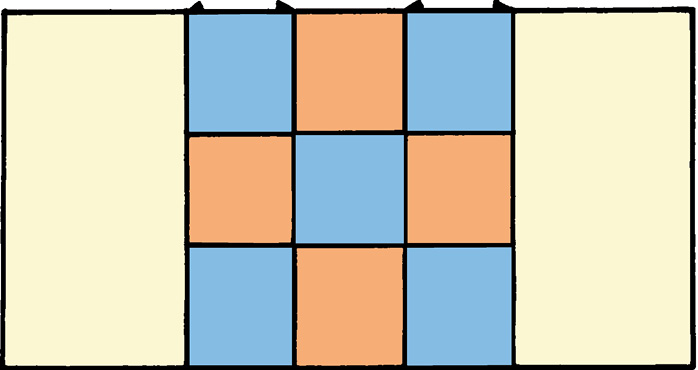
Fig 2
4 Stitch together the top row of shapes C, B and C. From the front press the seams towards shapes C (). Repeat this to make the bottom row.
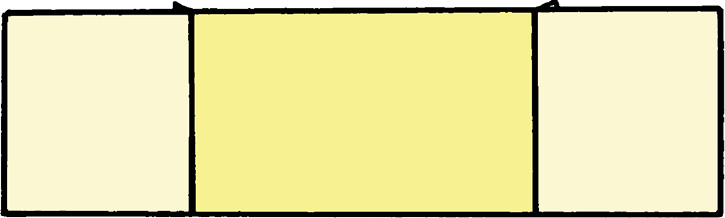
Fig 3
5 Join the three rows together, locking the seams so that they match exactly ().
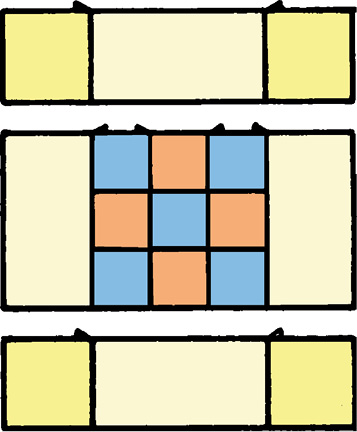
Fig 4a
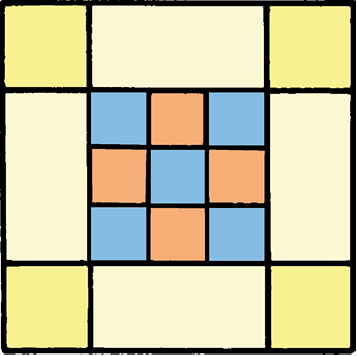
Fig 4b
6 Shapes D and E in represent the bees body and wing. Four body shapes and eight wing shapes are needed. The appliqu can be done by needle marking, as follows. Print templates of shapes D and E. Put the templates on the fabric and draw around the edge firmly with a blunt-ended needle to make a creased line. Cut out the fabric shape with a in (6mm) seam allowance. Tack (baste) under the seam allowances, following the needle-marked creases.
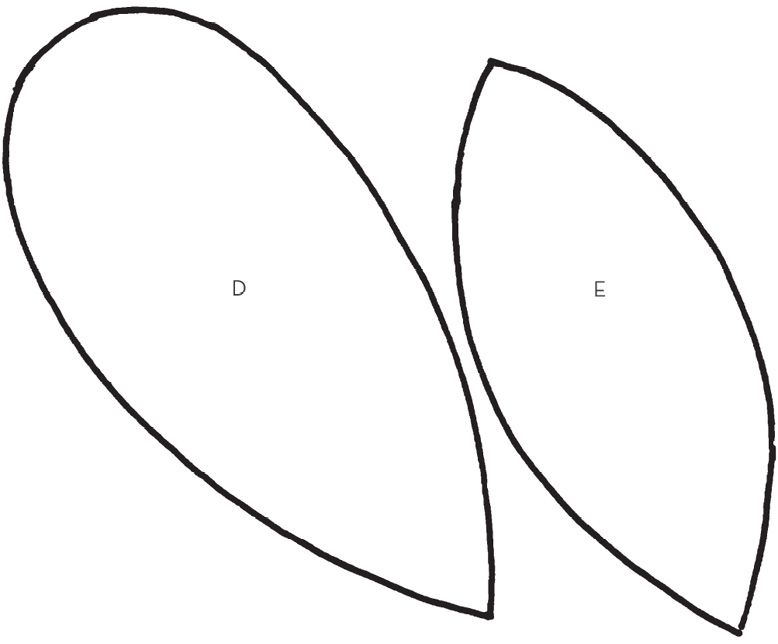
Fig 5
7 Arrange the four body shapes and eight wings on the pieced block () and pin in place. Sew each one on to the background with small slip stitches, using thread to match the appliqu. Once completed, the backing fabric can be cut away to reduce the bulk.
Font size:
Interval:
Bookmark:
Similar books «9 Classic Quilt Blocks»
Look at similar books to 9 Classic Quilt Blocks. We have selected literature similar in name and meaning in the hope of providing readers with more options to find new, interesting, not yet read works.
Discussion, reviews of the book 9 Classic Quilt Blocks and just readers' own opinions. Leave your comments, write what you think about the work, its meaning or the main characters. Specify what exactly you liked and what you didn't like, and why you think so.