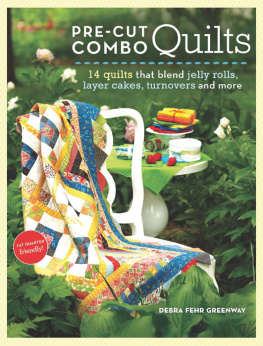
PRE-CUT COMBO
Quilts
14 quilts that blend jelly rolls,
layer cakes, turnovers and more
DEBRA FEHR GREENWAY


Introduction
My brother and fellow author, Dennis, told me that writers pen the introduction to their books last, right before the book goes to press. Im glad I followed that wise advice because from the inception of this book until now when I am (finally!) wrapping it up, I have turned some major corners. The original introduction would never have cut it.
When I first got the idea to write a book about combining multiple sizes and cuts of pre-cut fabrics, thats about all I had in mind. For years I had worked in quilt shops, and I cant count how many customers would actually caress the pre-cuts and tell me how they would love to have all of themthey just didnt know what to use them for! I was empathetic, to say the least. I had always tried to use just about every fabric in any given line for the dozens of store samples I made. So I started to play with combining pre-cuts, and thats where it all began. PRE-CUTS POTPOURRI (page 94) is one of the first of these quilts (it made a really fun class, too). WONKY POSIES (page 10), GREAT BOUNCING BEGONIAS (page 42), LAYER CAKE CHARM (page 66), CHRISTMAS BLESSING (page 110) and the cover quilt, LOG CABIN SCHOOLHOUSE (page 72), were all made in the early stages of playing with pre-cutsexperimenting with appliqu, prairie points, paper piecing and various settings.
I know how popular printed panels are and realized that these cuties are a natural to use in conjunction with pre-cuts. They became easy to use when I found that by varying the size of inner border yardages I could easily surround the panels with pre-cut borders that fit perfectly! RUDOLPHS ENCOURAGEMENT COMMITTEE (page 104) is a great example of this technique.
Fairly soon into this process, I realized that because many manufacturers use the same dyes in their fabric lines, I could combine pre-cuts from different lines. NOT THE OLD-SCHOOL WAY (page 88) uses two lines of pre-cuts from two different Moda designers. From there, it was not a stretch to try using batik pre-cuts with solids, as in HOLLYHOCKS (page 50) and MIXED FRUIT SORBET (page 58). Mixing pre-cuts got a whole lot more fun, and the opportunities for design exploded.
By far though, the most exciting and explosive innovation was when I figured out a way to use fat quarter bundles for pre-cuts. Now I could move way beyond the restriction of which manufacturers made pre-cuts and explore other manufacturers that made fat quarter bundles. MOTHER OF PEARL (page 26) is one such quilt, as are the BIG BROTHERS QUILT and KID SISTERS QUILT pair (pages 100103). The latter two are examples of one fat quarter bundle divided by color to make coordinating quilts. What fun!
Then lo and behold, I realized I could make up my own fat quarter bundles! Now, truly, the sky was the limit. I bundled up some hand-dyed fabrics for HOT SUMMER DAZE (page 117), POP, SIZZLE, BLOOM! (page 22) and THE FALL OF AUTUMN (page 119), all of which sprang from this idea.
I knew I had to include a fat quarter (or fat eighth) cutting diagram for every pattern. This way, your opportunities are also unlimited. And I can write my introduction in peace, knowing that I have truly made an effort to split the pre-cuts field wide open! I hope you enjoy these patterns, and I would love to see every quilt you make from them.
Quilt, bind and enjoy!
Pre-Cuts:
Basics & Beyond
I remember (much too well) cutting piecing templates from plastic milk cartons. That was my big contribution to recycling in the 1980s! Do any of you remember the rotary cutter revolution? It was amazing and instrumental in spurring on the incredible quilting explosion of that decade.
I cant say that pre-cuts will change the quilting world the way the rotary experience did, but I can say that pre-cuts are one of the handiest innovations since. First we had fat quarters, then charm squares, and from there we received a plethora of additions to the family. The depth of this movement is yet to be determined, as it is limited only by the creative minds of those who market themfrom the local shop owner to the big guys in manufacturing.
As quilters continue to create, the market for pre-cuts and their applications will continue to grow. Recently I was able to purchase a whole set of 2 squares. So keep your eyes peeled!
TYPES OF PRE-CUTS
The fat quarter, fat eighth and sweet sixteens are all cuts based on fractions of yardage. These three types of pre-cuts are user-friendly and have many applications. Many times you can find these pre-cuts bundled by entire fabric lines. Many shops will bundle and sell pleasing assortments, but you can also find them individually to make up your own assortment.
- Fat quarters are 18 wide 22 longtwice the length and half the width of a quarter yard. They always have one selvage edge
- Fat eighths are 9 wide 22 long, including a selvage edge
- Sweet sixteens are fairly new on the market and run half the size of a fat eighthabout 9 wide 11 long
Layer cakes, jelly rolls, charm squares, honey buns, dessert rolls and turnovers are sets of fabric that have specific common dimensions. When the manufacturer bundles them up, they usually come as an entire fabric line, varying from about twelve to maybe forty-four fabrics.
- Layer cakes are 10 squares
- Jelly rolls are 2 strips Width of Fabric (WoF, 4044)
- Charm squares are usually 5 squares, but vary from source to source (in the past, 6 squares were common)
- Honey buns are 1 wide WoF
- Dessert rolls usually contain all the solids and/or tone-on-tones in a fabric line and are 5 wide WoF
- Turnovers are 6 half-square triangles, which can be sewn together and trimmed down to 5 squares
WORKING WITH PRE-CUTS
Every manufacturer seems to have a different kind of edgesome are straight and some are ziggy-zaggy, pinked edges to help prevent raveling. Where in all of that are you supposed to place a seam allowance? There is a pretty easy solution: measure. Dont take anything for granted. See for yourself where the seamline has to be to make a perfect 2 jelly roll seam, or where you need to place the charm square by your needle to get a dead-on 4 square.
Subcutting pre-cuts seems to be another bugaboo. For instance, sometimes I will use charm squares for sashing corner squares by cutting them into four equal 2 squares. Where do you cut? Many times the point of the pinked edge is the correct spot to line up with the straight edge of a rotary-cut piece, but please dont take that for granted. If you measure your pre-cuts like I mentioned above, you will know where to cut. Then, if you have to stitch a pinked edge to a straight-cut edge, you will know where to align them.
Turnovers have a long bias edge that is very easy to stretch out of shape. Please be very gentle with turnovers. When you are sewing any bias edge to a straight edge, the rule of thumb is to place the bias edge on the bottom. You may choose to pin it, too, but it almost always will feed right in with no problems.

