• Complain

Margaret Hubert - Flowers of the Month Granny Squares: 12 Squares and Instructions for a Blanket

Here you can read online Margaret Hubert - Flowers of the Month Granny Squares: 12 Squares and Instructions for a Blanket full text of the book (entire story) in english for free. Download pdf and epub, get meaning, cover and reviews about this ebook. year: 2014, publisher: Creative Publishing international, genre: Home and family. Description of the work, (preface) as well as reviews are available. Best literature library LitArk.com created for fans of good reading and offers a wide selection of genres:

Romance novel Science fiction Adventure Detective Science History Home and family Prose Art Politics Computer Non-fiction Religion Business Children Humor

Choose a favorite category and find really read worthwhile books. Enjoy immersion in the world of imagination, feel the emotions of the characters or learn something new for yourself, make an fascinating discovery.

No cover
  • Book:
    Flowers of the Month Granny Squares: 12 Squares and Instructions for a Blanket
  • Author:
  • Publisher:
    Creative Publishing international
  • Genre:
  • Year:
    2014
  • Rating:
    3 / 5
  • Favourites:
    Add to favourites
  • Your mark:
    • 60
    • 1
    • 2
    • 3
    • 4
    • 5

Flowers of the Month Granny Squares: 12 Squares and Instructions for a Blanket: summary, description and annotation

We offer to read an annotation, description, summary or preface (depends on what the author of the book "Flowers of the Month Granny Squares: 12 Squares and Instructions for a Blanket" wrote himself). If you haven't found the necessary information about the book — write in the comments, we will try to find it.

Spring, summer, winter or fallenjoy the perfect crochet book for any season!

Flowers of the Month Granny Squares includes both written and charted instructions for 12 original granny squares representing a new flower for every month of the year. For those new to crocheting granny quares or those who just need a refresher, all the granny square basics are covered. Complete instructions are also provided for combining all the squares into a fabulous flowery blanket.

Use your imagination with these unique granny squares to create a blanket, sweater, hat, or almost any other crocheted item. Since you work on small pieces one at a time, this technique is perfect for anyone new to crocheting or just want a project thats great for on-the-go crochet.

Let designer Margaret Hubert be your guide to her fun, fast, pretty world of flower-inspired granny squares!

Flowers of the Month Granny Squares: 12 Squares and Instructions for a Blanket — read online for free the complete book (whole text) full work

Below is the text of the book, divided by pages. System saving the place of the last page read, allows you to conveniently read the book "Flowers of the Month Granny Squares: 12 Squares and Instructions for a Blanket" online for free, without having to search again every time where you left off. Put a bookmark, and you can go to the page where you finished reading at any time.

Light

Font size:

Reset

Interval:

Bookmark:

Make
Flowers of the Month Granny Squares

12 SQUARES AND INSTRUCTIONS FOR A BLANKET

CONTENTS Granny Square Techniques GETTING STARTED Most granny squares are - photo 1

CONTENTS
Granny Square Techniques
GETTING STARTED

Most granny squares are worked in rounds, beginning with a center ring. There are different ways to begin the ring. The method you choose may depend on whether you want the center to be open or tightly closed.

CHAIN RING

In this method the size of the ring is fixed and cannot be tightened.

1 Make a foundation chain joining with a slip stitch to form a ring 2 - photo 2

1. Make a foundation chain, joining with a slip stitch to form a ring.

2 Work the next round inserting the hook into the center of the ring rather - photo 3

2. Work the next round inserting the hook into the center of the ring rather than in the chain stitches.

SLIP KNOT
1 Form a loose slip knot Holding the tail between your thumb and middle - photo 4

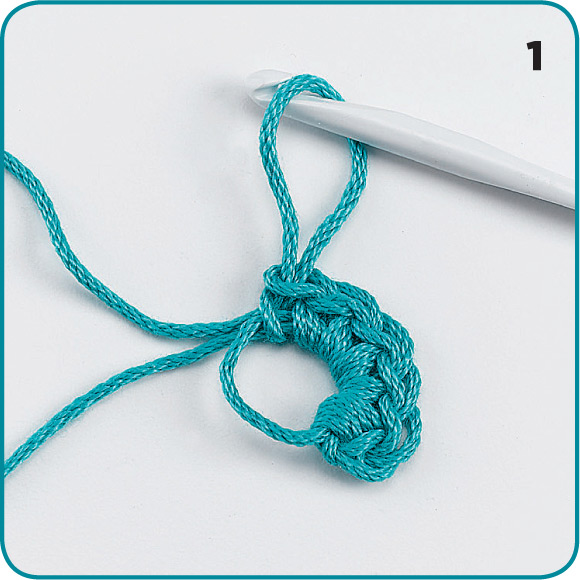
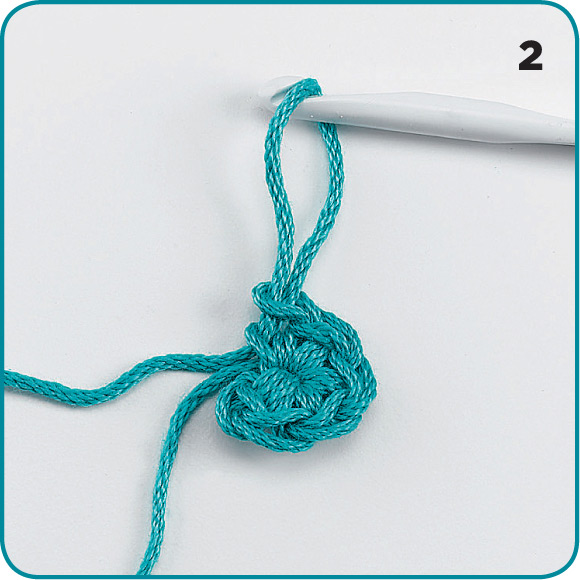
1. Form a loose slip knot. Holding the tail between your thumb and middle finger, work the first round of stitches into the slip knot.

2 Before joining the round gently pull the tail of the knot to tighten the - photo 5

2. Before joining the round, gently pull the tail of the knot to tighten the center.

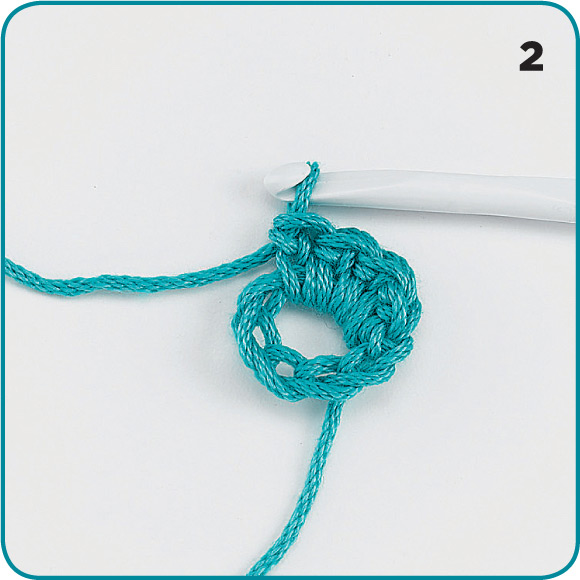
ADJUSTABLE RING

A third method, sometimes referred to as magic ring or sliding loop, also allows you to pull the ring tightly closed.

1 Wrap the yarn clockwise around your index finger twice leaving a 6 152 - photo 6

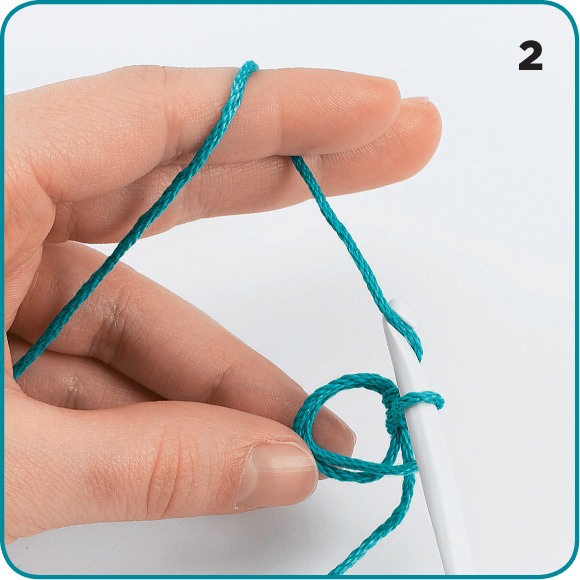
1. Wrap the yarn clockwise around your index finger twice, leaving a 6" (15.2 cm) tail. Holding the tail between your thumb and middle finger, slide the hook under the wraps and catch the working yarn.

2 Pull the working yarn through the ring and chain the designated number of - photo 7

2. Pull the working yarn through the ring, and chain the designated number of stitches.

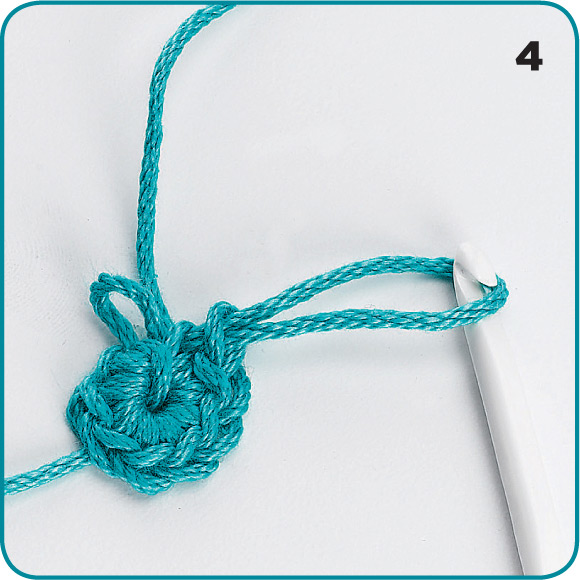
3 Work additional stitches into the two loops of the ring keeping the tail - photo 8

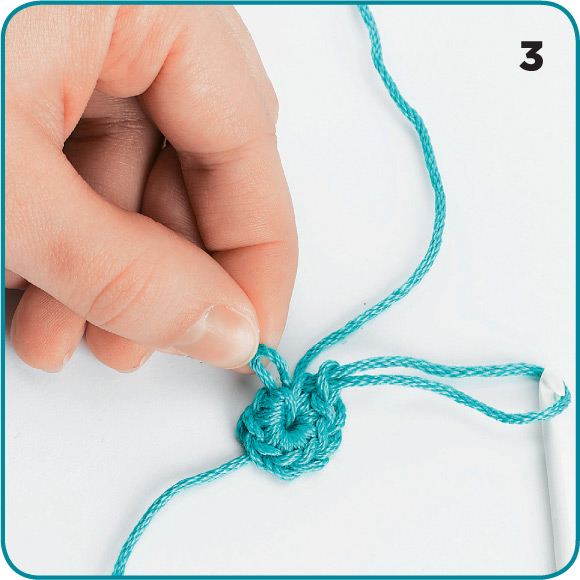
3. Work additional stitches into the two loops of the ring, keeping the tail free. Before joining the round, pull on the tail a little; one loop will tighten slightly. Pull on that loop, which will tighten the other loop.

4 Then pull the tail to tighten the remaining loop CLASSIC GRANNY SQUARE Most - photo 9

4. Then pull the tail to tighten the remaining loop.

CLASSIC GRANNY SQUARE

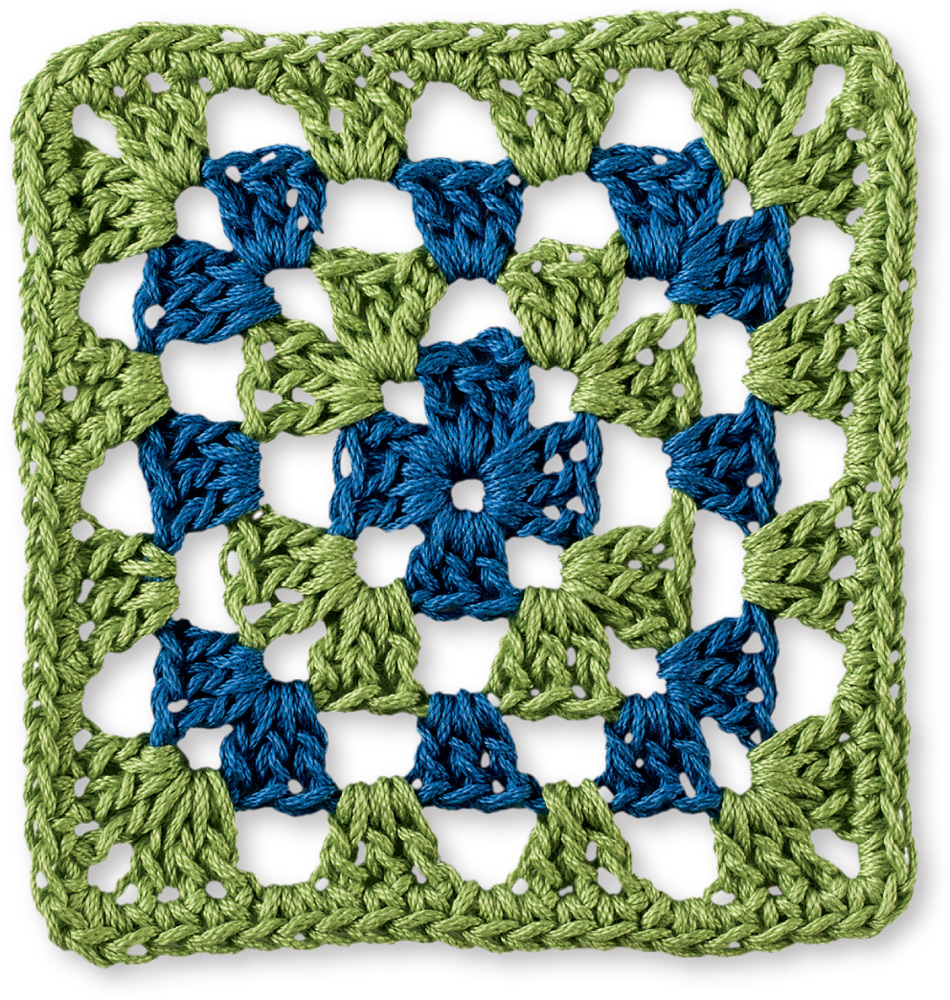
Most granny squares are worked in rounds instead of rows. A classic granny begins with a foundation chain formed in a circle. Because many of the floral granny squares in this book are very textural, you may find it appealing to separate them with the plainer classic granny squares for projects like blankets. If you have never crocheted a granny square before, this is the best place to start!

HOW TO CROCHET A CLASSIC GRANNY SQUARE
1 Foundation rnd With A ch 4 join with a Sl st to form a ring 2 RND - photo 10

1. Foundation rnd: With A, ch 4, join with a Sl st to form a ring.

2 RND 1 With A ch 3 counts as a dc work 2 more dc in ring ch 3 work 3 - photo 11

2. RND 1: With A, ch 3 (counts as a dc), work 2 more dc in ring, *ch 3, work 3 more dc in ring, rep from * twice more, join with a Sl st to 3rd ch of beg ch 3.

3 RND 2 Join B by making a slip knot on hook place hook in any corner ch-3 - photo 12
3 RND 2 Join B by making a slip knot on hook place hook in any corner ch-3 - photo 13
3 RND 2 Join B by making a slip knot on hook place hook in any corner ch-3 - photo 14

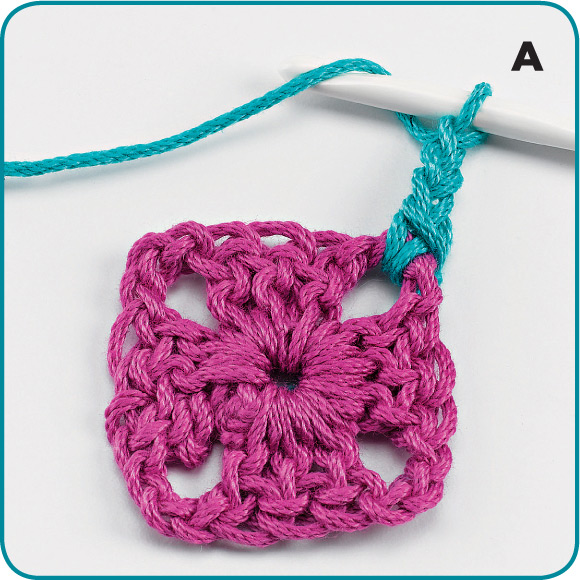
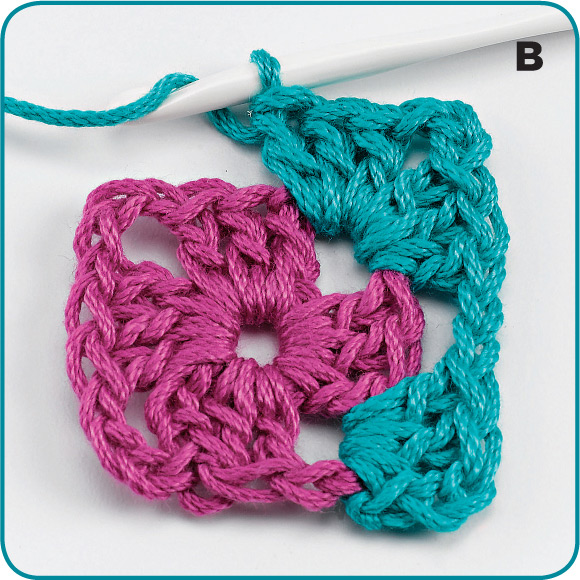
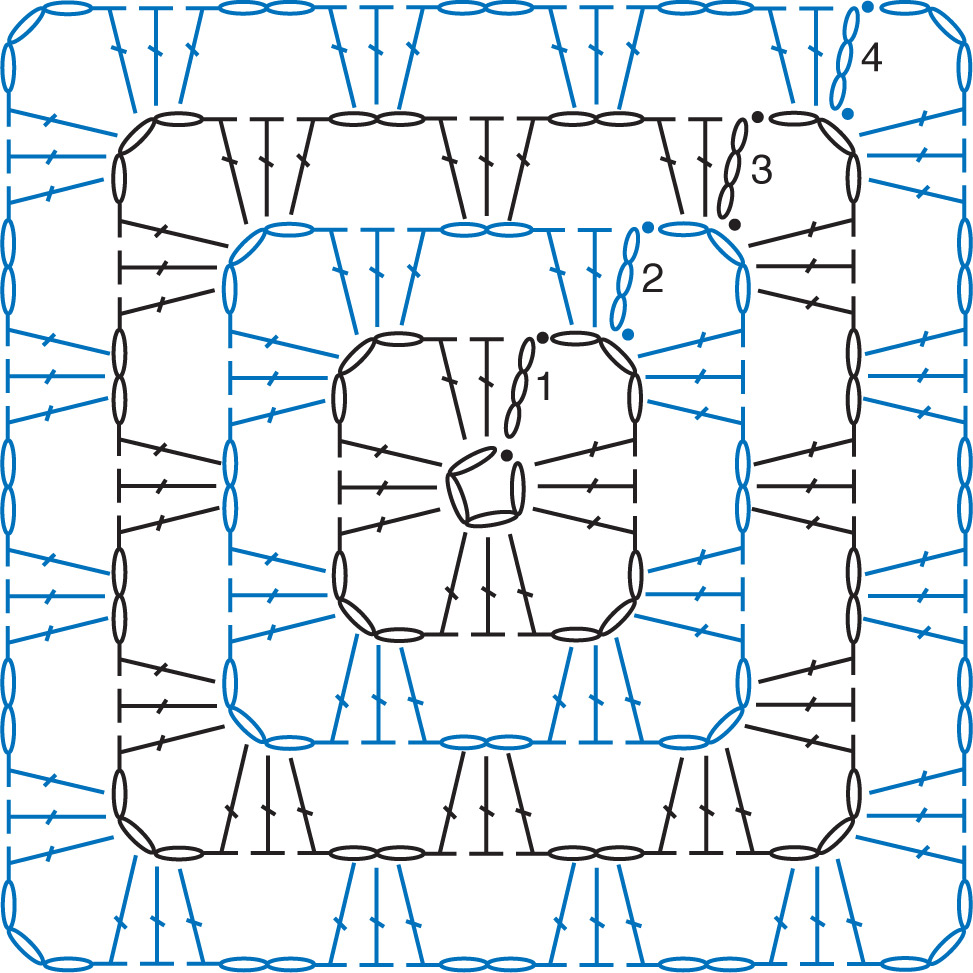
3. RND 2: Join B by making a slip knot on hook, place hook in any corner ch-3 sp, pick up a loop, yo through 2 (1 ch made), ch 2 more for beg chain (A). 2 dc in same ch-3 sp (half corner made), *ch 2 [3 dc, ch 3, 3 dc] in next ch-3 sp (corner made) (B), rep from * twice, ch 2, 3 dc in same sp as beg ch-3, ch 3, join with a Sl st to 3rd ch of beg ch-3 (C).

4 RND 3 Join A with a slip knot same as rnd 2 make 2 more dc in same ch 3 - photo 15

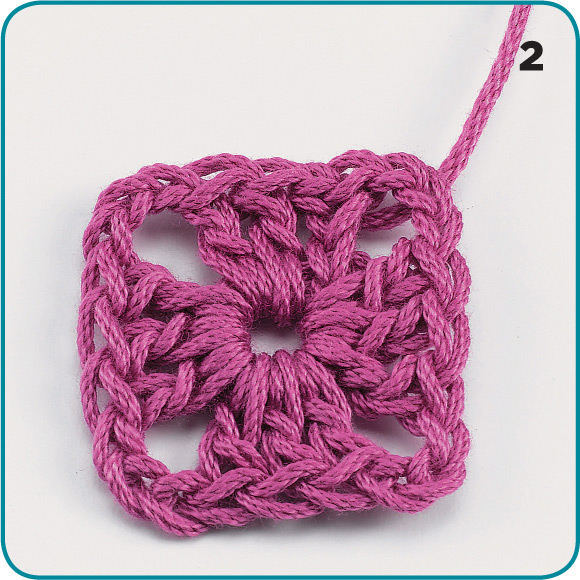
4. RND 3: Join A with a slip knot (same as rnd 2), make 2 more dc in same ch 3 sp (half corner made), *ch 2, 3 dc in next ch-2 sp, ch 2, [3 dc, ch 3, 3 dc] in next ch-3 sp (corner made), rep from * twice, ch 2, 3 dc in next ch-2 sp, ch 2, 3 dc in same sp as beg half corner, ch 3, join with a Sl st to 3rd ch of beg ch-3, fasten off.

Continue to add rounds until your classic granny square is the size you desire. Here is a Classic Granny with four rounds. Refer to the symbol chart on if you are unfamiliar with reading crochet stitch diagrams.

BEGINNING CHAINS When you crochet in rows you alternate from right side to - photo 16
BEGINNING CHAINS When you crochet in rows you alternate from right side to - photo 17
BEGINNING CHAINS

When you crochet in rows, you alternate from right side to wrong side with each row. At the end of each row, you crochet a turning chain of one to four chains, depending on the height of the next row of stitches. When crocheting granny squares, you are working in rounds always from the right side and continuing in the same direction, but you still crochet a chain to begin the round. If the next round will be single crochet, you chain 1 to begin; half-double crochet: chain 2; double crochet: chain 3; triple crochet: chain 4, etc. The directions will tell you how many chains to make. The beginning chain counts as a stitch. For instance, the directions may say, ch 3 (counts as dc). At the end of each round, the last stitch is worked into the beginning chain from the previous round.

INVISIBLE JOIN

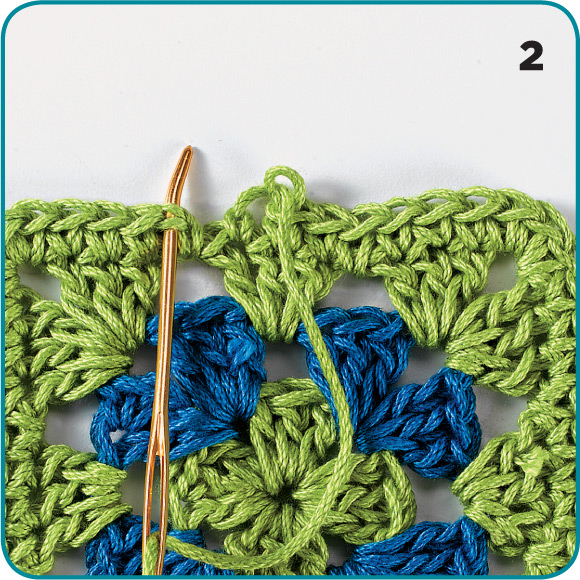
When working in the round, connecting the end of the round to the beginning can sometimes seem awkward. Here is a way to connect the last stitch in a way that will leave the connection nearly invisible.

1 End the last stitch but do not join to the beginning with a slip stitch - photo 18

1. End the last stitch but do not join to the beginning with a slip stitch.

2 Cut the yarn leaving a tail several inches long Pull the yarn through the - photo 19
Next page
Light

Font size:

Reset

Interval:

Bookmark:

Make

Similar books «Flowers of the Month Granny Squares: 12 Squares and Instructions for a Blanket»

Look at similar books to Flowers of the Month Granny Squares: 12 Squares and Instructions for a Blanket. We have selected literature similar in name and meaning in the hope of providing readers with more options to find new, interesting, not yet read works.


Reviews about «Flowers of the Month Granny Squares: 12 Squares and Instructions for a Blanket»

Discussion, reviews of the book Flowers of the Month Granny Squares: 12 Squares and Instructions for a Blanket and just readers' own opinions. Leave your comments, write what you think about the work, its meaning or the main characters. Specify what exactly you liked and what you didn't like, and why you think so.