Charles Evans - Quick & Clever Watercolours
Here you can read online Charles Evans - Quick & Clever Watercolours full text of the book (entire story) in english for free. Download pdf and epub, get meaning, cover and reviews about this ebook. year: 2012, publisher: F+W Media, genre: Home and family. Description of the work, (preface) as well as reviews are available. Best literature library LitArk.com created for fans of good reading and offers a wide selection of genres:
Romance novel
Science fiction
Adventure
Detective
Science
History
Home and family
Prose
Art
Politics
Computer
Non-fiction
Religion
Business
Children
Humor
Choose a favorite category and find really read worthwhile books. Enjoy immersion in the world of imagination, feel the emotions of the characters or learn something new for yourself, make an fascinating discovery.

- Book:Quick & Clever Watercolours
- Author:
- Publisher:F+W Media
- Genre:
- Year:2012
- Rating:5 / 5
- Favourites:Add to favourites
- Your mark:
Quick & Clever Watercolours: summary, description and annotation
We offer to read an annotation, description, summary or preface (depends on what the author of the book "Quick & Clever Watercolours" wrote himself). If you haven't found the necessary information about the book — write in the comments, we will try to find it.
Accomplished artist, Charles Evans, will have you painting in no time with these cleverly-constructed art projects that can each be completed in a matter of minutes. Packed with simple techniques and top tips that will ensure successful results every time, Charles easy-to-follow instruction will help improve your painting skills at once. It helps you learn professional hints and tricks about using watercolors and watercolor pencils which offer extra flexibility and convenience. It includes varied art projects for outdoors and indoors, ranging from simple landscapes to more complex compositions, from pets to still lives. It reveals inspirational pages from Charles own sketchbooks that clearly demonstrate the immediacy of this medium.
Charles Evans: author's other books
Who wrote Quick & Clever Watercolours? Find out the surname, the name of the author of the book and a list of all author's works by series.


Quick & Clever Watercolours — read online for free the complete book (whole text) full work
Below is the text of the book, divided by pages. System saving the place of the last page read, allows you to conveniently read the book "Quick & Clever Watercolours" online for free, without having to search again every time where you left off. Put a bookmark, and you can go to the page where you finished reading at any time.
Font size:
Interval:
Bookmark:

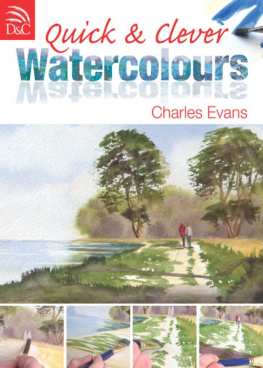
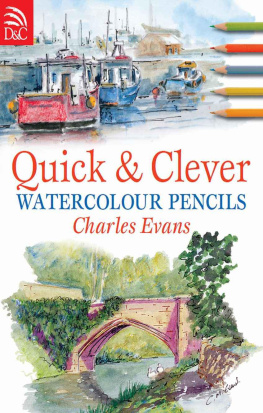
Quick & Clever
Watercolours
Charles Evans
![]()
My kind of painting is not about fiddling or messing about with lots of complex processes and tiny brushes its about slapping on paint using big brushes, scribbling messily with watercolour pencils, getting dirty and having fun. The point is that this is all supposed to be about fun and enjoyment thats why we start painting.
The one thing I can promise in this book is that you wont be bogged down by jargon or confusing terms; instead there will be words and phrases such as slap it on, a daub, squiggly bits and splat. This is about as technical as I usually get, although I have included a few more technical phrases so you can recognize them when you need to.
I have always had tremendous passion and enjoyment for painting. People say, You always make it look so easy, but if you are using big brushes, having fun and slapping on the paint, then results certainly do come quickly and you have definitely enjoyed yourself; and that is what its all about.
A quick look at the contents of this book will show that its not the type where you have to start at the easy beginning and work your way through to the complex end, missing out sections at your peril. The name of the game is to get you painting the subjects that you want to paint, so you can dip in and out as suits you best. (But thats not to say you cant work from beginning to end if you want to, of course.)
The exercises are designed to be very quick and easy, and should help you build up the confidence to tackle the parts and details that people often find difficult trees, boats, skies, buildings, people and animals. The projects incorporate all the exercise themes, and also introduce new ideas and solutions that you can work with and use in your own paintings.
If you glean anything from this book, it will hopefully not be, as we are told so many times, that watercolours are the most difficult painting medium; it will be that they are the most enjoyable one, with the most instant effects. In addition, the usual trauma of making a mistake can be eased by the fact that this is not the ruination or the ending of the painting; if you blunder, simply wash it out and do it again. So sit back, relax and enjoy!
All the materials that I use are made by Daler-Rowney. Its usually the case that you tend to use what your superiors used before you, such as course tutors or college lecturers. So you stick with what you are used to. For me, allied to this is the fact that Daler-Rowney products have an exceptionally long tradition and were always used by the great J.M.W. Turner which is good enough for me!
Whether or not you decide to use the same materials as I do, remember that part of the title of this book is quick; the big rule here is not to burden yourself down with all sorts of stuff that youll never use and that just gets in the way. Use the guidelines Ive given in this section, keep equipment to a minimum, and you wont go far wrong.
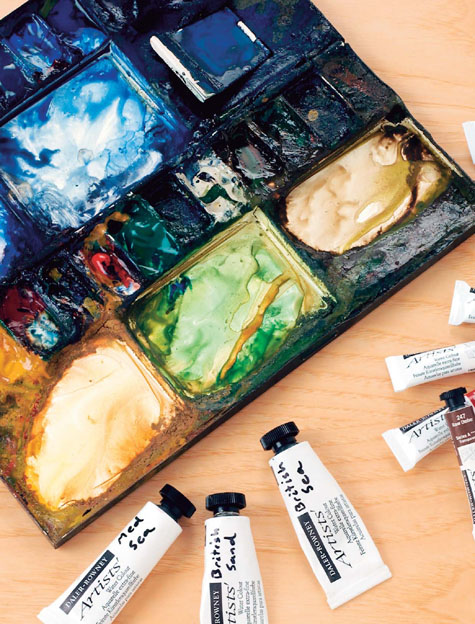
The paints I use are all artists quality: French ultramarine, burnt sienna, yellow ochre, raw umber, Hookers green (dark), cerulean or cobalt blue, alizarin crimson and light red.
Three new paint colours are introduced for the first time in this book, the Charles Evans range: British sea, Mediterranean sea, and British sand, all produced by Daler-Rowney to my specifications. They are ready-mixed colours to make it easier for you to capture the colour of water: you can use them straight from the tubes or play around, mix and match and experiment.
The first two are called sea colours, but if you stick plenty of water in them, especially British sea, this will do for any stretch of water, be it a lake or river. If you want to adjust the colour slightly, I would suggest adding a tiny touch of Hookers green, which will change the colour sufficiently for a beautiful lake type of water that catches a hint of surrounding greenery.
Obviously, as with any other colour, these colours can be stronger or weaker depending on the amount of water added. Mediterranean sea is a beautiful warm colour, and if you want to deepen it ever so slightly, to make it even warmer and stronger, add a tiny tint of alizarin crimson but its just as good on its own, straight from the tube.
You can warm up the sand colour with the addition of a hint of burnt sienna, cool it down with a tiny touch of French ultramarine, or make it brighter with a similar amount of yellow ochre; for a very neutral beach, just use it straight from the tube.
Another very useful feature of the sand colour is that you can use it for mixing in place of white: when you mix white paint with a colour to make it lighter, you end up with an opaque colour because white is totally opaque if you use the sand colour instead, its neutrality and transparency will lighten everything without making the mixed colour opaque.
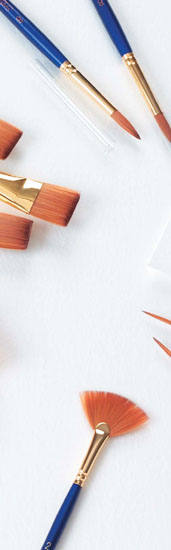
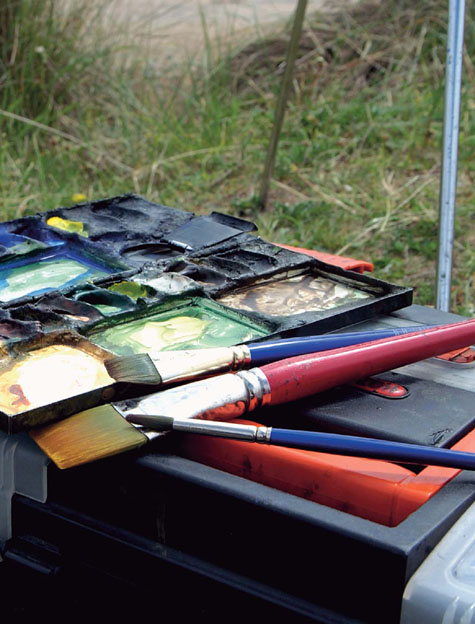
The biggest brush I use is a 1in Dalon, a totally synthetic brush that has been abused for about the last 10 years. It looks well used and is also bent, bitter and twisted, but it does a really good job. My other three brushes are all Sapphire, which is a blend of best quality sable and synthetic and can thus have the qualities of both kinds of bristle. These are a in flat wash brush, a No. 8 round and a No. 3 rigger.
So you see, I only ever use four brushes in total there are no great rafts of equipment and brush rolls bursting out at the seams, most of which are never used. If I cant hold it in my hand or keep it in my bucket, then its surplus to requirements.
The paper I normally use, and have used throughout this book, is Langton Rough. This is only 300gsm (140lb) in weight, and both sides are identical theres no wrong side, therefore, and you cant really go wrong with it. I never pre-stretch or mess about with the paper; I just chop a sheet in half and tape it to the board using ordinary masking tape. As you can see in the projects, I also use tinted paper for some work; this comes from a pad of Bockingford tinted papers.
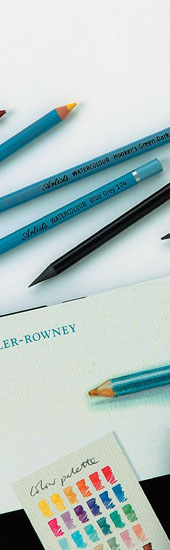
The pencils I use are Daler-Rowneys range of high-quality watercolour pencils, which use very strong artists-quality pigments. As youll see in this book, I dont use a huge amount of different colours, but the pencils arent expensive and its nice to have a particular colour for when you need it, even if this is once a year.
A very important thing to remember with watercolour pencils is that if you use a penknife or craft knife to sharpen them not a pencil sharpener the points dont become brittle or snap easily, and thus last a lot longer.
For sketching outdoors, a useful tip is to wrap a bit of masking tape around the pencil where your fingers hold it: this stops the pencil getting any sweat off your fingers on a hot day or moisture from the atmosphere on a wet one, both of which can make the pencil slip around alarmingly. You can see that Ive done this for the projects in this book.
Font size:
Interval:
Bookmark:
Similar books «Quick & Clever Watercolours»
Look at similar books to Quick & Clever Watercolours. We have selected literature similar in name and meaning in the hope of providing readers with more options to find new, interesting, not yet read works.
Discussion, reviews of the book Quick & Clever Watercolours and just readers' own opinions. Leave your comments, write what you think about the work, its meaning or the main characters. Specify what exactly you liked and what you didn't like, and why you think so.