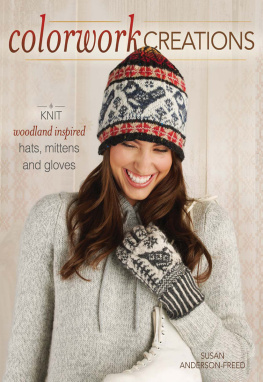
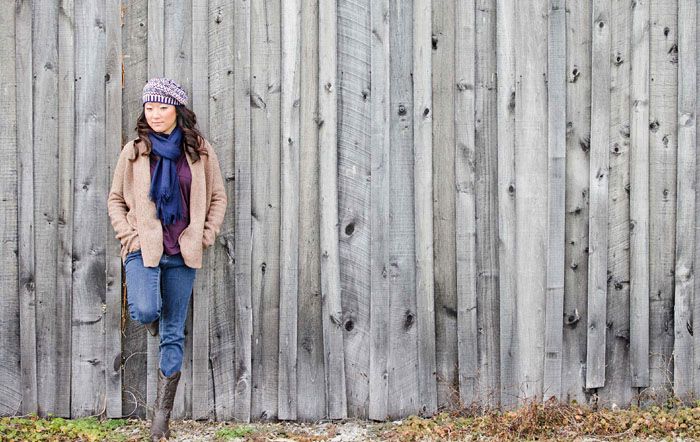
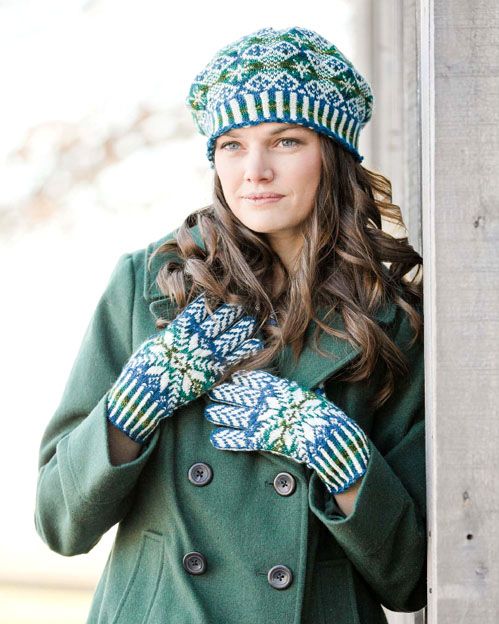
I fell in love with Fair Isle knitting in 1992 when I discovered Alice Starmores Book of Fair Isle Knitting. We were spending a year at the Institute for Advanced Studies in Princeton, New Jersey, which was an easy drive to The Tomato Factory Yarn Company in Lambertville. Skeins of wonderfully colored Shetland jumper-weight yarn lined the shelves of this delightful store. I bought enough yarn for several sweaters on our initial excursion and thus began my foray into Fair Isle knitting. Along with detailed instructions, Starmores book furnished a new vocabulary that included steeks and peerie patterns. I fondly remember ordering skeins of natural, nondyed Shetland wool whose color names still captivate me: Gaulmogot, Katmollet, Yuglet, Mooskit, Moorit and Shaela.
After ten years I began experimenting with glove and mitten design. I started by using my adaptations of Fair Isle designs on the glove or mitten body. I gradually added peerie patterns to the fingers and thumbs. A trip to Iceland in 2009 introduced me to the uniquely beautiful nineteenth-century Icelandic weaving and embroidery patterns. I adapted several patterns first to glove and mitten designs and later to the other projects featured in this book.
The patterns, with the exception of the Jenny and Susan designs, are each named after one of my chemotherapy nurses. Each patterns name also reflects the image that a traditional pattern evoked when I began redesigning it. For example, a stepped cross reminded me of Navajo weaving, and I began to transform the base design into a pattern that resembled a Navajo rug (see the Susans Storm patterns on pages 20, 44 and 120). In another instance, I chose a heart design and enlarged it to include a flower on the inside (see the Shirleys Snow Heart patterns on pages 80 and 100). I changed each traditional design in this manner. In most cases, the original base design is barely recognizable.
STRANDED KNITTING TECHNIQUES
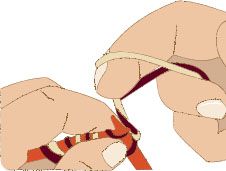
Since stranded or two-color knitting is in the round, the right side of the piece is always in front of the knitter. This results in fewer pattern mistakes and much greater knitting speeds. I generally prefer to hold my yarns on either side of my middle finger as shown below, left.
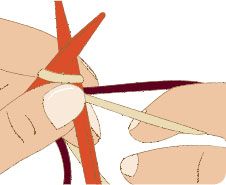
Yarn Placement
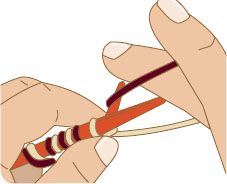
Knit with MC
To knit with the main color (MC) yarn, use the outside edge of your middle finger to lift the yarn into place.
Knit with CC
To knit with the contrasting color (CC) yarn, use the inside of your middle finger to lift the yarn into place.
TIPS AND TRICKS
If youre new to Fair Isle knitting, here are a few pointers Id like to share.
Tangled Yarn
Inevitably the yarns will tangle. To untangle them, simply place one strand of yarn in each hand and let your knitting hang down. Your garment will start to spin, with each revolution removing one twist. Its quite fun to watch.
Reading Patterns
Because knitting is in the round, read all patterns from right to left. Since I dont like to count the stitches knit in each color, if a pattern contains more than four consecutive stitches in the same color, I indicate that in the pattern. For example, in the simple chart at right, the diamonds in Rounds 3 and 5 contain five consecutive red stitches. Rounds 1 through 7 each contain at least one set of five consecutive white stitches. Be careful to watch for consecutive stitches wrapping from the end to the beginning of the next pattern repeat.
Yarn Carries
When a pattern indicates that more than three to four stitches are knit in a single color, always carry the yarn along the back of the work. To do this, simply bring the yarn that isnt being knit over the working yarn.
I also carry the yarns when I change colors. To do this, break off the old yarns and switch to the new yarns. Knit the pattern in the new colors. On the next round, tie the old and new yarns into a knot. As you knit each stitch, bring the yarn tails over the working yarn. Do this for ten to twelve stitches. Wait a few rounds before trimming the loose ends. Not only does this technique secure the loose ends, but it saves you time later.

MATERIALS AND TOOLS
YARNS
Ive knit the patterns in this book using two different weights of yarn.
The leg warmers use worsted-weight yarn while the remaining projects use fingering or sock-weight yarn. The leg warmers use a 50/50 alpaca/wool blend for greater sturdiness.
For the remaining projects, any fingering or sock-weight yarn works well. Since the gauge is small (typically eight and a half or nine stitches per inch [2.5cm]), differences in skein yardage produce slight, if any, difference in the finished size of a project.
Although I suggest specific yarns for each garment, Ive knit many of the projects using other yarns. All of the yarns worked well, and there are several fingering-weight yarns that I am eager to try.
For a complete list of yarns I used for this book, consult the Resources section on page 140.
The glove palms, sock and knee-high leg and foot borders and sole, as well as the leg warmer borders, use small repeating (peerie) patterns. The legends indicate that you should use the dark or light yarn because these colors change as the glove, sock, knee-high or leg warmer main pattern colors change.
For the dark yarn, use the darker color. For the light yarn, use the lighter color. If there is only one dark color or light color, that color is indicated in the legend.
For example, Sabrinas Ojo de Dios Knee-Highs (see page 114) use only Black as the dark yarn, and Lyndis Feathered Star Socks (see page 94) use only Natural as the light yarn.
NEEDLES
The pattern directions for the gloves and mittens suggest one set each of 6" (15cm) and 8" (20.5cm) double-pointed needles in the size required for the indicated gauge. I do not use a separate set of needles in a smaller gauge for the ribbing because all of the garments use corrugated ribbing, which tends to be inherently tighter.


