Betsy La Honta - The 3-in-1 Betsy Bag Pattern
Here you can read online Betsy La Honta - The 3-in-1 Betsy Bag Pattern full text of the book (entire story) in english for free. Download pdf and epub, get meaning, cover and reviews about this ebook. year: 2015, publisher: National Book Network (NBN);C&T Publishing;Stash Books, genre: Home and family. Description of the work, (preface) as well as reviews are available. Best literature library LitArk.com created for fans of good reading and offers a wide selection of genres:
Romance novel
Science fiction
Adventure
Detective
Science
History
Home and family
Prose
Art
Politics
Computer
Non-fiction
Religion
Business
Children
Humor
Choose a favorite category and find really read worthwhile books. Enjoy immersion in the world of imagination, feel the emotions of the characters or learn something new for yourself, make an fascinating discovery.

- Book:The 3-in-1 Betsy Bag Pattern
- Author:
- Publisher:National Book Network (NBN);C&T Publishing;Stash Books
- Genre:
- Year:2015
- Rating:4 / 5
- Favourites:Add to favourites
- Your mark:
The 3-in-1 Betsy Bag Pattern: summary, description and annotation
We offer to read an annotation, description, summary or preface (depends on what the author of the book "The 3-in-1 Betsy Bag Pattern" wrote himself). If you haven't found the necessary information about the book — write in the comments, we will try to find it.
Betsy La Honta: author's other books
Who wrote The 3-in-1 Betsy Bag Pattern? Find out the surname, the name of the author of the book and a list of all author's works by series.


The 3-in-1 Betsy Bag Pattern — read online for free the complete book (whole text) full work
Below is the text of the book, divided by pages. System saving the place of the last page read, allows you to conveniently read the book "The 3-in-1 Betsy Bag Pattern" online for free, without having to search again every time where you left off. Put a bookmark, and you can go to the page where you finished reading at any time.
Font size:
Interval:
Bookmark:
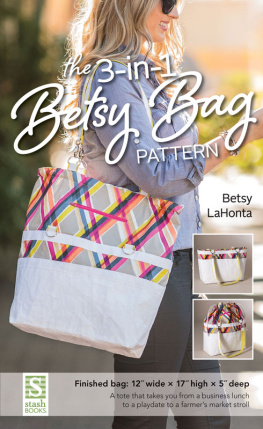
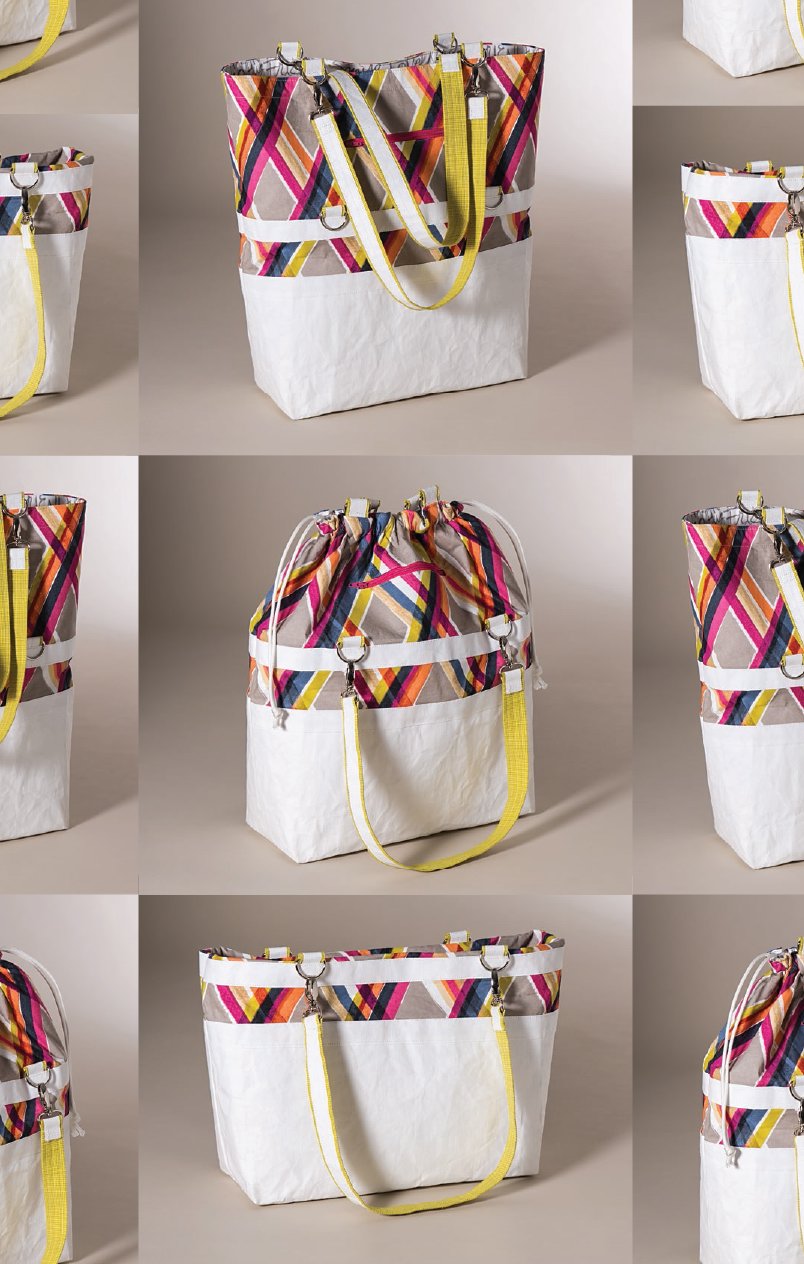
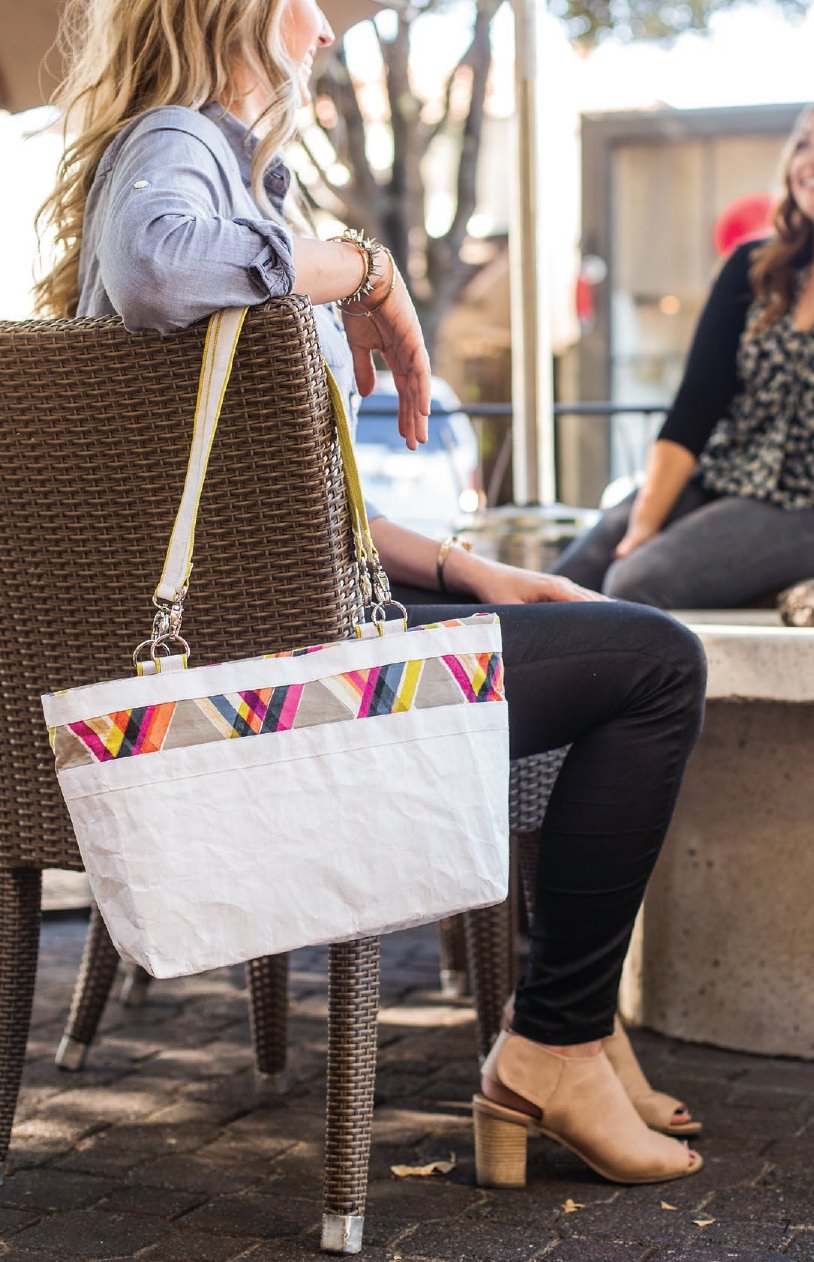
The 3-in-1 Betsy Bag
Finished bag: 12 wide 17 high 5 deep
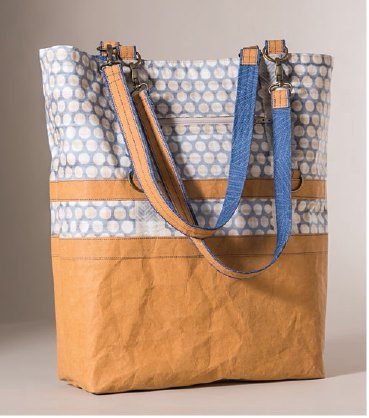
This fun, versatile tote can be used three ways. Coming back from the farmers market with more produce than you expected? Use it straight up with the straps attached at the top for those times when you need a really big bag. Attach the straps at the middle, tuck the top panel inside, and you have a sleeker, smaller tote. Or keep the straps in the middle and use the drawstring to create a midsized bag that will keep your contents secure. It also features an optional exterior zipper pocket to keep your phone or keys handy, as well as a large, sectioned interior pocket to help keep you organized.
This project uses krafttex (by C&T Publishing), a rugged paper product that cuts, sews, and washes like fabric but looks and feels like leather. Its very easy to use and doesnt require any special toolsjust regular sewing supplies and a sewing machine. It is available in a variety of neutral colors.
MATERIALS
Yardage is based on 42-wide fabric. Allow extra fabric for directional prints.
krafttex: 1 roll (19 1 yards) for bottom panel, edge finishing strips, straps, and D-ring anchors
Main fabric (A): yard for top panel, middle panel, and outer zipper pocket
Contrasting fabric (B): yard for inside pocket, straps, and D-ring anchors
Lining: yard
Interfacing: 1 yards of 20-wide medium-weight stiff fusible interfacing for top and middle panels and straps (I used Pellon 808 Craft-Fuse.)
1 yards of 20-wide lightweight flexible fusible interfacing for pockets and lining (I used Pellon Shape-Flex.)
Fusible web: 2 strips 7 of fusible web (or fabric glue) to hold zipper before stitching
Zipper: 7 long (a longer nylon zipper can be trimmed to size)
D-rings: 8 (to fit a 1-wide strap)
Swivel/snap hooks: 4
Cording: 1 piece 60 long
Optional: 24 cord locks / drawstring toggles (or see , to make your own)
NOTES
The instructions that follow are written for the bags using for help. Have fun and make it your own!
Depending on the fabric used, you may want to use stiffer or softer interfacing as appropriate. In the materials list are the interfacings I used for the bags shown.
The D-rings and swivel/snap hooks are available at hobby, fabric, and hardware stores.


tips
Helpful hints for working with krafttex:
For this tote bag project, its best to prewash and machine dry the krafttex at least once before starting. This will help soften it somewhat and will make it much easier to turn your project inside out. Ironing the washed krafttex before you measure and cut will flatten it out for more accurate results. (But dont worry, you wont lose that great distressed texture!)
krafttex doesnt have a true right or wrong side, but if you notice a texture difference between the sides, you may want to designate a right side.
It is easiest to cut the krafttex with a rotary cutter and cutting mat.
Because krafttex is a paper product, its best to keep a cutting blade and sewing machine needle dedicated to your krafttex projects.
When sewing with krafttex, use binder clips (from an office supply store) or quilt binding clips to hold the layers together for sewing. Pins are difficult to push through the material and will leave perforations.
Because the krafttex perforates (similar to vinyl), it is best not to sew back and forth in one place too many times or the material will tear. To secure the stitching at the beginning of a seam, place your presser foot and needle about in along the seamline and stitch backward to the edge, and then proceed to sew forward along the seamline.
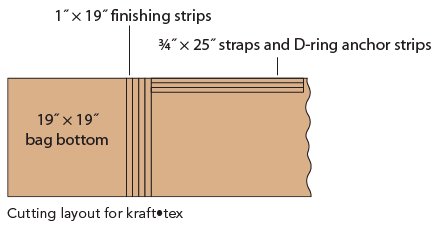
CUTTING
krafttex
Refer to the cutting layout diagram.
Cut 1 piece 19 19 for bag bottom.
Cut 4 pieces 1 19 for edge finishing strips.
Cut 3 pieces 25 for straps and D-ring anchors.
Fabric A
Cut 2 pieces 8 19 for top panel.
Cut 2 pieces 3 19 for middle panel.
Cut 2 pieces 8 8 for outer zipper pocket.
Fabric B
Cut 1 piece 12 19 for inside pocket.
Cut 3 pieces 2 25 for straps and D-ring anchors.
Lining
Cut 1 piece 19 41.
Interfacing
Medium-weight stiff fusible interfacing:
Cut 2 pieces 8 19 for top panel.
Cut 2 pieces 3 19 for middle panel.
Cut 3 pieces 25 for straps and D-ring anchors.
Lightweight flexible fusible interfacing:
Cut 2 pieces 8 8 for outside zipper pocket.
Cut 1 piece 19 41 for lining (optional, depending on fabric).
Construction
Seam allowances are unless otherwise noted.
Make the Outer Zipper Pocket
Follow the manufacturers instructions to fuse the lightweight flexible interfacing to the wrong side of both of the outer pocket pieces. Set one aside for the pocket back.
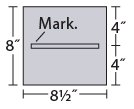
Fold the remaining piece in half so the piece is now 4 8 and crease to mark the center. Open it up and mark a 6 rectangle, centered on the crease, on the wrong (interfaced) side.
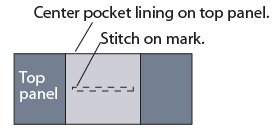
Center this pocket piece on one top panel piece, right sides together.
Stitch on the marked rectangle through both layers.
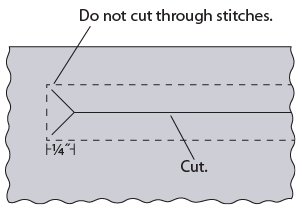
Draw a line through the center of the length of the rectangle. Mark a dot on the line in from both ends of the rectangle. Cut along the line between the dots, and then from the dots to the corners, being careful to not cut through the stitching.
Push the pocket piece through the rectangle to the wrong side of the top panel. Press the seams so it all lies flat.
Fuse the fusible web strips to the outer edges of the right sides of the zipper tape (or run a line of glue on each side).
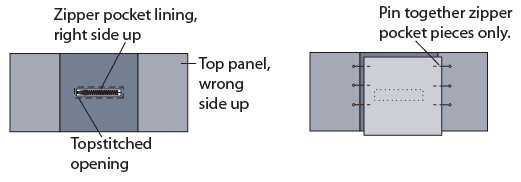
Place the zipper right side up on an ironing board and place the top panel piece on top, right side up, centering the zipper under the rectangular opening. Make sure the zipper is centered, with the zipper pull within the opening, not under the top panel at all.
Fuse the zipper tape in place.
Use a zipper foot to edgestitch around the rectangle on the right side of the top panel piece and secure the zipper in place.
Turn the top panel piece so the pocket lining is right side up. Layer the second zipper pocket piece on the first pocket piece, right sides together, aligning edges. Pin the 2 side edges of the pocket pieces together as shown.
Font size:
Interval:
Bookmark:
Similar books «The 3-in-1 Betsy Bag Pattern»
Look at similar books to The 3-in-1 Betsy Bag Pattern. We have selected literature similar in name and meaning in the hope of providing readers with more options to find new, interesting, not yet read works.
Discussion, reviews of the book The 3-in-1 Betsy Bag Pattern and just readers' own opinions. Leave your comments, write what you think about the work, its meaning or the main characters. Specify what exactly you liked and what you didn't like, and why you think so.