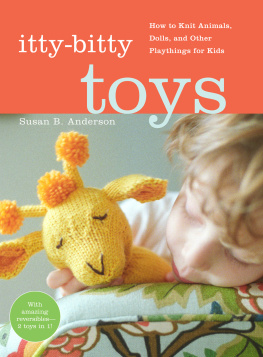
Susan B. Anderson - itty-bitty TOYS
Here you can read online Susan B. Anderson - itty-bitty TOYS full text of the book (entire story) in english for free. Download pdf and epub, get meaning, cover and reviews about this ebook. year: 2009, publisher: ARTISAN NEW YORK, genre: Home and family. Description of the work, (preface) as well as reviews are available. Best literature library LitArk.com created for fans of good reading and offers a wide selection of genres:
Romance novel
Science fiction
Adventure
Detective
Science
History
Home and family
Prose
Art
Politics
Computer
Non-fiction
Religion
Business
Children
Humor
Choose a favorite category and find really read worthwhile books. Enjoy immersion in the world of imagination, feel the emotions of the characters or learn something new for yourself, make an fascinating discovery.

- Book:itty-bitty TOYS
- Author:
- Publisher:ARTISAN NEW YORK
- Genre:
- Year:2009
- Rating:4 / 5
- Favourites:Add to favourites
- Your mark:
itty-bitty TOYS: summary, description and annotation
We offer to read an annotation, description, summary or preface (depends on what the author of the book "itty-bitty TOYS" wrote himself). If you haven't found the necessary information about the book — write in the comments, we will try to find it.
Susan B. Anderson: author's other books
Who wrote itty-bitty TOYS? Find out the surname, the name of the author of the book and a list of all author's works by series.


itty-bitty TOYS — read online for free the complete book (whole text) full work
Below is the text of the book, divided by pages. System saving the place of the last page read, allows you to conveniently read the book "itty-bitty TOYS" online for free, without having to search again every time where you left off. Put a bookmark, and you can go to the page where you finished reading at any time.
Font size:
Interval:
Bookmark:
itty-bitty toys
susan b. anderson
photographs by liz banfield
ARTISAN NEW YORK
Copyright 2009 by Susan B. Anderson
Photographs copyright 2009 by Liz Banfield
Step-by-step illustrations copyright 2006, 2007, 2009 by Harry Bates
All rights reserved. No portion of this book may be reproducedmechanically, electronically, or by any other means, including photocopyingwithout written permission of the publisher.
Published by Artisan
A Division of Workman Publishing Company, Inc.
225 Varick Street
New York, NY 10014-4381
www.artisanbooks.com
Library of Congress Cataloging-in-Publication Data is available.
eISBN: 9781579655891
Design by Jan Derevjanik
This book is dedicated to the memory of my mother, Mary Ann Barrett, and to my sweet, supportive familyBrian, Evan, Ben, Holly & Mary Kate

technique notebook
Knitting toys uses most of the same skills used in knitting a baby hat, a garment, or any other type of accessory. Sometimes the pieces are smaller and three-dimensional, which can make it feel like a new experience. Toy knitting uses the same skills in a different and interesting way. The following chapter provides instructions and tips on skills used throughout the book. If you are a new knitter, youll need to get some basics down first, then move right on to your first project in , referencing techniques as needed. Ive included the methods that I use when knitting toys. However, there are no steadfast rules in knitting; do what feels right and comfortable for you. If you achieve the same result while going about the techniques in a different way, that is fine.
Now take a deep breath, jump right in, and have some fun!
There are certain skills that I think of when it comes to the basics of knitting. Knitters can easily access all of this information online or in books and be able to quickly gather and master the necessary skills. I extensively covered the basics of knitting in my last two books, Itty-Bitty Hats and Itty-Bitty Nursery, and on my blog through written and video tutorials at www.susanbanderson.blogspot.com and at SusanBAnderson on www.youtube.com. The following skills are covered in my previous books and on my blog: casting on, the knit stitch, the purl stitch, binding off, gauge, seaming, increases, and decreases.
A couple of longstanding and excellent teaching Web sites include:
www.knittinghelp.com
www.learntoknit.com
All the other techniques used for the projects in Itty-Bitty Toys are included on the following pages. Heres where you will find techniques that go beyond the basics. Every special technique you need to make the projects in this book is included on the following pages. If you are new to knitting, take your time and give it a go. You will have things figured out in no time.
knitting in the round on circular needles Circular needles are two needles that are joined by a cable. They are used for both knitting in the round and knitting back and forth. The length of the needles, measured from tip to tip, is determined by the cable length. Even though the needles are attached, consider them separate needles, holding one needle in your right hand and the other in your left hand. The following steps will start you on your way.
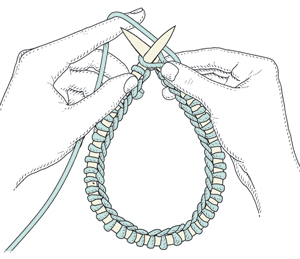
1. Cast on just as you would if you were knitting back and forth.
2. After you have completed casting on, spread the stitches all the way around the needles and the cable so the first and last stitches come together at the points of the needles.
3. Most important, make sure the stitches are not twisted before you begin knitting. Look to see if the cast-on row is at the inside of the circle as you hold the needles up. If the stitches are twisted, then untwist them at this time. There is no way to untwist stitches once youve started knitting. The only way to fix this is to start over.
4. Place a stitch marker (see ) on the right needle before you begin knitting, to mark the beginning of the round. Do this by sliding a stitch marker onto the point of your right needle.
5. Hold the left needle in your left hand and the right needle in your right hand. Be sure the yarn is coming from the needle in your right hand.
6. Begin working in the round by knitting the first stitch on the left needle as you usually would (again, making sure the yarn is coming from your right needle). Now you have joined the circle.
7. Continue knitting as your pattern directs until you reach your desired length, slipping the stitch marker from the left to the right needle as you begin each new round. Slide the stitches along the cable as you knit.
The easy part of knitting in the round is that you are knitting in a continuous circle, there is no turning back and forth, and there are no seams to sew at the end. Many people prefer knitting in the round over any other kind of knitting due to this continuity.
knitting in the round on double-pointed needles When you are knitting in the round on a number of stitches too small to fit comfortably around a circular needle, you must use double-pointed needles. Double-pointed needles come in different lengths. Certain lengths of needles are better suited for certain projects. Youll have to experiment to find a length that feels good to you.
Some projects call for double-pointed needles right away, on the cast-on row, and other projects transfer onto double-pointed needles as the stitches decrease in number. I will describe both types of situations. For this book, most often you will use four double-pointed needles, with the stitches being divided on three needles and the fourth needle being used to knit onto. Sometimes a pattern calls for five double-pointed needles to be used.
transferring stitches from circular needles to double-pointed needles Following are the steps for transferring from a circular needle to double-pointed needles when it becomes too tight.
1. With the left circular needle in your left hand, begin knitting onto the first double-pointed needle. Knit as many stitches onto the first needle as directed in the pattern. Switch to the second double-pointed needle, which is empty, and begin knitting the required number of stitches onto this needle, being sure to pull the yarn snugly when transferring to this new needle. Do the same for the third needle. The three double-pointed needles form a triangle with the first and last stitches meeting at the beginning of the round.
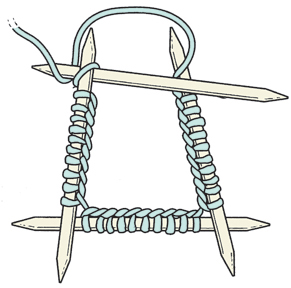
TIP Some patterns will tell you how many stitches to put on each needle. Others will tell you to divide the stitches evenly onto three or four needles.
2. Be sure to keep track of the beginning of your round by placing a detachable stitch marker on the first stitch.
Next pageFont size:
Interval:
Bookmark:
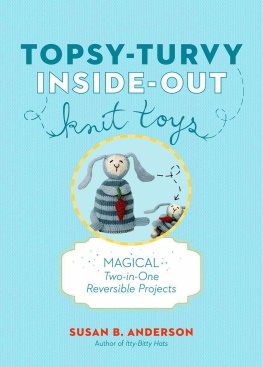
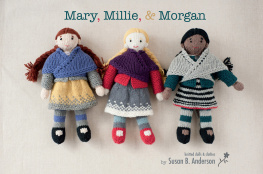
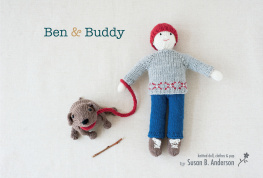
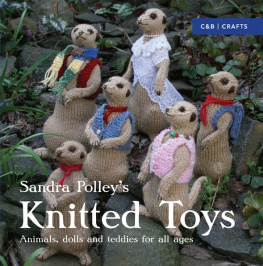
Similar books «itty-bitty TOYS»
Look at similar books to itty-bitty TOYS. We have selected literature similar in name and meaning in the hope of providing readers with more options to find new, interesting, not yet read works.
Discussion, reviews of the book itty-bitty TOYS and just readers' own opinions. Leave your comments, write what you think about the work, its meaning or the main characters. Specify what exactly you liked and what you didn't like, and why you think so.