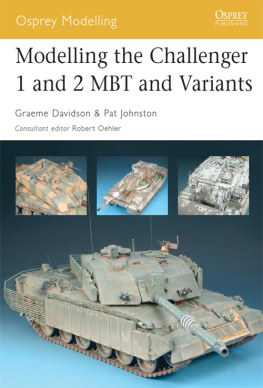
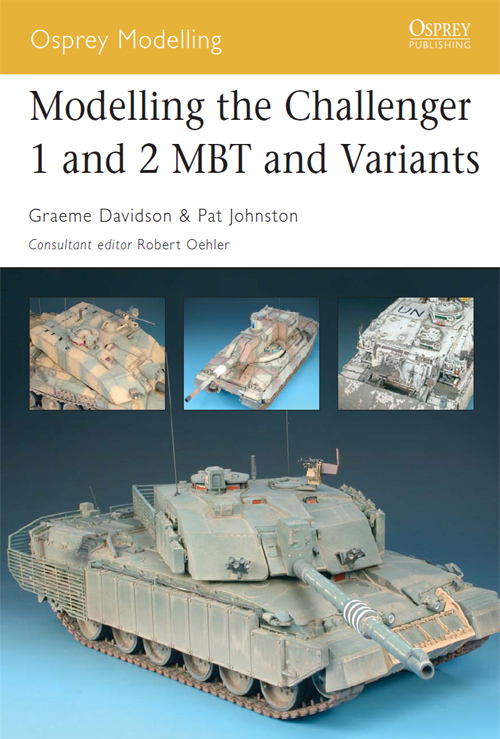
Osprey Modelling 29
Modelling the Challenger 1 and 2 MBT and Variants
Graeme Davidson & Pat Johnston
Consultant editor Robert Oehler Series editors Marcus Cowper and Nikolai Bogdanovic
Introduction
Introduced to the British Army in 1983, Challenger Main Battle Tanks have served operationally in the Balkans and both Gulf Wars, where their firepower, protection and shock action were instrumental to the success of British forces.
In addition to the familiar gun tanks, the Challenger family encompasses the Rhino Armoured Repair & Recovery Vehicle (ARRV), the highly modified Desert Challenger 2s operated by the Royal Army of Oman, and the radical Falcon 2 being developed by the Jordanian Army.
As the tank is well represented by major kit manufacturers in both 1/72 and 1/35 scales, this book covers a wide range of the Challenger family from Tamiya, Revell, Trumpeter and Accurate Armour, along with a helping of scratch-built and commercially available detail and marking sets.
I have tried to include as many different versions of the Challenger as possible in this book. As a result, there are seven chapters describing the construction and painting of these various tanks. I have attempted to prescribe a difficulty rating to each chapter, but that is very much a subjective assessment and, as the saying goes, your mileage may vary. More advanced builders may question why I did not add certain details or fix a particular error in a kit. The reason is that in some of the chapters, I have deliberately kept the builds to what I consider an intermediate level and these are marked with either one or two stars. However, even the four-star chapters should be within the skill set of an intermediate modeller; if you can scratch build a square box then you are 90 per cent of the way there already! Unfortunately, the five-star build for this book never came to be I had wanted to include a Trojan AEV but real life got in the way. In its place, I have substituted an extra two chapters on what I think are interesting variants the Falcon 2 used by Jordan and the newly up-armoured Challenger 2 with modifications to counter the close-combat threats in Iraq.
In order to allow enough space to adequately describe all seven chapters and still keep this book to 80 pages, I have had to find space in other areas. For that reason, there are no lists describing tools, museums and nomenclature. If Ive used a specific tool it is mentioned in the relevant chapter. In order to save room within the model chapters, I have tried to avoid repeating the explanation of a technique used. Most times, a specific technique is depicted once, and if it is used again, I will refer you to the chapter in which it is described.
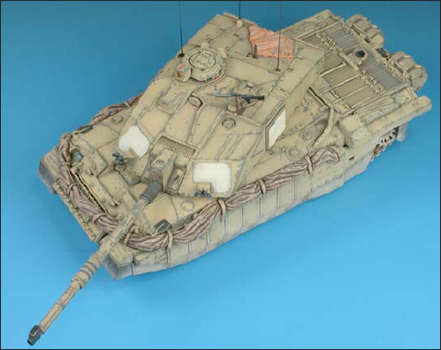
Challenger 1 Mk 3, Kings Royal Hussars, Op Agricola c .1999
Construction and photography by Graeme Davidson Finishing by Pat Johnston
| Degree of Difficulty: |  |
| Kits used: | Tamiya Challenger 1 Mk 3 (35154), Accurate Armour Challenger Combat Dozer (A032). |
| Additional detailing sets used: | Eduard photo-etch for Challenger 1 (35332), Scale Scenics mesh, Aber photo-etch Chains, Numbers, cheese cloth, .22g copper wire, .24g floral wire, various Evergreen styrene and Tichy bolt sets. |
| Markings: | Echelon Fine Details Challenger 1 Decals (T35002), kit decals. |
| Paints: | Tamiya XF-67 NATO Green, XF-62 Olive Drab, XF-69 NATO Black, XF-2 White, XF-3 Yellow, XF-7 Red and XF-57 Buff; Humbrol Matt 49, 75 and 33; Testors Chrome Silver; Winsor & Newton Raw Umber, Yellow Ochre, Lamp Black and White; Rembrandt Raw Umber pastel chalk. |
| References: | Osprey New Vanguard 23: Challenger MBT 198297, Janes Armour and Artillery 2003, Concord 7505 Challenger 1 & 2. |
Background
The Challenger 1 began its service in the British Army following the failure to deliver the Shir 2 that was originally designed for Iran prior to the overthrow of the Shah. Following that event, Royal Ordnance was tasked to build 243 Challenger 1s (FV 4030/3) for the British Army in spring of 1983, with the Royal Tank Regiment (RTR) receiving the first tanks later the following year. The Challenger has only gone through a few upgrades over its service life, with a Mk 3 Challenger being the final version that has been fitted with a Thermal Observation and Gunnery Sight (TOGS) (Mk 2) and a quick release for the rear-mounted fuel drums. In 1990, the Pearson Combat Dozer Blade (UDK1) was accepted for service and all Challengers were capable of mounting it. The dozer was used to dig hull-down fighting positions, clear obstacles and fill in anti-tank ditches. This chapter depicts a Challenger dozer tank of the KRH Regiment deployed to Kosovo as part of the NATO Operation Joint Guardian contingent in 1999. This would be the last operational deployment for the Challenger 1, as the following year the British Army would take delivery of the new Challenger 2.
Construction
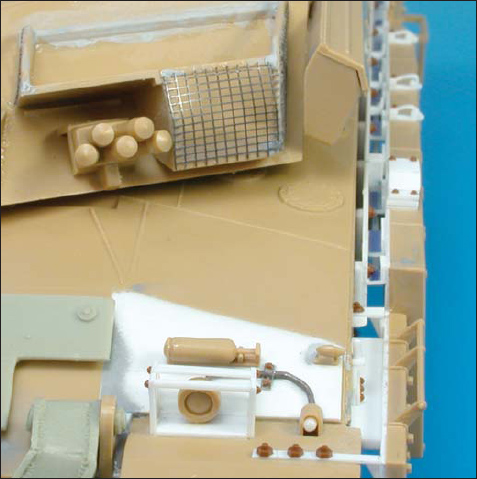
First introduced as a Challenger 1 Mk 2 kit (35134), Tamiya later released the kit following the 1991 Gulf War and included additional parts to build the up-armoured version with external long-range fuel tanks. Out of the box, it builds into a decent kit; however, there are three main areas that can be improved upon with a bit of scratch-building: the turret bin, the fuel-drum mounts and the side armour. While this conversion is primarily focused on these areas, I will also mention some of the extra detailing added to other parts of the kit.
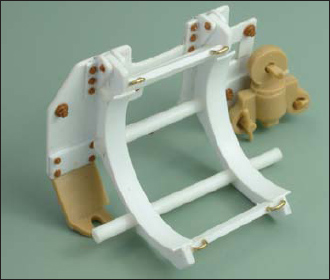
Holes were drilled into each cross bar for the brass wire tie-down brackets.
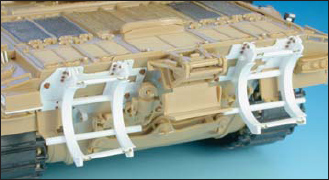
The kit external fuel-drum brackets were replaced by scratch-built items.
Side appliqu armour was spaced away from the hull. If only Tamiyas Challenger 2 had been released when I worked on this, I could have saved a lot of effort!
The first step was to rebuild the fuel-drum mounts, which consist of a pair of curved brackets cut from .020in. plastic strip mounted to a plate cut from .010in. plastic sheet. Instead of trying to cut the curve with an X-Acto, I outlined the shape on the plastic using a pencil and then removed the excess with a drum sander mounted in a Dremel tool. This method can quickly melt the plastic, so I hooked up a sewing machine pedal to my Dremel. This permits the machine to turn slower and not build sufficient heat to melt the styrene. My Dremel tool is a single-speed type; I have read that you should not attempt to hook up a speed controller to a Dremel with the five-speed selection as it can damage the motor.

