Table of Contents
Chainmail Made Easy
Learn to Chainmail in 24 Hours or Less!
by Jeff Baker
2014 Jeff Baker ALL RIGHTS RESERVED. No part of this document or related files may be reproduced or transmitted in any form whatsoever (electronic, photocopying, recording, or otherwise) without prior express written, dated and signed permission from the author. The information presented herein represents the view of the author as of the date of publication. The author reserves the right to alter and update his opinion based on the new conditions.
Preface
Welcome to Chainmail Made Easy: Learn to Chainmail in 24 Hours or Less! , the introductory volume in the Chainmail Made Easy series, where youre about to pick up the ancient art of chainmailling in 24 hours or less! Yes, you really can learn the basics of how to chainmail within a day. Youll need a few simple tools that you may already have or will need to purchase at your local home improvement store along with some welding filler wire and youll soon be on your way.
This volume focuses on getting you up and chainmailing as fast as possible. Itll zero in on the absolute minimum youll need to start weaving within 24 hours as outlined below:
- The tools and materials youll need
- Wrapping wire into coils with a coiling jig youll build
- Cutting rings from the coils you wound
- Weaving one of the most common and easiest weaves from detailed graphic instructions
- Practicing the weave learned with three different exercises
You should confidently be weaving chainmail pieces by the end of your first day following these simple and easy-to-follow instructions.
If, by the end of the day, youre thoroughly hooked and wish to learn more about chainmailling including the history of chain mailing, learning a dozen or so more weaves, a dozen real projects, tips and tricks, chainmail terms defined, and much more, youll find the next two volumes in this series listed in the section with links.
Happy Mailling!
Jeff Baker

Thank you for downloading my book. The boys above ask that you please REVIEW this book on Amazon. I need your feedback to make the next version better and to create additional volumes. Thank you very much!
Click to Review this Book .
"To be notified when future volumes are released, please click the link below to subscribe."
http://www.ChainmailMadeEasy.com/notify
HOURS 1-2: What Tools and Materials Do I Need?
The tools youll need will depend a lot upon what tools you already have. Below is a list of those youll need to get started along with the materials youll need to make your rings.
Important: Please read through the entire set of instructions before making any tool purchases. Some tools might not be needed based on which options you choose during the ring coiling and making processes OR you may already own the tools required.
Feel free to make appropriate substitutions if you already own a tool that can do the same job. As long as your tool will do whats needed in these instructions, youll be fine.
Tools (qty and item)
- 2 - 4 - 6 linesman pliers
- Linesman pliers are a heavy duty, wide nosed pliers with teeth. They provide an excellent grip on rings but can scratch them because of their teeth. They are perfect for beginners just learning because of their grip.
- A 4 to 6 pair of pliers is ideal to work with rings in the size youll be making, 1/4 diameter. Larger pliers can be used but they become bulky when working with rings of this size.

- Below is a comparison of 6 linesman pliers to 4 giving you an indication of the size difference.

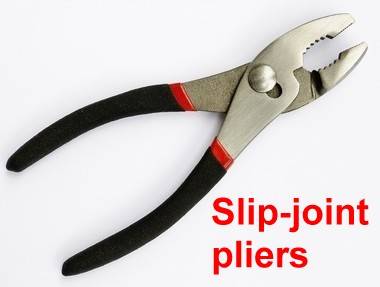
- If you cant find linesman in the recommended sizes then you can use two pairs of Slip-joint pliers in a similar size. Slip-joint pliers adjust to two jaw opening sizes, one smaller and one larger. Use the smallest opening setting. Keep in mind you run into the possibility of the pliers slipping into the larger size while using.
- 1 - 6 - 8 diagonal cutters OR 6-8 bolt cutters
- Diagonal cutters - A curved blade pliers-like tool. The bladed ends come to a point and are perfect for snipping wire. One side is mostly flat showing the cutting edges while the other is concave.
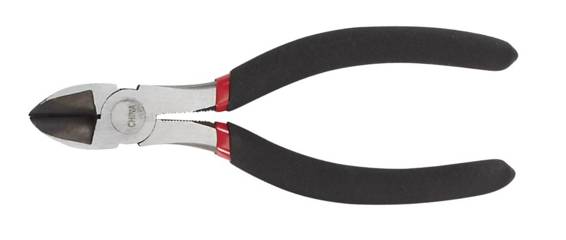
- Bolt cutters - A tool used for cutting chains, padlocks, bolts or wire. The blades on both sides are straight, coming to a point.

- Whether diagonal or bolt cutters, its important to use the larger size, 6 to 8 inch, in order to give you the proper leverage to cut 16 gauge (1/16-.063) rings off a coil. With smaller cutters its very hard on your hands to try to cut each ring off.
- Variable speed, reversible electric drill
- A variable speed, reversible electric drill is needed to coil wire on the mandrel. The variable speed is very important because youll need to control how fast the mandrel spins.
- A single speed is too fast for the control youll need. Reversing will come in when youve coiled the whole mandrel and need to release tension before cutting the coil off it.
- 1/16 drill bit (IF using the Hole Method on the mandrel)
- Used to drill a hole through the side of the mandrel (a 1/4 metal rod). Its recommended that you use one of the following types of drill bits designed for drilling into metal.
- They are in order from cheapest to most expensive and least effective to most effective:


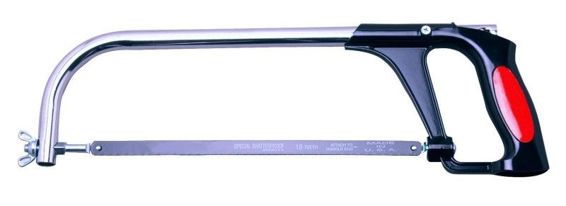
- Hack saw (to cut the metal mandrel and for the Slot Method on the mandrel)
- The metal rod youll purchase to make your mandrel usually comes in lengths starting at 3 feet. Youll only need 18 so youll need to cut that length from the main rod. A hack saw is a great tool to cut through soft metal.
- 400 or greater grit metal sand paper
- This will be used to lightly sand the finished mandrel to allow the wire to grip better while winding.

