Contents
Guide
Weaving with Rings & Scale Maille
Karen Karon

CONTENTS
Introduction
This book is written for those who are interested in making chain maille jewelry, are familiar with most of the classic weaves, and are looking for new weaves that will help them to expand their chain maille design palettes and perfect their skills with more challenging linkage patterns. If youve never tried chain maille before or are still a chain maille beginner, this book is NOT for you. Also, because this book is written from a jewelry-making perspective, if youre looking for tips on chain maille armor construction, this book is NOT for you.
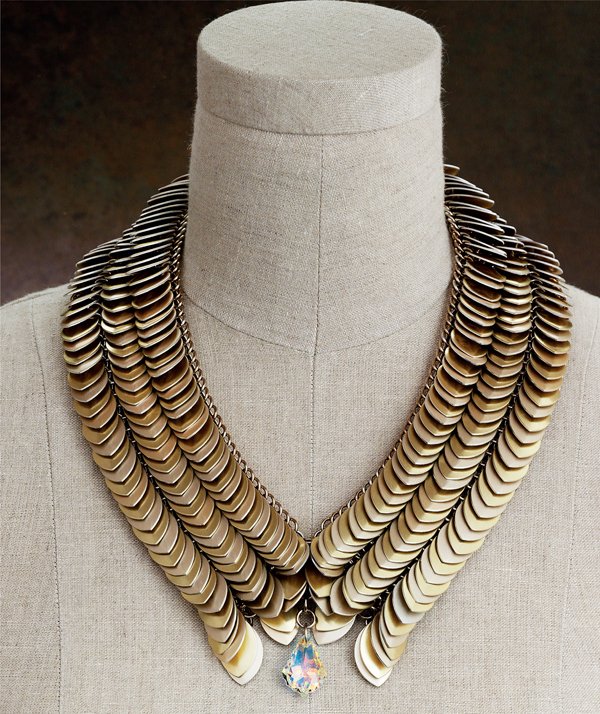
For those who want to design with alternative materials, the chapter on weaving with scales, a current hot trend in chain maille and fashion, is sure to please. The weaves included in the book are mostly modern weaves inspired by the classics and created by some very talented members of the chain maille community. I have explored and experimented with these weaves, designing some cool jewelry and accessories along the way. This exploration has enabled me not only to write instructions for completing these weaves, but also to help you master each one. As well, I share some of the essentials Ive learned, including jump ring sizing options, helpful hints, tips, tricks, shortcuts, and pitfalls to avoid.
How to Use This Book
As in my first book, Chain Maille Jewelry Workshop, this advanced book takes a technique-based approach and shows multiple methods to accomplish a weave. Sprinkled throughout, there are lots of tips and suggestions for alternate designs. In addition, each weave chapter includes two projects that illustrate some of the techniques learned in that chapter. You can choose to jump into whatever chapter appeals to you. The material within each weave chapter is presented in order of complexity, allowing you to build skills naturally within each weave group.
The book features a review chapter that provides refreshers on the information from Chain Maille Jewelry Workshop that you will need to accomplish the weaves in this new book. All pertinent informationtogether with some new tips and tricksis conveniently contained in one volume. To complete your preparation, read the introductory and finishing chapters of the book first: they are full of tips and tricks that will help you complete the projects successfully. After youve warmed up with these three chapters, start at the beginning of whatever weave chapter interests you. Keep in mind that, although the weaves are presented in order of complexity, the sheet weave variations are more complex than the base weaves. For example, when working the Persian chapter, GSG is easiest, followed by Arkham, Crotalus, and then Viperscale. The sheet variations of GSG and Arkham are more complex than all of the base weaves, but they are placed in proximity to their base weaves for continuity. Before you complete a piece of jewelry, read the to determine how to finish your piece with various clasp attachments and findings.
As in Chain Maille Jewelry Workshop, each weave section contains a chart that includes suggested jump ring sizes in two gauges (16 and 18) and two metals (sterling silver and bright aluminum) for each weave. The suggested silver sizes are based on the jump rings from Urban Maille, my favorite precious metal jump ring source (no affiliation, just a happy customersee ).
Note that these size recommendations are based on the simplest form, a bracelet. If you wish to make an item that needs to flex differentlyfor example, a collar that requires flexibility on the edgesyou may need to make size adjustments to achieve suitable flex and fit.
The suggested counts for jump rings per inch for the sheet weaves are based on sheets that are sized as pictured. If you want to work wider (or thinner), you will need to estimate the number of jump rings you will require for your project. Also, these weaves tend to tighten a bit when widened: to make a wider weave, you may need to adjust the jump ring size to achieve the desired result.
Tools
For chain maille construction, two pairs of top-quality pliers are really all you need. Whether I work with large or small jump rings, I use full-size, smooth-jawed, flat-nose pliers. The straight, flat jaws cover more surface area on the jump rings than do pointed chain-nose pliers and provide a secure hold. All of my pliers have long handles, about 4" (10 cm). The longer handles provide more leverage and cause less hand fatigue.
Ive been using the same two pairs of pliers for the majority of my work for years. I use my Swanstrom flat-nose pliers in my right hand: its spring mechanism gives me a wide range of movement with my dominant hand. In my left hand, I use my Lindstrom RX flat-nose pliers; they are lightweight and the handles are extremely comfortable. The bio-spring attached to each handle limits the pliers range of movement, which is why I use this pair in my left, nondominant hand. Lindstrom and Swanstrom both make quality products. Many of my students also love their Wubbers pliers.
Lately, I have been making lots of micro-maille. Even though the jump rings are very small (2 mm range), I still prefer to work with full-size flat-nose pliers. Sometimes, it is difficult to fit the jaws of my go-to pliers into the tiny spaces in the micro-weave to grasp the jump rings firmly. The jaws are just a bit thick. I recently discovered Tronex short-jawed flat-nose pliers. They are full sized, with long handles, but the jaws are thinner (by just a fraction of a millimeter), allowing me easier access into the tiny spaces in micro-weaves. The Tronex pliers are also very well made, with very smooth jaws: therefore, no refining (see ) was necessary.

