Best of Stitch
Beautiful Bedrooms
from the editors of Stitch magazine
selected by Amber Eden

CONTENTS
Introduction
Of all the rooms in the home, the bedroom is one of the fastest and easiest to freshen up with fabric. A new pillow, quilt, or window covering is a cinch to stitch, a fabulous format for featuring favorite textiles, and a quick way to change the look of your boudoir. Once your bedroom is looking its best, whip up something for yourselfa pair of cozy slippers, a soothing eye mask, or a pretty nightgown, and your retreat will be complete.
Best of Stitch: Beautiful Bedrooms features fifteen of our favorite projects for the bedroom, as well as five completely new designs. With styles ranging from romantic to global chic to vintage-inspired to sleek contemporary, youre sure to find several projects to fit your personal style and dcor. Theyre the stuff of sweet sewing dreams.
No matter how much or how little time you have, or your sewing skill level, youll find the perfect project. Try your hand at new techniques, including patchwork, appliqu, felting, and trapunto. Informative sidebars throughout the book will give you all the skills you need to complete the projects, such as piecing, making piping, installing invisible zippers, and sewing with silk. Brush up on your sewing fundamentals and terminology with the Sewing Basics section. Youll also find all the full-size pattern pieces and templates on the pattern pages at the back of the book.
Happy sewing and sweet dreams,
Amber Eden
Editor, Stitch magazine
Perfect Pillows
Toss a few throw pillows on a bed, settee, or chair to change the look of your bedroom with minimal time and expense. Choose from the sunny to add the perfect finishing touch to your retreat. Once you try your hand at one of these sleeping beauties, youll be surprised at how quickly you can transform a room.
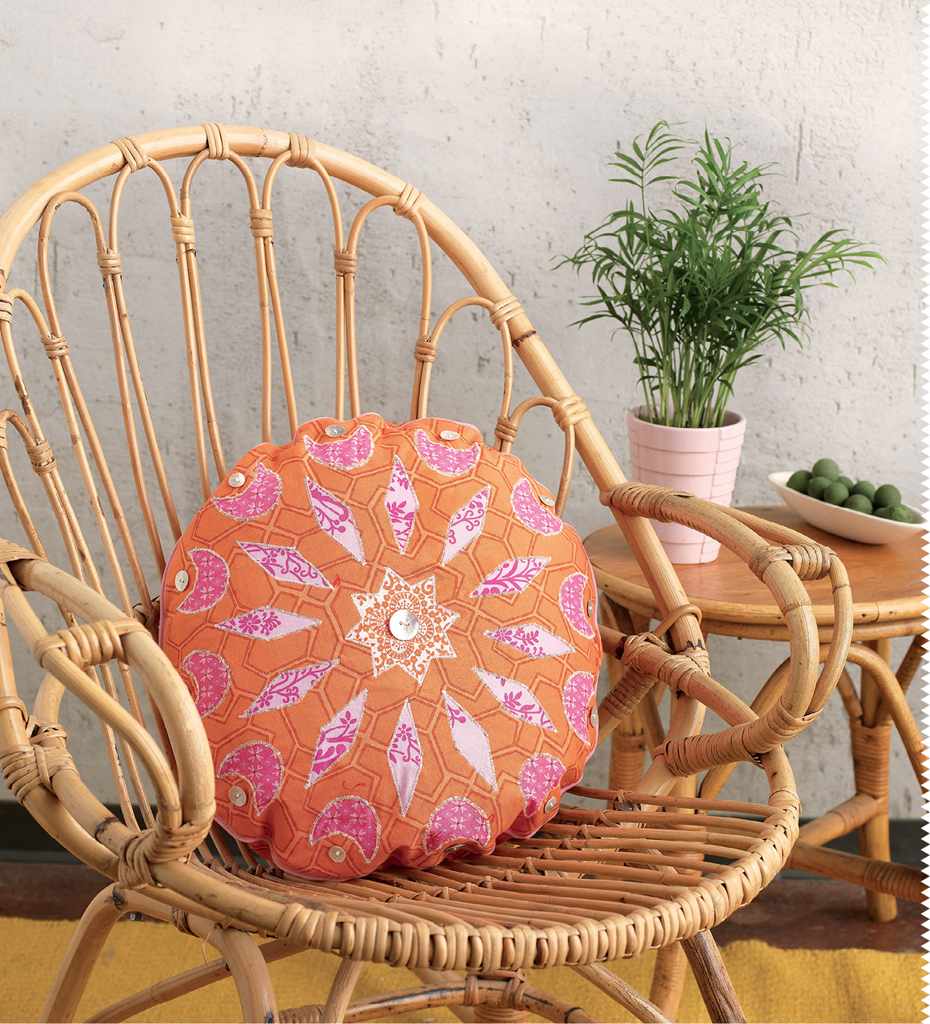
Boho Pillow
Inspired by Moroccan designs, this bright and colorful throw pillow uses reverse appliqu and layers of your favorite prints to bring a vibrant pop to your bedding or side chair. Add decorative shell buttons for an elegant accent. by Rebeka Lambert
Fabric
12 yd (46 cm) of 45" (114.5 cm) wide woven fabric for pillow (Main; shown: orange print)
12 yd (46 cm) of 45" (114.5 cm) wide woven fabric or 1 fat quarter for crescent shapes (Contrast A; shown: dark pink print)
38 yd (34.5 cm) of 45" (114.5 cm) wide woven fabric or 1 fat quarter for diamond shapes (Contrast B; shown: light pink print)
5" (12.5 cm) square scrap of woven fabric for center star (Contrast C; shown: orange-and-white print)
Other Supplies
13 buttons for embellishment (one of these should be larger than the others; shown: one 78" (23 mm) and twelve 58" (15 mm) shell buttons)
1 package of premade piping (or 112 yd [1.4 m] of piping of choice [shown: pink])
16" (40.5 cm) round pillow form
Freezer paper (optional)
Spray starch (optional; see )
Glue stick (or spray fabric adhesive of choice)
Fabric marker or pencil
Zipper foot for sewing machine
Craft or patternmaking paper
Templates (download here)
Finished Size
16" (40.5 cm) round pillow.
Notes
- All seam allowances are 12" (1.3 cm) unless otherwise noted.
- An ordinary glue stick was used on the sample to keep fabric layers in place, but any fabric adhesive can be used. A regular glue stick was chosen over fusible adhesive to provide a temporary solution without stiffness.
- Starching and ironing the pillow front before sewing all the layers together will keep puckering to a minimum.
Cut the Fabric
- Trace the Circle templates onto craft or patternmaking paper and cut out. Trace the 2 Stencil templates onto craft paper or freezer paper. Cut along the outer edges of the stencils; cut out the interior shapes as well if using craft paper.
- Using the provided templates, cut a 17" (43 cm) circle from the Main fabric for the pillow front, positioning the template close to one selvedge and reserving the remaining fabric for the pillow back. Cut a 1512" (39.5 cm) circle from Contrast A, a 12" (30.5 cm) circle from Contrast B, and a 4" (10 cm) circle from Contrast C.
Create the Design
- Using a fabric marker or a pencil, trace the stencil with 3 rows of shapes onto the wrong side of the pillow front. Carefully cut out all the interior shapes using a small sharp pair of scissors. Cut along the lines and take care not to cut the fabric outside the crescent, diamond, and star shapes. Note: If using freezer paper for the stencils, iron the freezer paper to the fabric wrong side and cut the interior shapes from the paper and fabric at the same time. Remove the freezer paper before continuing.
- Use the scalloped stencil to cut a scalloped ring from the 1512" (39.5 cm) Contrast A circle.
- Layer the pieces right side up as follows: 12" (30.5 cm) Contrast B circle, the scalloped ring (Contrast A), and the 4" (10 cm) Contrast C circle. The scalloped inner edge of the Contrast A circle will overlap the Contrast B circle slightly, and the Contrast C circle should be centered on Contrast B. Use the glue stick to hold the layers in place. Place the Main fabric pillow front right side up on top of the layered circles. Adjust the Main circle so that Contrast A shows through the crescent openings; Contrast B, through the diamonds; and Contrast C, through the center star. Adhere and pin everything in place.
- Set the machine for a satin zigzag stitch, 2.53 mm wide and 0.30.4 mm long. Test the stitch on fabric scraps; it should cover the fabric completely, without bunching. Using contrasting thread, sew around all the cutouts on the pillow front. Position the stitch so the needle swings over the cut edge of the Main fabric, covering the raw edges.
- Sew the larger button to the center of the Contrast C star. Sew one of the smaller buttons centered between the horns of each crescent, with the edge of the button a scant 14" (5 mm) from the appliqu edge.

