 Publisher: Amy Barrett-Daffin Creative Director: Gailen Runge Acquisitions Editor: Roxane Cerda Managing Editor: Liz Aneloski Editors: Liz Aneloski, Kristyne Czepuryk, and Karla Menaugh Technical Editor: Debbie Rodgers Cover/Book Designer: April Mostek Production Coordinators: Tim Manibusan and Zinnia Heinzmann Production Editor: Jennifer Warren Photography Assistant: Gabriel Martinez Models: Elisa Herberg and Yen Nguyen Cover photography by Ivo Coia Instructional photography by Laura Coia; lifestyle and subjects photography by Lauren Herberg of C&T Publishing, Inc. Published by C&T Publishing, Inc., P.O. Box 1456, Lafayette, CA 94549
  Dedication A very special thank you to all of my wonderful YouTube friends. Your heartfelt comments, love, and support keep me going. I get up every morning excited and inspired to find new ideas and projects that I can share with you, which in turn also makes me very happy.
  Acknowledgments I do not think there is enough paper space for me to acknowledge everyone who deserves acknowledgment.
  Acknowledgments I do not think there is enough paper space for me to acknowledge everyone who deserves acknowledgment.
So many of my YouTube family and friends have been constantly encouraging me to write this book on patternless sewingso thank you for that. Thank you, C&T Publishing, for all your help. You have been absolutely amazing to work with. I truly mean that. To my mother, who taught me to sew and create by remaking, reusing, and recreating. She showed me by example that it is a greater gift to give than to receive.
For that, I will always be thankful. Many thanks to my children, which include my daughter-in-law, sons-in-law, and my grandchildren; they inspire me. They believe that I can make anything. They never laugh at the crazy things that I want to make, and oftentimes, they help me think of crazy things to make! My extended family and friends, who let me babble on with excitement about new and fun projects: I do not know how you put up with me sometimes! Thank you for all your love and support. However, my biggest thank you goes to my husband, Ivo. You have been my rock, my timekeeper, time-saver, pusher, and puller of all things that I need.
It was 52 years ago that we met, and I would never take back a single moment. You make me believe, let me fly, and help me reach goals that sometimes I didnt even know that I had. To say that I love you doesnt ever seem like enough, but I do. LLAC Introduction Patternless sewing is a fun way to sew and make wonderful projects. Start with simple shapes such as squares, rectangles, or circles. What size do these shapes have to be, you ask? Well, most times, that will be entirely up to you.
The beauty is that you can use any fabric you already have that is cut into these shapesor you can make these shapes from scratch. Basically, you are the designer of these projects. If you want to make a big project, then just start with big shapes. For smaller projects, use smaller shapes. This is an ideal time to use up any of your fabric that may otherwise end up in the scrap basket. In fact, better yet, you can make these projects from fabric currently in your scrap basket.
What a fantastic way to use up all of our beautiful fabrics! These projects can be made quickly and easily as well, even while you have other projects on the go. Before you know it, you will have made a nice selection of items that you can use yourself or give away as gifts. Its always great to have a selection of items readily availablevery handy for gift giving! You will be able to custom-make some projects to fit your own needs or preferences. For example, you can make a sewing machine cover to fit the exact size of your particular machine. With the step-by-step plans included in this book, not only will it be easy for you to make a cover for your sewing machine but also for your serger and anything else even covers for your coffee makers, blenders, or other small appliances. Regardless of your sewing skill, you will be able to make these fun projects.
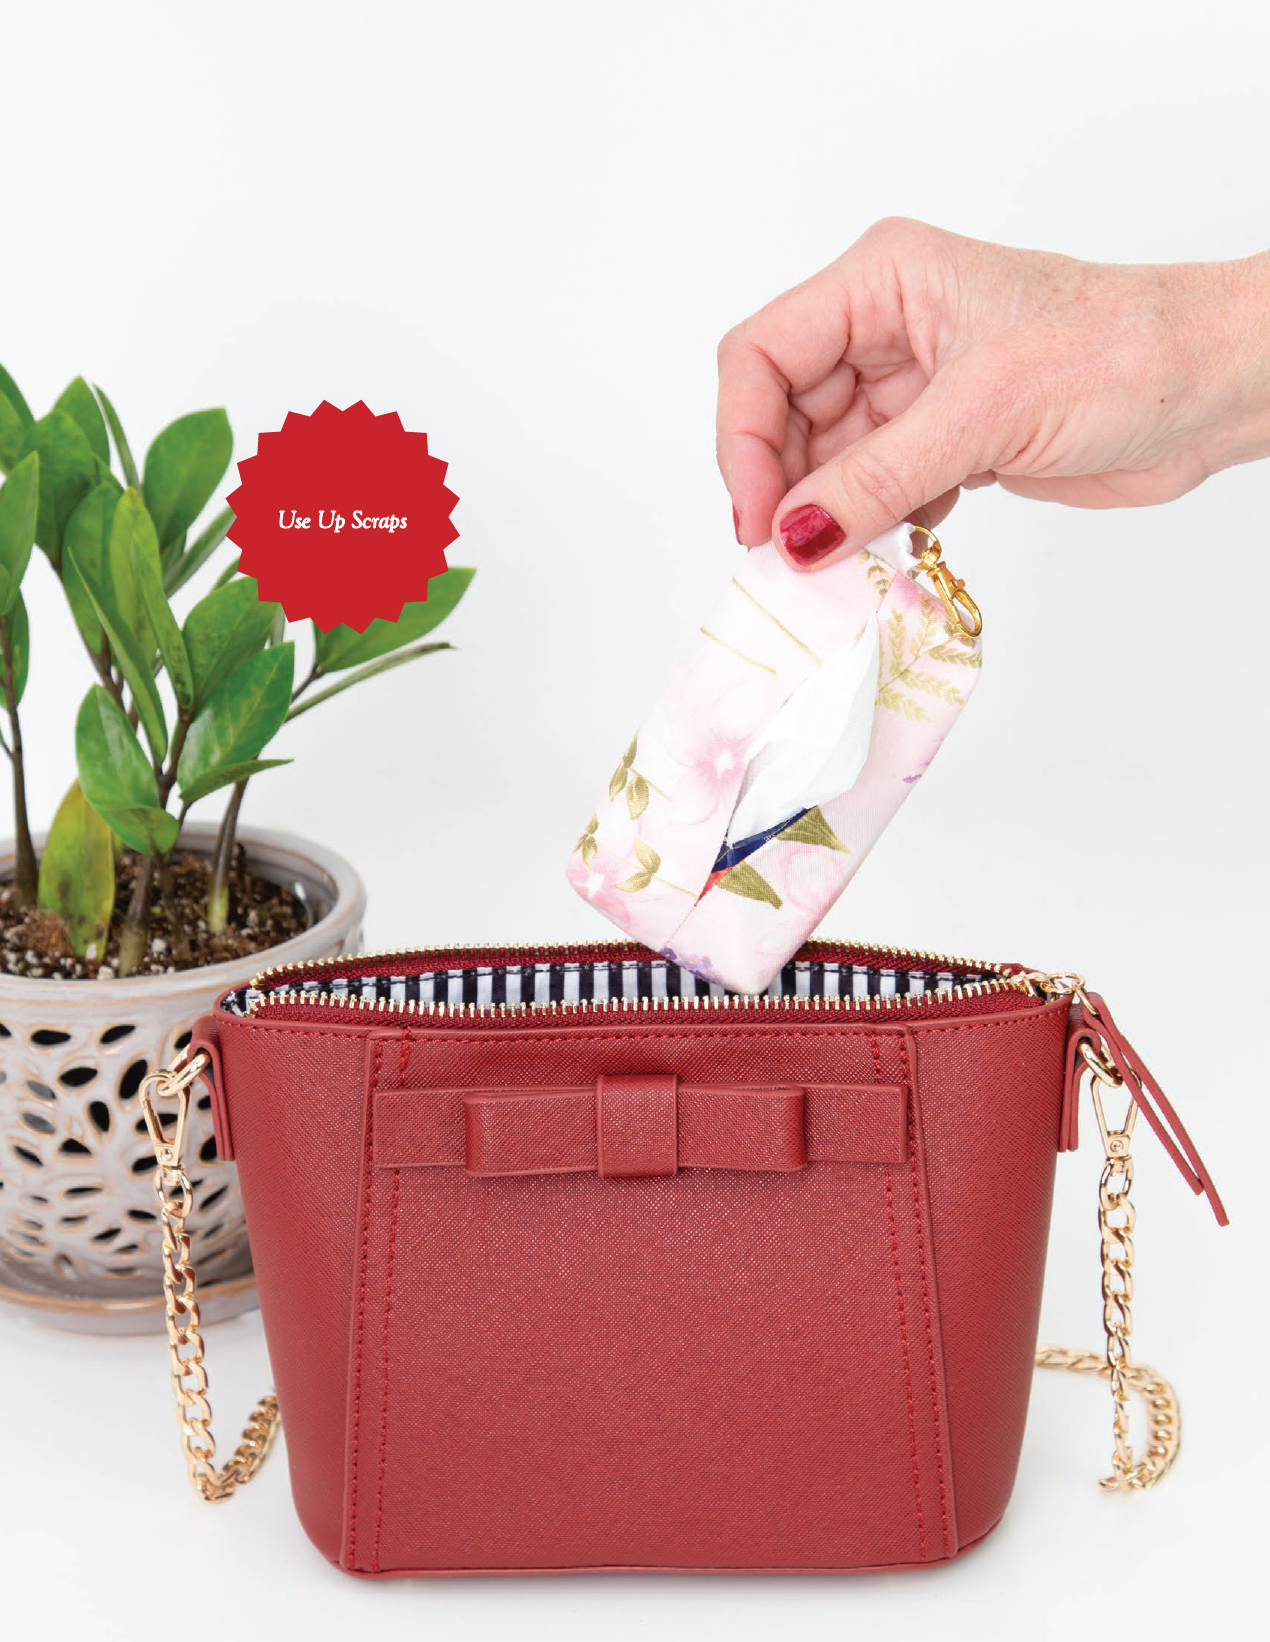
Whether they are tiny, small, large, or hugeyou will be able to make them all! At the end of the day, the most important thing is to make sure you have fun and to make every day a sewtacular day!  AccessoriesSmall Tissue Cover FINISHED SIZE: 3 wide 5 high deep This little travel tissue cover is so quick and fun to make. You can make it with or without a metal clasp. Once youve made one for yourself, youll want to make more for all your family and friends.
  Requirements Fabric: 1 rectangle 5 12 Fabric pen Stiletto -wide ribbon: 3 length (optional) clasp (optional) ConstructionAll seam allowances are unless otherwise noted. Fold the fabric right sides together to measure 5 6. Sew along the 5 edge, leaving a 1 opening in the middle. Backstitch at both ends of the opening.
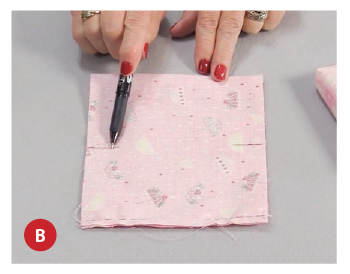
Finger-press the seam open. Fig.A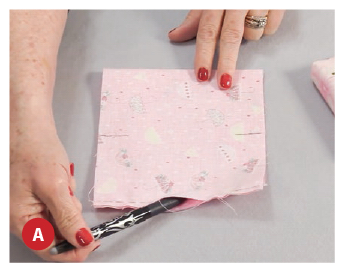 Locate the center of each 6 side between the fold and the seam. With a fabric pen, draw a 1 line perpendicular to the fabric edge. Stitch along each pen mark, backstitching at both ends of each seam. Fig.B
 Optional: To add a ribbon with a clasp, thread the ribbon through the clasp ring, fold the ribbon in half, and baste the ends of the ribbon together. Insert the ribbon/clasp inside the fabric close to the fold, placing the raw edges of the ribbon slightly above the edge of the fabric.
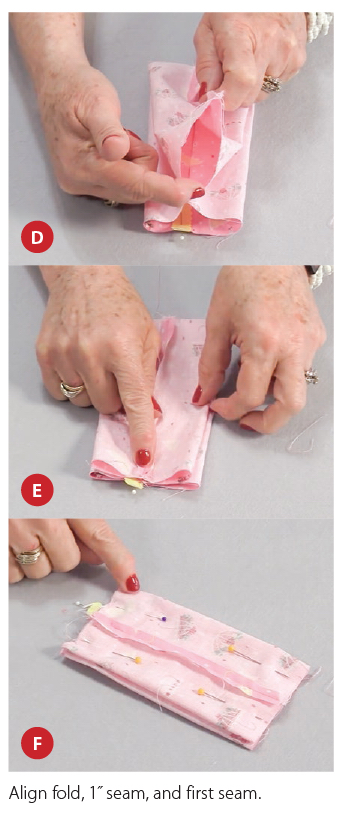
Pin in place. Fig.C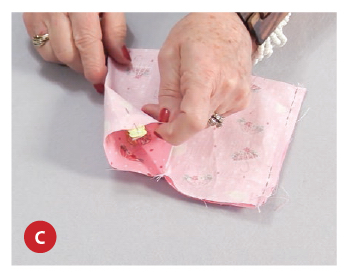 At each end, align the fold, the 1 seam, and the first seam, creating 2 folds on each side. Pin the layers together along both edges. Figs.DF
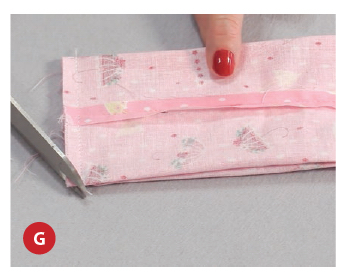
 Sew across both ends, starting and ending the seams with a backstitch. Backstitch to secure the ribbon. Fig.G
 Turn to place the fabric right side out, but with the ribbon still on the inside. Fig.G
 Turn to place the fabric right side out, but with the ribbon still on the inside.
There will be a 1 opening on the bottom (used for turning) and a 3 tissue slot on the top. Shape all 4 corners.
Next page


 Publisher: Amy Barrett-Daffin Creative Director: Gailen Runge Acquisitions Editor: Roxane Cerda Managing Editor: Liz Aneloski Editors: Liz Aneloski, Kristyne Czepuryk, and Karla Menaugh Technical Editor: Debbie Rodgers Cover/Book Designer: April Mostek Production Coordinators: Tim Manibusan and Zinnia Heinzmann Production Editor: Jennifer Warren Photography Assistant: Gabriel Martinez Models: Elisa Herberg and Yen Nguyen Cover photography by Ivo Coia Instructional photography by Laura Coia; lifestyle and subjects photography by Lauren Herberg of C&T Publishing, Inc. Published by C&T Publishing, Inc., P.O. Box 1456, Lafayette, CA 94549
  Dedication A very special thank you to all of my wonderful YouTube friends. Your heartfelt comments, love, and support keep me going. I get up every morning excited and inspired to find new ideas and projects that I can share with you, which in turn also makes me very happy.
  Acknowledgments I do not think there is enough paper space for me to acknowledge everyone who deserves acknowledgment.
  AccessoriesSmall Tissue Cover FINISHED SIZE: 3 wide 5 high deep This little travel tissue cover is so quick and fun to make. You can make it with or without a metal clasp. Once youve made one for yourself, youll want to make more for all your family and friends.
  Requirements Fabric: 1 rectangle 5 12 Fabric pen Stiletto -wide ribbon: 3 length (optional) clasp (optional) ConstructionAll seam allowances are unless otherwise noted. Fold the fabric right sides together to measure 5 6. Sew along the 5 edge, leaving a 1 opening in the middle. Backstitch at both ends of the opening.
 Locate the center of each 6 side between the fold and the seam. With a fabric pen, draw a 1 line perpendicular to the fabric edge. Stitch along each pen mark, backstitching at both ends of each seam. Fig.B
 Optional: To add a ribbon with a clasp, thread the ribbon through the clasp ring, fold the ribbon in half, and baste the ends of the ribbon together. Insert the ribbon/clasp inside the fabric close to the fold, placing the raw edges of the ribbon slightly above the edge of the fabric.
 At each end, align the fold, the 1 seam, and the first seam, creating 2 folds on each side. Pin the layers together along both edges. Figs.DF
 Sew across both ends, starting and ending the seams with a backstitch. Backstitch to secure the ribbon. Fig.G
 Turn to place the fabric right side out, but with the ribbon still on the inside. Fig.G