Laura Coia - Sew Very Easy Quilt Favorites: 12 Skill-Building Projects from Laura Coia
Here you can read online Laura Coia - Sew Very Easy Quilt Favorites: 12 Skill-Building Projects from Laura Coia full text of the book (entire story) in english for free. Download pdf and epub, get meaning, cover and reviews about this ebook. year: 2020, publisher: C&T Publishing, genre: Home and family. Description of the work, (preface) as well as reviews are available. Best literature library LitArk.com created for fans of good reading and offers a wide selection of genres:
Romance novel
Science fiction
Adventure
Detective
Science
History
Home and family
Prose
Art
Politics
Computer
Non-fiction
Religion
Business
Children
Humor
Choose a favorite category and find really read worthwhile books. Enjoy immersion in the world of imagination, feel the emotions of the characters or learn something new for yourself, make an fascinating discovery.

- Book:Sew Very Easy Quilt Favorites: 12 Skill-Building Projects from Laura Coia
- Author:
- Publisher:C&T Publishing
- Genre:
- Year:2020
- Rating:4 / 5
- Favourites:Add to favourites
- Your mark:
Sew Very Easy Quilt Favorites: 12 Skill-Building Projects from Laura Coia: summary, description and annotation
We offer to read an annotation, description, summary or preface (depends on what the author of the book "Sew Very Easy Quilt Favorites: 12 Skill-Building Projects from Laura Coia" wrote himself). If you haven't found the necessary information about the book — write in the comments, we will try to find it.
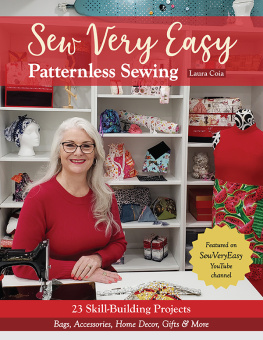
Her instructional videos have inspired thousands to start sewing. Now for the first time, sew-lebrity Laura Coia shares written patterns for the most loved video tutorials on her Sew Very Easy YouTube channel! Learn the basics of quilt making, from cutting and pressing to borders and finishing. Then practice your skills with a dozen beautiful projectsquilts youll come back to time and time againall suitable for beginners and beyond.
Laura Coia: author's other books
Who wrote Sew Very Easy Quilt Favorites: 12 Skill-Building Projects from Laura Coia? Find out the surname, the name of the author of the book and a list of all author's works by series.


Sew Very Easy Quilt Favorites: 12 Skill-Building Projects from Laura Coia — read online for free the complete book (whole text) full work
Below is the text of the book, divided by pages. System saving the place of the last page read, allows you to conveniently read the book "Sew Very Easy Quilt Favorites: 12 Skill-Building Projects from Laura Coia" online for free, without having to search again every time where you left off. Put a bookmark, and you can go to the page where you finished reading at any time.
Font size:
Interval:
Bookmark:
Publisher: Amy Barrett-Daffin
Creative Director: Gailen Runge
Acquisitions Editor: Roxane Cerda
Managing/Developmental Editor: Liz Aneloski
Technical Editors: Linda Johnson and Julie Waldman
Cover/Book Designer: April Mostek
Production Coordinator: Tim Manibusan
Production Editor: Jennifer Warren
Illustrator: Linda Johnson
Photo Assistant: Rachel Holmes
Cover photography by Ivo Coia
Quilt photography by Diane Pedersen
Published by C&T Publishing, Inc., P.O. Box 1456, Lafayette, CA 94549
Dedication
This book is dedicated to my YouTube family of subscribers and viewers. Together, we have shared many experiences, and I would like to give thanks for all the wonderful comments, feedback, and support.
Acknowledgments
I would like to thank my mother, Lorraine Manley, for raising me with good values, teaching me, and instilling in me the love of sewing. I still remember sewing in my closet as a child because we had no room in the housefun times and great memories!
Over the years, I have written many manuscripts; I always wanted to write a book but found a way to avoid doing so. Many thanks to my husband, Ivo Coia, for encouraging me and not allowing me to avoid doing so this time. He has always supported me, believed in me and my abilities, and been there since day one.
To my children: Corrado Coia, for his advice and inspiration to start a YouTube channel and begin my journey. Vincenzo Coia, for his overall support and his encouragement to actually hit the publish button on my very first YouTube video. Christina (Coia) Bouchard, for being there with support, advice, and great feedback and ideas. Thank you.
Many thanks to my friends and extended family, who have put up with my mind wandering over the many conversations we had, and for their support.
The staff at C&T Publishing have been amazing to work with and incredibly supportivethank you to all for such a great experience with my first book. A special thank-you to Linda Johnson for learning how to speak Laura and helping me put it all down into wordsI couldnt have done it without you!
Introduction
Quilting is a wonderful hobby. We quilters have so much to give us inspiration: beautiful fabrics, outstanding tools and notions, and great quilt shops and teachers, along with amazing quilts. Inspiration makes quilting so incredible; it allows us to express ourselves in our own personal way.
I started sewing as a young child and thus did not know the rules. This allowed me to be creative and follow my own inclinationsthere was no such thing as right or wrong. As such, my style and most of my tips and techniques were developed over time by a trial-and-error method.
It is important that we do not stress over the rules but rather enjoy our time in the sewing room and be happy with our creations. Quilting can be a relaxing and enjoyable hobby. It should only bring us joy. The more we quilt, the more we want to quilt!
This book contains patterns that I hope will be inspirational and, most of all, fun for you to make. The patterns are a reflection of the techniques I use to help make things sew very easy.
Be creative and use fabrics and colors that speak to you. It is the selection of fabric that will change the look and feel of a quilt. For example, a timeless pattern can be turned into a modern quilt and vice versa by virtue of fabric selection alone.
Regardless of your level of sewing expertise, you will find that the quilt projects in this book are not only easy to make but will also produce stunning results. I have really enjoyed making these patterns and quilts, and I hope that you will love making them, too.
Have a sewtacular day,
Laura
Beards and Beer
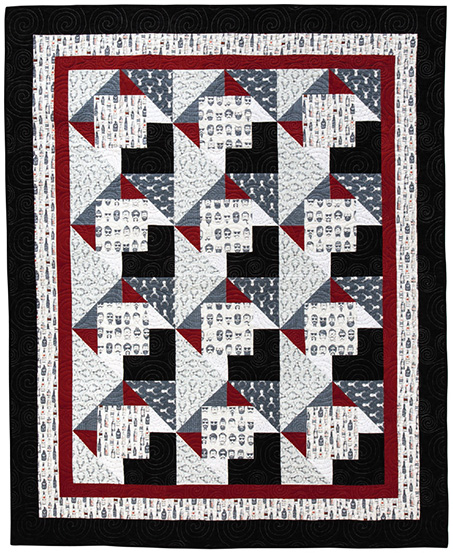
Designed by Laura A. Coia, quilted by Barb Baker
FINISHED QUILT: 63 78
FINISHED BLOCK: 15 15
What do you do when you love a certain special fabric but dont want to cut it up? Make a quilt that showcases the fabric you love, of course! The block for this quilt starts with a big 8 square surrounded by triangles on all sidesnot once around, but twiceto make an even larger 15 finished block. Echoing your favorites again in the border is another great way to enjoy them as a frame for the quilt. But if your favorites are directional prints, what then? In this case, consider the how-tos of border construction when using directional fabrics in order to get the look you want.
Materials
For more information regarding abbreviations, see Terminology.
First focus fabric (beards): yard for blocks
Second focus fabric (beer): 2 yards for blocks and second inner border
Charcoal: 1 yards for blocks and outer border
Dark gray print: yard for blocks
Dark gray script: yard for blocks
Light gray print: yard for blocks
Light dot: yard for blocks
Red accent: yard for blocks and first inner border
Binding: yard (Or use the extra backing fabric for the binding.)
Backing: 5 yards
Batting: 72 87
Lauras Tip
Before cutting fabric strips that will become triangles, starch the fabric and press until thoroughly dry. This will stiffen the fibers and any bias edges, reducing the chance of stretching.
Cutting
Whenever 5 squares are cut into triangles, keep half the triangles in one stack and half in another.
First focus fabric
Cut 2 strips 8 WOF; subcut 8 squares 8 8 for the center squares.
Second focus fabric
Cut in the order described.
Open up the fabric and fold the selvages in half.
Cut 2 strips 3 LOF (parallel to the selvage); shorten each to 3 70 for the sides of the second inner border.
Open up the fabric and refold the matching selvages along one edge.
Cut 3 strips 3 WOF for the top and bottom of the second inner border.
Cut 1 strip 8 WOF; subcut 4 squares 8 8 for the center squares.
Charcoal
Cut 2 strips 9 WOF; subcut 6 squares 9 9. Cut each once in half diagonally for 12 large triangles.
Cut 2 strips 5 WOF; subcut 12 squares 5 5. Cut each once in half diagonally for 24 small triangles.
Cut 7 strips 4 WOF for the outer border.
Dark gray print
Cut 2 strips 9 WOF; subcut 6 squares 9 9. Cut each once in half diagonally for 12 large triangles.
Dark gray script
Cut 2 strips 5 WOF; subcut 12 squares 5 5. Cut each once in half diagonally for 24 small triangles.
Light gray print
Cut 3 strips 9 WOF; subcut 12 squares 9 9. Cut each once in half diagonally for 24 large triangles.
Light dot
Cut 2 strips 5 WOF; subcut 12 squares 5 5. Cut each once in half diagonally for 24 small triangles.
Red accent
Cut 2 strips 5 WOF; subcut 12 squares 5 5. Cut each once in half diagonally for 24 small triangles.
Cut 6 strips 2 WOF for the first inner border.
Quilt Center Construction
All seam allowances are unless otherwise noted.
Blocks
Square-in-a-Square: Round One
Next pageFont size:
Interval:
Bookmark:
Similar books «Sew Very Easy Quilt Favorites: 12 Skill-Building Projects from Laura Coia»
Look at similar books to Sew Very Easy Quilt Favorites: 12 Skill-Building Projects from Laura Coia. We have selected literature similar in name and meaning in the hope of providing readers with more options to find new, interesting, not yet read works.
Discussion, reviews of the book Sew Very Easy Quilt Favorites: 12 Skill-Building Projects from Laura Coia and just readers' own opinions. Leave your comments, write what you think about the work, its meaning or the main characters. Specify what exactly you liked and what you didn't like, and why you think so.