Contents
Guide
A heartfelt thanks to Casie Vogel, Claire Chun, Shayna Keyles, Lily Chou, and the rest of the team at Ulysses Press for putting their faith in me to write another book, and then for making it better!
To two real American heroes, Dr. Andrew Taylor Still and Dr. William Garner Sutherland, for leaving a legacy of healing that I was fortunate to follow. And to the thousands of patients, and readers, who put their faith in my experience and knowledgethank you.
And of course, a special thanks to my family. My darling wife, Janice, a true partner in love and life, and a wonderful mother to our children: You make it all possible, and fun! To my sweet little Lexi: Thank you for sacrificing some daddy time so that I could write. I miss every moment Im not playing with you. And to littlest Madie, a ray of sunshine, heres to having another book of daddys in the house for you to chew on. Finally, to my Mom: Were so happy to have you, grandma, as our new neighbor.
Self-massage techniques can relieve, as well as prevent, muscle and joint pain. I often recommend my patients use a foam roller to release tension, restore elasticity in the muscles and tendons, and promote circulation. Its been demonstrated that massage can reduce soreness and stiffness, and though I advocate professional bodywork, foam rollers are an inexpensive and convenient way to massage the muscles regularly.
I recommend a 6 18 or 36 round foam roller (the longer one makes it easier to roll both legs at once), which you can find online and at retail sporting goods stores. Dont buy a cheap one; they can be too soft and wont last. Look for a hard plastic tube covered in an inch or two of foam. Mine has grooves and spikes, designed for a better massage.
To use a foam roller, lie on a mat or carpeted surface and position the roller against the muscle, as described in the following pages. Let your body weight supply the force. Since youll be using your arms on the floor for balance and support, you can also use them to control the amount of body weight and pressure being applied. Once in position, slowly roll back and forth over the muscle, moving the roller a few inches at a time. Spend a little more time on areas that are tender. Each muscle or area should take no longer than 30 seconds to complete. Roll along the muscles only, avoiding the joints.
Go slowly, and dont overdo it! Early on, while your muscles are still tight, some soreness afterwards is possible. That soreness is likely the result of the massage pressure breaking up restricted tissues and kicking up some inflammation in the process. Stop if it hurts, and try massaging that area again in a day or two, using less pressure. If you find that youre stopping a lot because of sore muscles, try using your foam roller on a bed to dial down the pressure even more.
I recommend using the foam roller regularly, and especially a few hours after your HIIT workout, to encourage circulation and reduce the post-workout soreness that sometimes occurs. A great time to foam-roll is while listening to music or watching TV.
Dr. Joseph Tieri is an osteopathic physician and a specialist in the holistic, hands-on healing practice, of osteopathic manipulation. He is part owner and partner of the Stone Ridge Healing Arts Center, and has been in private practice for more than 17 years.
Dr. Tieri is the author of End Everyday Pain for 50+: A 10-Minute-a-Day Program of Stretching, Strengthening, and Movement to Break the Grip of Pain, and has published articles and editorials on osteopathy and holistic healing in the regional press and in the Journal of the American Osteopathic Association. He is an adjunct professor at Touro College of Osteopathic Medicine and a clinical instructor, teaching the art of hands-on osteopathy to medical students and residents in his office.
For more information, please visit endeverydaypain.com.
2017 Alzheimers Disease Facts and Figures. YouTube video, 1:45. Posted by actionalz (Alzheimers Association) Mar 3, 2017. https://www.youtube.com/watch?time_continue=104&v=aLsVS0lrRD0.
Bartram, Sean. High-Intensity Interval Training for Women: Burn More Fat in Less Time with HIIT Workouts You Can Do Anywhere. New York: DK Publishing, 2015.
Bartman, Sean. Idiots Guide: High-Intensity Interval Training. New York: Alpha Books/Penguin Random House, 2015.
Driver, James. HIITHigh Intensity Interval Training Explained. Lexington, KY: James Driver, 2012.
Hall, Roger. Tabata Workout Handbook: Achieve Maximum Fitness with Over 100 High Intensity Interval Training Workout Plans. Hobart, NY: Hatherleigh Press, 2015.
Mayo Clinic Staff. Diabetes Complications. Mayo Clinic. July 31, 2014. Accessed August 15, 2017. http://www.mayoclinic.org/diseases-conditions/diabetes/basics/complications/con-20033091.
Metzl, Jordan D. Dr. Jordan Metzls Workout Prescription: 10, 20 & 30-Minute High-Intensity Interval Training Workouts For Every Fitness Level. New York: Rodale Wellness, 2016.
Mosley, Michael, and Peta Bee. Fast Exercise: The Simple Secret of High Intensity Training-Get Fitter, Stronger and Better Toned in Just a Few Minutes a Day. New York: Atria, 2013.
Reynolds, Gretchen. The Best Exercise for Aging Muscles. New York Times. Accessed August 15, 2017. https://www.nytimes.com/2017/03/23/well/move/the-best-exercise-for-aging-muscles.html.
Rooke, Kristin. 7 Interval Training Workouts to Burn Fat Fast. builtlean.com. Accessed August 15, 2017. Builtlean.com/2013/08/19/interval-training-workouts
Thapoung, Kenny. You May Be Calculating Your Target Heart Rate Wrong. Womens Health. Accessed August 15, 2017. http://www.womenshealthmag.com/fitness/target-heart-rate.
Yeager, Selene. The Womens Health Big Book of 15-Minute Workouts: A Leaner, Sexier, Healthier YouIn 15 Minutes a Day! New York: Rodale Inc., 2011.
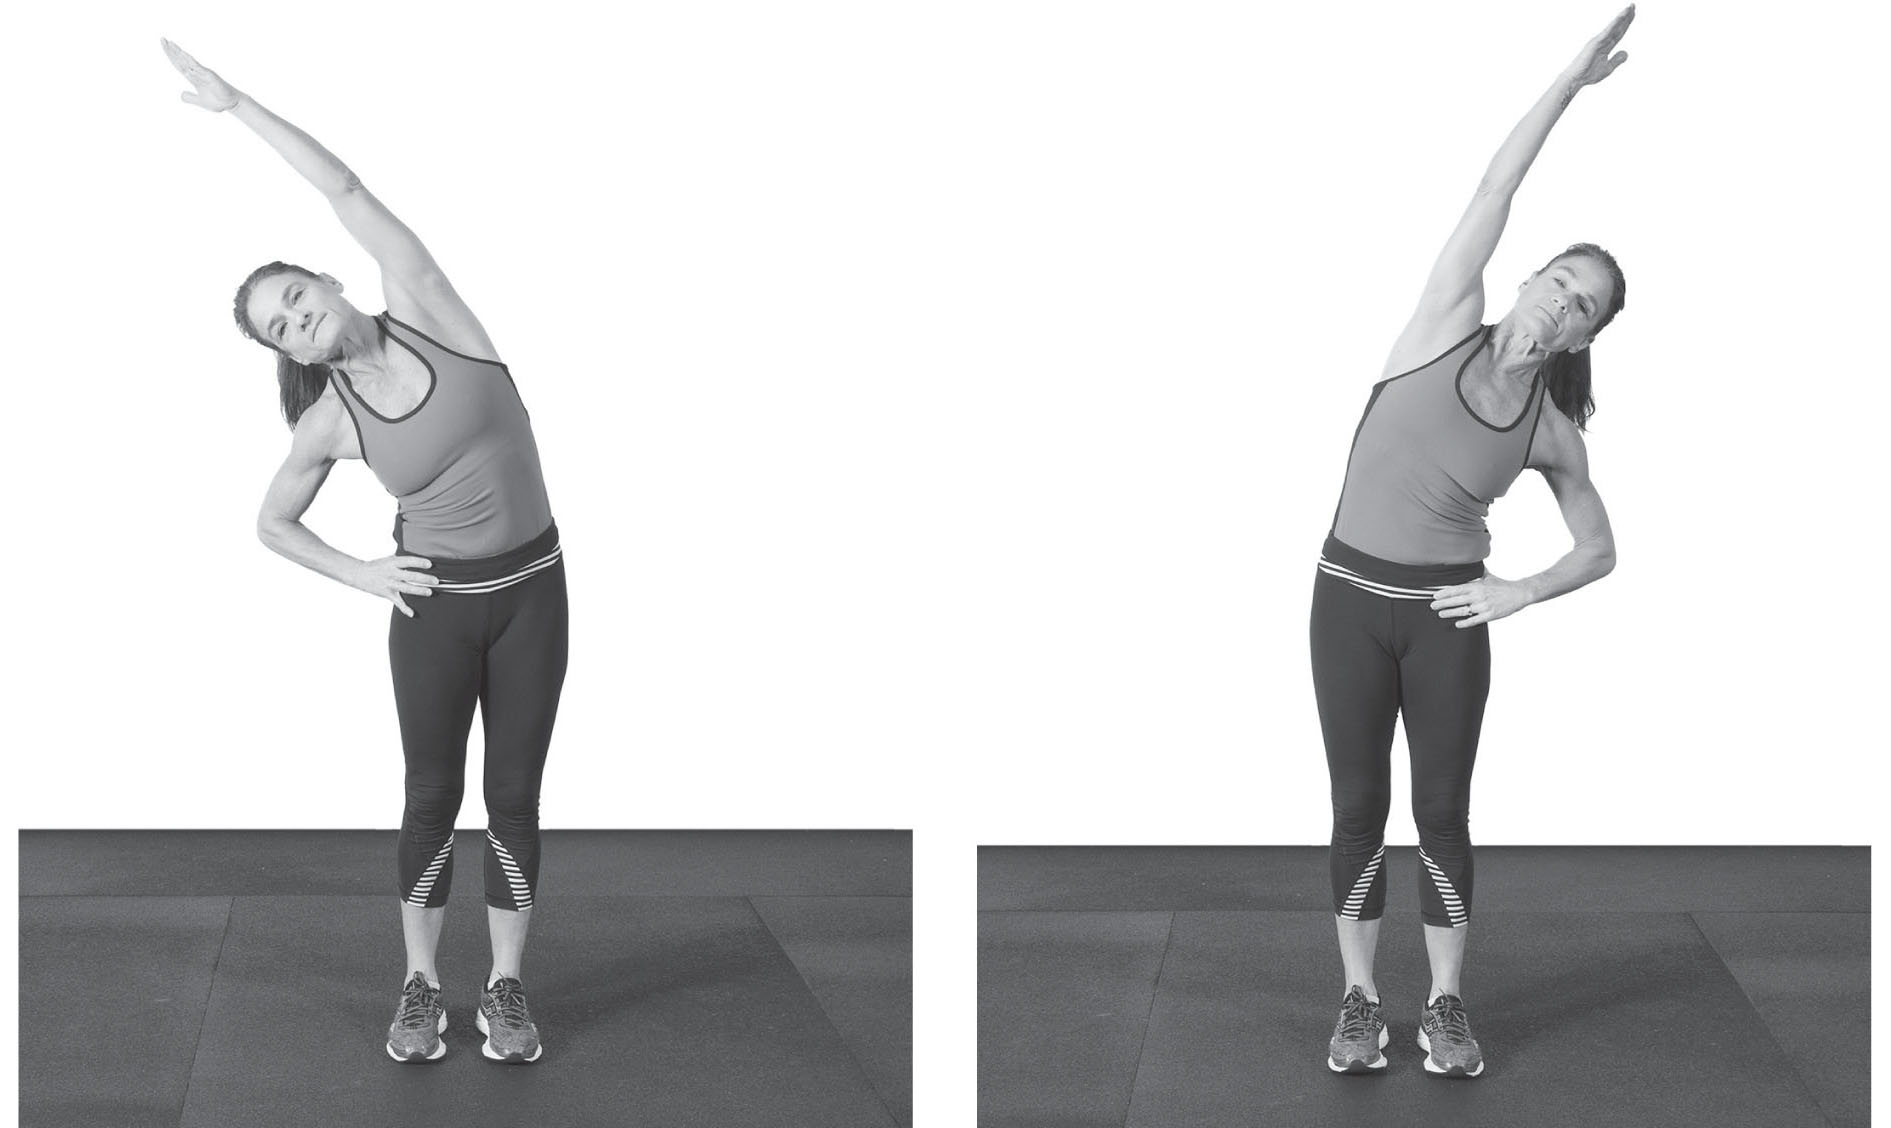
Stand with your feet shoulder-width apart. Raise your left arm straight over your head and place your right hand on your hip. Bend your trunk laterally to the right as far as it will comfortably go.
Return to the center, switch arm positions, and then bend laterally to the left.
Return to starting position.
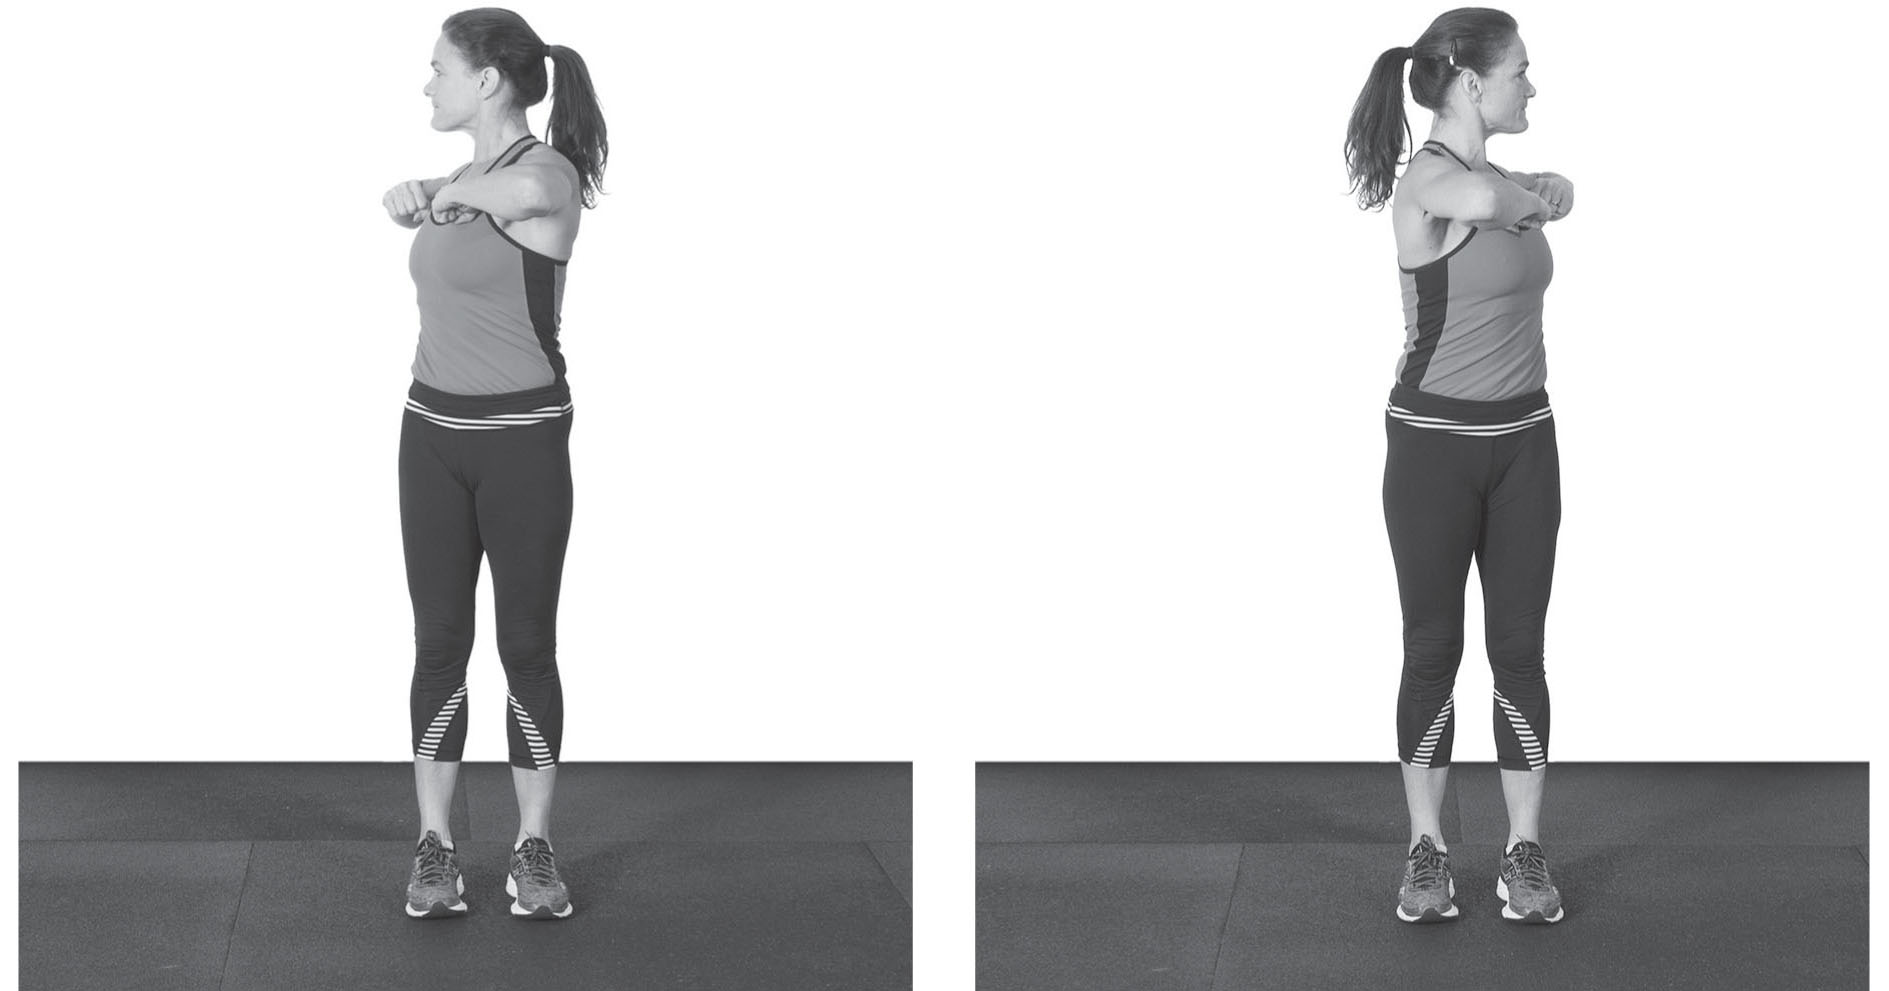
Stand with your feet shoulder-width apart, arms out to the sides and parallel to the ground, elbows fully bent, and fists touching your chest. Rotate your upper body and head to the right as far as you can comfortably go so that youre looking over your right shoulder.
In a smooth motion, move back to the center and continue rotating to the left.
Return to starting position.
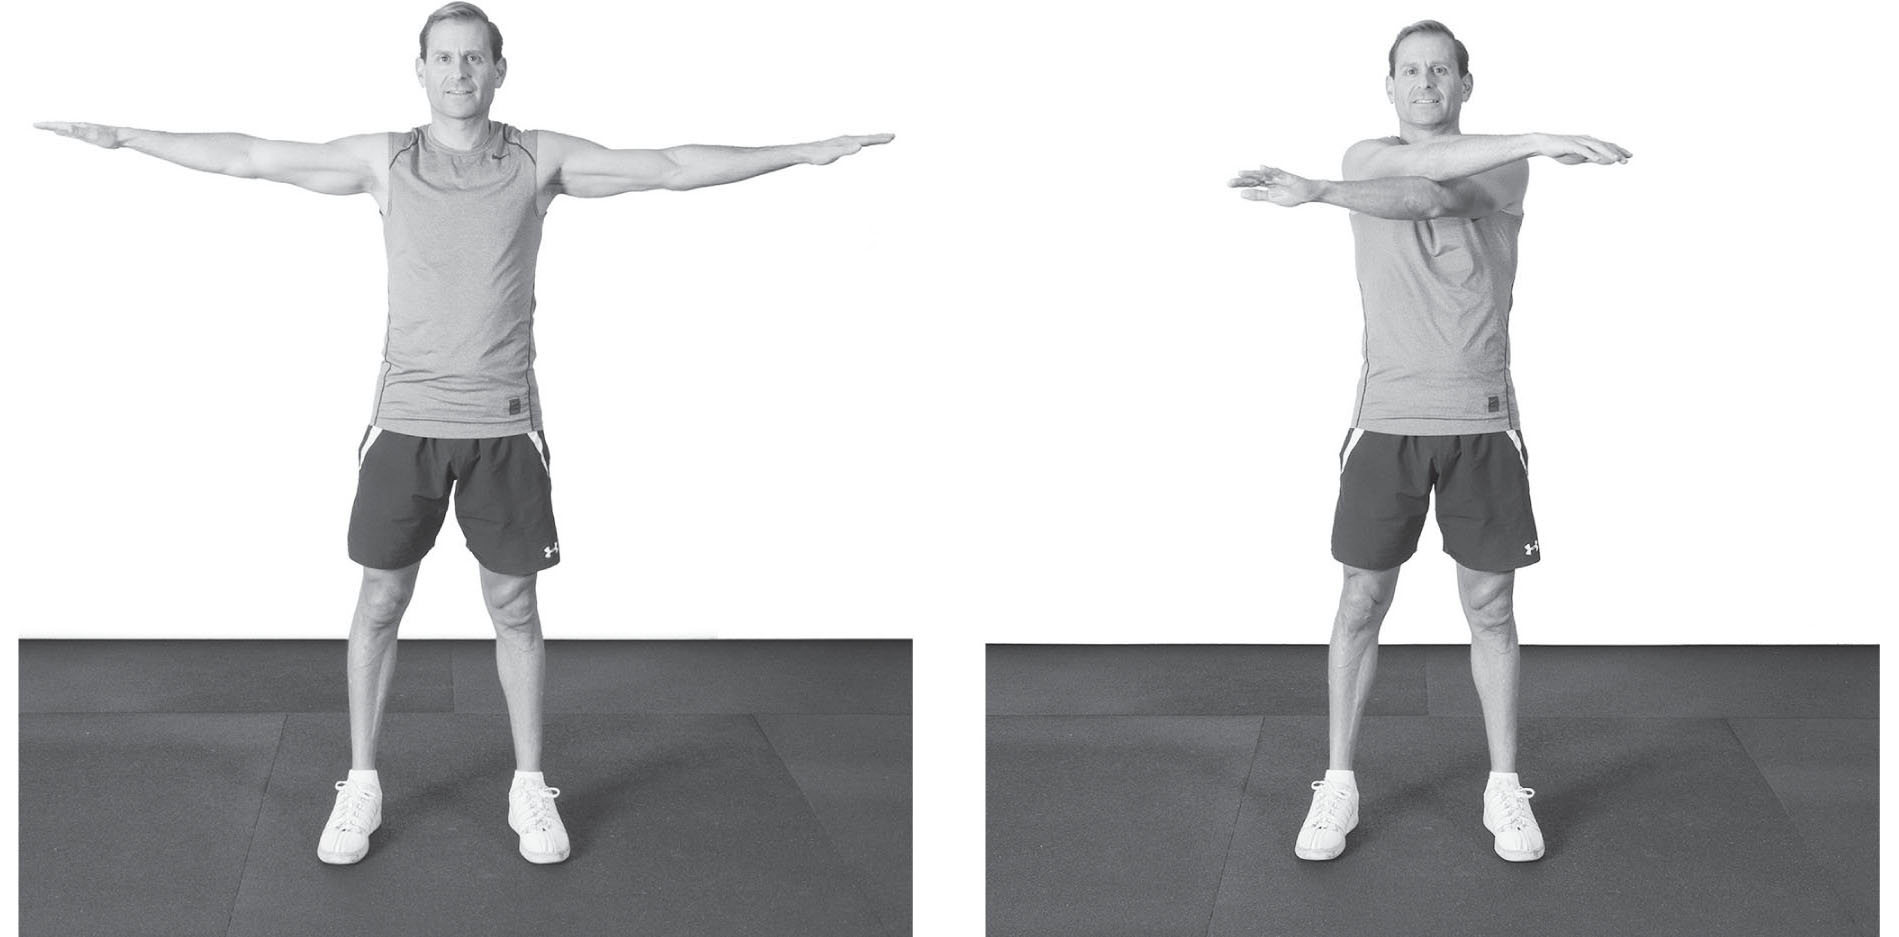
Stand with your feet shoulder-width apart and arms extended straight out to the sides, level with your shoulders.
Simultaneously move your straight arms toward the center, crossing them in the middle of your chest, and continuing toward the other side.
Move your arms back to the starting position and repeat, crossing the other arm on top.
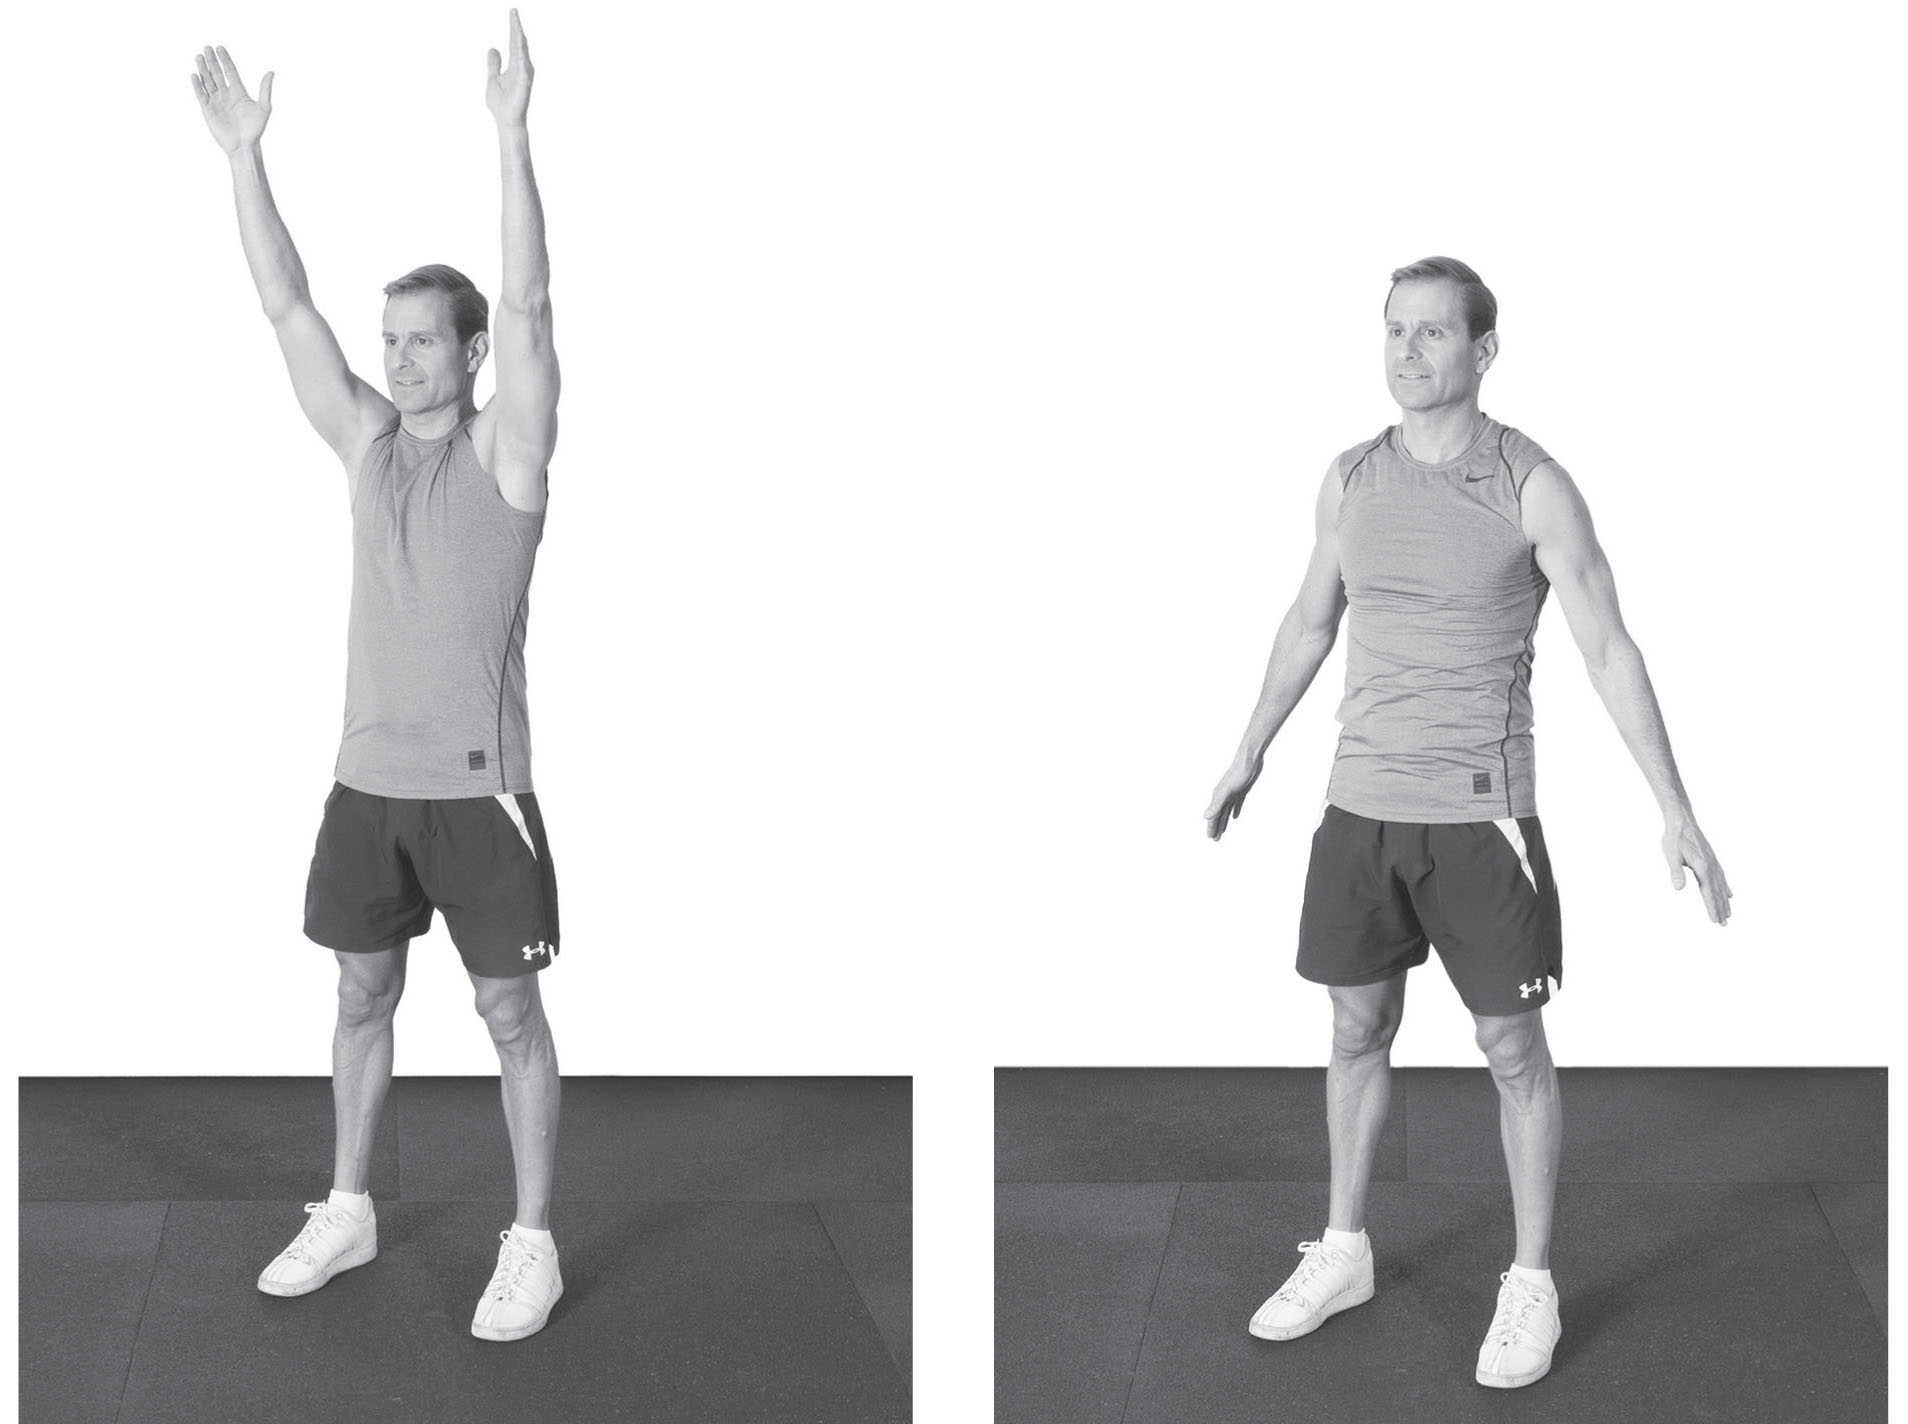
Sit or stand with good posture. Bring both arms straight up and, in a continuous motion, bring them backward, down, then forward, forming a circle.
Repeat in the other direction.
Next page

