How To Photograph Christmas Lights By Dan Eitreim How To Photograph Christmas Lights Copyright 2018 by Dan Eitreim All rights reserved. No part of this publication may be reproduced or transmitted in any form or by any means, mechanical or electronic, including photocopying and recording, or by any information storage and retrieval system, without permission in writing from the publisher. Requests for permission or further information should be addressed to: Author: Dan Eitreim 10650 7th Ave. Hesperia, California 92345 Published by: On Target Publishing Published in the United States of America Please read the full disclaimer at the end of this book.  Table of Contents Introduction Message From The Author
  Hello, Im Dan Eitreim and Ive been shooting photographs professionally for over 20 years. Before we get started, let me tell you a bit about me.
Getting stunning images is almost automatic for me now, but it wasnt always like that! I remember struggling to figure out what all the buttons and dials on my camera were for, and I remember the frustration at not being able to shoot the type of images I knew it was possible to produce. I think I own just about every photo technique book available and believe me, there is a lot of misinformation and downright useless information out there. Most photo books are written - not to really teach you anything new - but to show off the authors photographs! In this series of e-books, Ive tried my best to avoid that pitfall. While there are a lot of my own photos in here, there are also a lot of stock photos. The idea is to use the photos to demonstrate a point, not to show off my work. Simple system Ive developed a simple, systematic approach that ANYONE can easily master to start shooting better photos TODAY! Once youve completed this, the thirty-seventh training lesson in this step along your photo journey, How To Photograph Christmas Lights, dont lose your momentum! Head over to Amazon and get any of the previous lessons you may have missed! There is a listing of them at the end of the book.
Btw - If you havent yet gotten a copy of Volume 1 - 7 Secrets To Creating Stunning Photos!, its a freebie ! (but, its not listed with Amazon), check it out here:  http://www.OnTargetPhotoTraining.com Its time YOU put the WOW factor into your photos! **********
 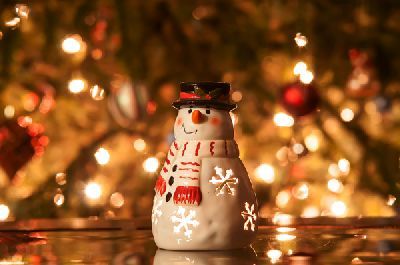 The Christmas Tree This is a booklet describing how YOU can get better photos of Christmas lights. Ive focused on the tree since that is the most common subject, but these concepts will work for most any lighting display.
 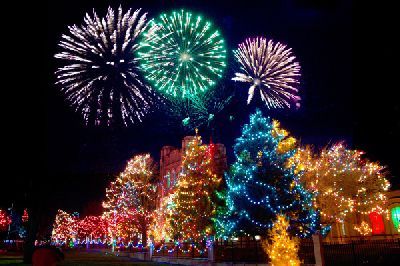 During the Christmas holiday season, everywhere you turn there are pretty lighting displays - ones worth capturing with our cameras. But how? Creating shots that show both the beauty of the tree AND the beauty of the lights is our challenge. The Problem The problem is that - while pretty - most of the Christmas lights we decorate our trees with are very dim. If we use a lot of external lights or a flash (on-camera or off) we will get a nice image of the tree, decorations, presents and etc.
But the flash will totally overwhelm the Christmas lights and we either cant see them at all, or (like in the below image) they are nothing but a dim glow that adds little or nothing to the photo. 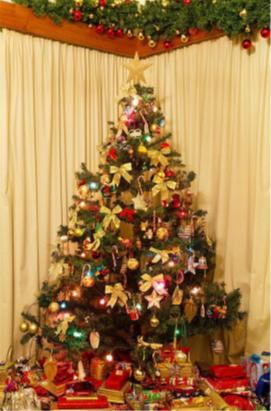 If we cut out the external lights and we DONT use a flash (now our main target is the lights on the tree) we get a nice festive image of the lights, but the tree and other decorations dont look as good as they should. The trees lights arent powerful enough to light the tree, presents and so on.
 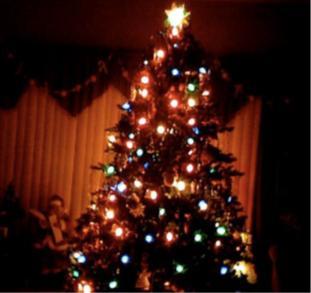 A middle of the road approach will give you results that are unsatisfactory at both extremes. What can we do? Here are a couple options for you... Combining Multiple Exposures To begin, if you have a camera that is capable of doing a double exposure you have it made! BTW - Most digital cameras DONT allow for a double exposure! Im told that a couple digital camera manufacturers have added the option, but it is rare.
If you have a digital camera that can do double exposures, do one exposure with the flash turned on, to get the tree, presents and so on. Then do the second exposure with the extraneous lights off and a long shutter to maximize the trees lights! Of course the camera must be mounted on a tripod and not moved between shots. If you have a digital camera that doesnt allow for a double exposure, there is a work-around. Take the two shots listed above and combine them in Photoshop. If you dont know how to do that, there is actually software out there designed for combining images. It was made for combining the various images in an HDR project.
This ISNT exactly an HDR photo, but the idea is the same. In case you didnt know, a HDR photo is made by combining anywhere from 3 to 7 or more shots all made at different exposures (from under-exposed through over-exposed). That way when you combine them, you can get shots that show detail in both the highlights AND the shadows. 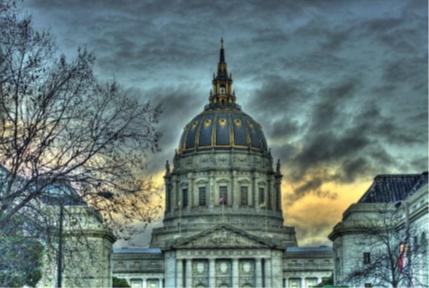
 But theres another easier - way to get better photos of Christmas tree lights! The Problem Solved This method requires a little bit of camera mastery and I highly recommend you take advantage of the next Christmas season to practice and learn how to do this! You WILL have to take the camera off automatic and actually employ a few advanced techniques.
  EVERY setting you use in EVERY photo has both advantages and drawbacks. It is the way you work your way through the various choices that will define your creativity and photographic style.
Oh, I should mention that this description makes it seem harder than it really is. Try it, youll like it. Here we go... Youll need a tripod To begin with, you must have a tripod. Dont even try to shoot Christmas lights without one. Dont believe me? Try it, youll end up with something like this 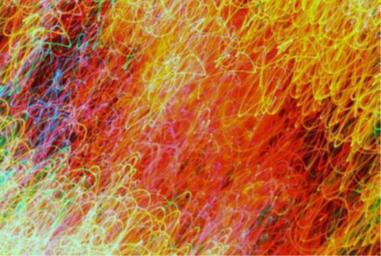 While a picture like this might be fun in an abstract sort of way, its not what we are after.
First: Turn off all the other lights in the room so that the trees lights are the only ones that are lit. We dont want any extraneous lights throwing off our exposure settings. Next, you need to determine the settings necessary to best record the trees lights (in your darkened room) without over or underexposing them. To establish our exposure (now that we are on manual rather than automatic), we will be concerned with three settings: ISO, Aperture and Shutter Speed. ISO Start with your ISO setting: A higher ISO needs less light to record an image, and in low light situations, we may be tempted to automatically increase it. Unfortunately, higher ISOs will introduce noise to our photos and they will be less color saturated.
Next page






 Table of Contents Introduction Message From The Author
  Hello, Im Dan Eitreim and Ive been shooting photographs professionally for over 20 years. Before we get started, let me tell you a bit about me.
 http://www.OnTargetPhotoTraining.com Its time YOU put the WOW factor into your photos! **********
  The Christmas Tree This is a booklet describing how YOU can get better photos of Christmas lights. Ive focused on the tree since that is the most common subject, but these concepts will work for most any lighting display.
  During the Christmas holiday season, everywhere you turn there are pretty lighting displays - ones worth capturing with our cameras. But how? Creating shots that show both the beauty of the tree AND the beauty of the lights is our challenge. The Problem The problem is that - while pretty - most of the Christmas lights we decorate our trees with are very dim. If we use a lot of external lights or a flash (on-camera or off) we will get a nice image of the tree, decorations, presents and etc.
 If we cut out the external lights and we DONT use a flash (now our main target is the lights on the tree) we get a nice festive image of the lights, but the tree and other decorations dont look as good as they should. The trees lights arent powerful enough to light the tree, presents and so on.
  A middle of the road approach will give you results that are unsatisfactory at both extremes. What can we do? Here are a couple options for you... Combining Multiple Exposures To begin, if you have a camera that is capable of doing a double exposure you have it made! BTW - Most digital cameras DONT allow for a double exposure! Im told that a couple digital camera manufacturers have added the option, but it is rare.
 But theres another easier - way to get better photos of Christmas tree lights! The Problem Solved This method requires a little bit of camera mastery and I highly recommend you take advantage of the next Christmas season to practice and learn how to do this! You WILL have to take the camera off automatic and actually employ a few advanced techniques.
  EVERY setting you use in EVERY photo has both advantages and drawbacks. It is the way you work your way through the various choices that will define your creativity and photographic style.
 While a picture like this might be fun in an abstract sort of way, its not what we are after.