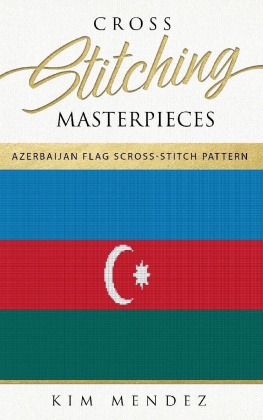
Cross Stitching Masterpieces
Azerbaijan Flag Cross-Stitch Pattern
Copyright 2019 by Kim Mendez
Visit the authors website at www.kimmendezbooks.com .
Table of Contents
Cross Stitch Guide
Cross stitching is a great skill to learn! Not only is it an enjoyable hobby, it also allows you to create many different types of patterns for every occasion or theme. In addition, cross stitching can be done anywhere. Take your project with you in the car, to the beach, or simply work on it at home watching television. The projects range from huge to small and any design you can think of, but the best part is that cross stitching starts with very basic skills. Use this guide, as well as the patterns, to get started on your first cross-stitching masterpiece.
Cross-Stitching Definition
Cross stitching is a process of embroidery which typically follows a pattern in the shape of an X, or cross-shaped stitches. Several different types of fabrics and threads can be used to complete a cross stitch project.
Cross-Stitching Needs
The beauty of cross stitching is not only in the final projects, but also in the simplicity of the supplies. Only a few simple supplies are needed to get started. Several cross-stitching kits are available; however, one can easily purchase the basic supplies individually. All you need to get started is the cross-stitch fabric (usually Aida cloth) , embroidery floss, tapestry needles, and of course scissors. The fabric and floss may vary based on the pattern you wish to follow. The needed size of the fabric as well as the type and color of the floss are indicated on the individual cross-stitch patterns.
One optional item when cross stitching is an embroidery hoop. An embroidery hoop is a metal, wood, or plastic ring that holds the project in one spot as you work. It is possible to complete a cross-stitch pattern without an embroidery hoop; however, the process may be harder to accomplish. If you purchase an embroidery hoop, consider the size of cross stitches you wish to do. Small hoops are comfortable, but they need to be adjusted as you work around the pattern. This means you will be moving the hoop around a lot. A larger hoop is nice because it requires minimal adjustments; however, it can be more awkward to hold. Make sure you have an embroidery hoop in a size that feels comfortable to you, and avoid any unnecessary annoyances.
If you are looking for any cross-stitch supplies or want to know more about cross stitching, please visit the Kim Mendez website: www.kimmendezbooks.com.
1. Read the Pattern
The cross-stitch chart is your key for creating the final project you wish to achieve. Reading the chart is easy due to the gridded design presented. The chart displays a symbol for each box on the cross-stitch project. These symbols correlate to a key explaining the count, code, and name of the floss needed for the stitch in that box. The cross-stitch chart may seem overwhelming at first, but simply take each box one stitch at a time. The line numbers will help you keep track of where you are. It is a good idea to start in the middle of the pattern and work your way toward the edges. This helps you align the pattern to the middle of your fabric. Soon you will start to see the desired image laid out in front of you. When finished, your cross-stitch project should match that of the chart and final photo of the pattern.
2. Prepare the Fabric and Floss
Before you begin a project, make sure you have the right amount of fabric. If the pattern is large it is a good idea to prepare the fabric by securing the edges. The typical cross-stitch fabrics have a tendency to fray and get in the way of your work. If you have a sewing machine, a simple zig-zag stitch along the edges of the fabric will keep it from falling apart. Masking tape can also be used to hold the fraying edges together.
When it comes to the embroidery floss, there is a little more flexibility on the amount you need. Luckily, if you run out of floss, you can simply tie a knot on the project and start up with a new thread on the next stitch. When buying the thread, you will have six strands in one. You can pull apart these strands and use only one strand for cross-stitch patterns. Be sure to reference the pattern to see which embroidery floss you will need, as well as the thickness of the threads.
3. Center of Your Fabric for the Pattern
On smaller cross-stitch patterns, one will usually be able to trim around the edges to make the completed project look centered. However, with larger cross-stitch patterns it is critical that you begin stitching in the middle of your fabric. This is an easy step. Simply fold the fabric in half, then into a quarter, and you will find the center point where the creases intersect. You can make a small mark at the center or place a pin there, so you do not forget when your fabric loses its crease. Before you begin stitching, double-check that you are working horizontally or vertically so your pattern fits correctly on the fabric.
Once you have your center located, it is time to attach the embroidery hoop (if using one). Lay the fabric on a flat surface, then place one side of the hoop onto the fabric. Next, lift the fabric and hoop in order to put the other side of the hoop into place. It is important to keep the hoop centered and not too snug. If the fabric is pulled too tightly it can distort the image you are stitching. Lastly, fashion the embroidery hoop into place and you are ready to thread your needle and begin stitching (no knot needed).
4. Creating Your Cross Stitches
Now for the fun part, the cross stitching! Start by bringing your needle with threaded floss through the back side of the fabric. You will want the needle and floss to travel through the hole and leave about an inch or so of thread in the back. Hold onto the tail of the thread so it does not slip through the fabric. The tail will eventually be covered by the other cross stitches as you continue to follow the pattern. It is best not to create a knot as it could distort the smoothness of the final project.
Once your needle and floss are through the fabric (from the back), place your needle in the hole diagonally across from the original entry. This is known as a half stitch and it appears on your fabric as a diagonal slash (/).
To complete the cross stitch, all you need to do is bring the needle back through the hole that is below your starting point. Then, cross over the first half stitch so your final cross stitch appears as an even X on the fabric.
5. Cover More Space with a Row
If you have a large space that requires the same floss, you can save time by stitching a row. To begin a row, make several half cross stitches (it should appear like this //// on your fabric). Then simply return the other direction with the same stitches to complete the row of Xs.
Follow your pattern to assess where the best spots are to use rows or individual stitches.
6. Ending the Thread or the Project
Continue cross stitching until you either run out of thread or reach the end of your pattern. Flip your fabric over, thread the needle under three or more stitches, and pull the tail through. You can continue to weave the tail under the project until it is no longer visible or trim off the excess thread.
7. Stand Back and Enjoy Your Masterpiece
Cross stitching is a fun and rewarding hobby. Make sure to put your project on display. Your friends will admire your work and you can take pride in making a beautiful picture from scratch. With this guide, and the patterns inside, you will have a cross-stitch pattern for every occasion and a new favorite hobby to enjoy anywhere!
Next page
