Pattern Services and Revisions
If you are an Annies customer and have a question about the instructions on a pattern you have purchased, please visit:
AnniesCatalog.com/pages/customer_care/pattern_services.html
Templates
To download templates for easy printing, view the download instructions at the end of this book or click the Templates chapter in the Table of Contents.
 I Can Cross Stitch is published by Annies, 306 East Parr Road, Berne, IN 46711. Printed in USA. Copyright 2014 Annies. All rights reserved.
This publication may not be reproduced in part or in whole without written permission from the publisher.
RETAIL STORES: If you would like to carry this pattern book or any other Annies publication, visit AnniesWSL.com.
Every effort has been made to ensure that the instructions in this pattern book are complete and accurate. We cannot, however, take responsibility for human error, typographical mistakes or variations in individual work. Please visit AnniesCustomerCare.com to check for pattern updates.
ISBN: 978-1-57367-449-2
1 2 3 4 5 6 7 8 9
Table of Contents
Creating a cross-stitch masterpiece is easy and fun. You can create beautiful, colorful designs to hang on your walls, display on your favorite tote bag, or give as gifts to friends.
We have carefully selected designs that can be framed in a simple embroidery hoop, worn or even used to decorate your room. You can use the colors we suggest, or you can change it up and use colors that work in your room or your favorite colors.
In this book, you will learn the basic techniques to creating beautiful projects simply by making a stitch shaped like an X, and how to finish those stitched projects to make one-of-a-kind pieces. Use these charts and instructions over and over to create gifts for your friends and family or just to add color to almost anything your heart desires. Show off your talents and your creations with confidence!
Meet Elizabeth Spurlock
Born into a crafty family, Elizabeth Spurlock learned crafts from family and friends, including embroidery from her grandmother and cross stitch from a college friend. She has worked as a full-time designer for a cross-stitch publication, and has served as the design director for two other craft publishers. She has also worked as a freelance designer. Elizabeth especially enjoys teaching beginning stitchers and introducing them to the fun and sense of accomplishment that comes from creating cross-stitched accessories for themselves and gifts for their friends and family. She believes that beautiful, fun designs can be crafted even at a basic skill level, and that beginners will feel a greater sense of accomplishment and gain more lasting interest in the craft if they can create something they are proud to show off or give as a gift. Elizabeth lives in Atlanta, Ga., with her husband and two sons.

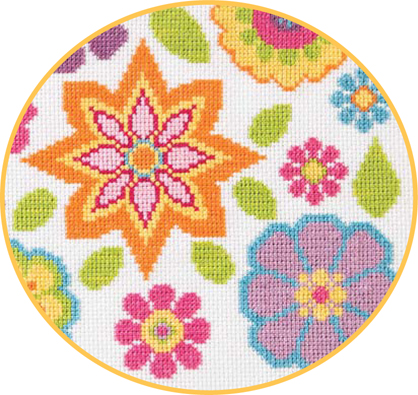
Use the information in this section to help you create the right stitch and select the correct tools to complete your projects.

WORKING FROM CHARTED DESIGNS
Each square on a chart corresponds to a space for a cross stitch on the stitching surface. The symbol in a square shows the floss color to be used for the stitch. The width and height for the design stitch area are given in number of stitches and in inches; centers are shown by arrows at bottom and right-hand side of chart. Locations of backstitches are shown by heavy lines.


You can change the colors to match your favorites or your room. Just select a new set of colors, making sure that you choose the same number of colors, and get started! by pattern.
FABRICS
In our materials listings, we give fabric suggestions that will complement each design. Our stitched samples were worked on 14-count Aida and 14-count perforated paper, which have 14 squares per inch; that number is called the thread count.
FLOSS
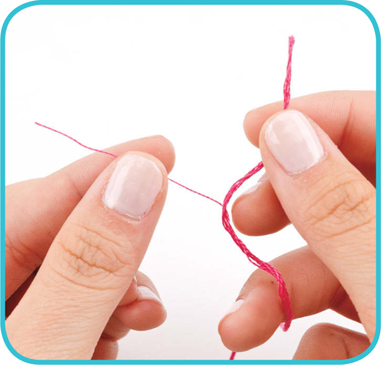
All of our samples were stitched using DMC six-strand embroidery floss. Color numbers are given for floss. Cut floss into comfortable working lengths; we suggest about 1218 inches. When separating the strands, gently pull apart the strands and regroup as indicated by pattern.
NEEDLES
A blunt-tipped tapestry needle, size 24, is used for stitching on most 14-count fabrics and papers. The correct-size needle is easy to thread with the amount of floss required, but is not so large that it will distort the holes in the fabric. When threading needle, insert one end of strand or strands of floss and pull through.

HOOPS & Q-SNAPS
A hoop or Q-Snap, which is a square fabric holder, is used to keep fabric pulled taut when stitching. Always use a hoop that is comfortable to hold while working and will be right for the project. If using a hoop, take care not to tighten hoop too much or it will distort stitches. Center project fabric in hoop or Q-Snap and lock in place by tightening the top screen on a hoop or snapping sides down on a Q-Snap; adjust placement as necessary or when stitching a different area. Never use a hoop or Q-Snap on perforated paper.
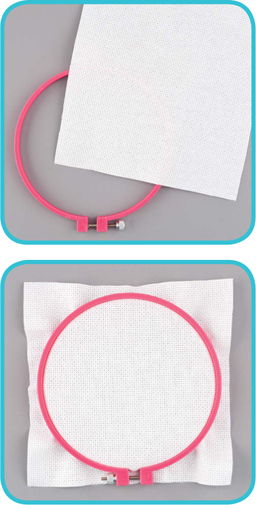
Front of hooped Aida fabric
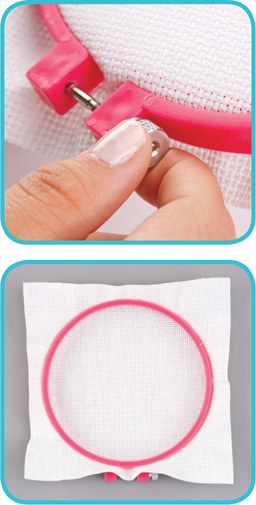
Back of hooped Aida fabric
SCISSORS
Good scissors are a necessity for stitching and are used to cut fabric and floss. Always be careful when using sharp scissors or when trimming your designs; ask an adult for help when using sharp scissors.
IRON
You can remove the wrinkles caused by your hoop by gently ironing the fabric around your stitched piece. An iron is also needed when you adhere your stitched piece to something like a bag or pillow, and you will use iron-on fusible interfacing to do that (see page 36 for more instructions).
Remember to always protect your work by placing a press cloth between the iron and your stitched piece. Never iron perforated paper, and ask an adult for help when ironing.
THE STITCHES
The number of strands of floss used for stitching will be determined by the thread count of the fabric used and the pattern. Refer to the chart and instructions to determine the number of strands used for cross stitches or backstitches.


 I Can Cross Stitch is published by Annies, 306 East Parr Road, Berne, IN 46711. Printed in USA. Copyright 2014 Annies. All rights reserved.


