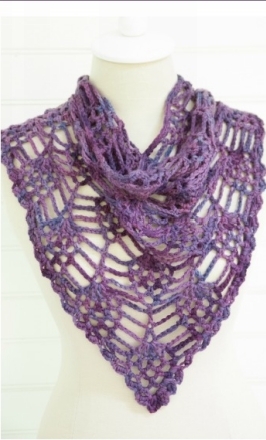
Following the patterns form the book will surely leave you with beautifully designed summer shawls. However, to make sure that your patterns really open up and reveal their beauty, theres one more thing to be done.
Once you finish your project, you should make sure to do something called blocking. As you may infer from the name itself, the process serves to block the pattern, i.e. to gently stretch the yarn interwoven into the work to show up the pattern in its best.
There are two ways to do this, and they will work interchangeably for most types of yarn and projects.
For the first method, you will need to prepare pins and a large wooden board or a piece of cardboard. Then, submerge your work, in this case shawl, into cold water, and after a few minutes, squeeze it gently. Then, place the shawl on the board and pin the edges down. I guess that the hardest part is to wait for the shawl to dry.
If you are wondering about a quicker method, here is one.
Lay the shawl on a flat surface and cover it with a damp towel or cloth. Pay attention that the cloth is not wet too much because the point here is to steam the shawl.
Then, take you iron, set it on low or medium and press over the damp cloth. Make quick movements (dont keep the iron on the cloth for more than 2 seconds). Remember you dont need to iron the shawl but to steam it. And in just a few minutes, your shawl will be ready to show it off.
Theres one more thing to be mentioned here. To make sure that you follow the instructions correctly, take a look at the abbreviations used in the book.
I hope you will enjoy your summer with these crochet projects that will certainly add a note of elegance to your outfits.
Chapter 1 Lovers Knot Shawl

ROW 1
To begin, create a slip knot. Then, create 2 chain stitches. Go into the first chain stitch, yarn over and pull through. You now have 2 loops on your hook. Yarn over and pull through 2 loops. This creates a single crochet knot that anchors lovers knots to one another.
*To create a lovers knot, lengthen the working loop a bit (depending on the size of the knot you want).Ch 1, insert the hook in between the yarn strands that create the chain. Yarn over and pull through, and you now have 2 loops on the hook. Yarn over again and pull through 2. This is another sc knot that secures the lovers knot.
Repeat from * two more times to create three lovers knots in total. Join the last one to the first knot with a sc.
This way, you created the starting ring of lovers knots.
ROW 2
To begin Row 2, *create 3 lovers knots following the same steps as in the first row. Join the last one to the first knot on the right. Repeat from * to join three knots to the second knot on the right.
Since you are now at the side of Row 2, you will have to go back to Row 2 and create 2 lovers knots at the side, which will actually count as the beginning of the next row.
The diagram below can help you get a clearer image of the pattern.

ROW 3
Start again with 3 lovers knots. Join to the closest knot to the left. Remember that in the previous row you worked towards the right? In this row, you will work towards the left, and dont forget to alternate the direction with every new row.
Then, you come to the middle part, so you will need only 2 lovers knots. Join them to the closets ring of knots following the same direction.
Again, create 3 lovers knots and join them to another ring of knots. And you come to the end of this row. You will again have to make two knots to go back to the row.
HOW TO CONTINUE?
Simply follow the same pattern over and over again. When you work in the middle, you will have to create only 2 lovers knots. On the other hand, when you work on the sides, you will need 3 lovers knots.
HOW TO FINISH?
When you reach the desired length of your shawl, work only 2 knots at the sides and 1 knot in the middle. If you wish, you can add fringes to the shawl.
Chapter 2 Simple Summer Shawl

To begin, create the foundation chain.
ROW 1
Begin by skipping the first 2 chains and work a sc in the next chain. *Ch 3, skip 3 chains and in the next chain, work a dc, ch 1 and work another dc. This creates a V stitch. Skip 2 chains, work a sc in the next chain. Repeat the pattern from * across the row.
You should end this row with the equal number of scs, V stitches, and chain-3 spaces.
ROW 2
Begin with 3 chains and create a V stitch in the first stitch. Now, you come to a chain-3 space. *Sc here, ch 2 and create a V stitch in the next sc. Repeat the pattern from * across the row. When you reach the end, work a sc in the top of the turning chain.
HOW TO CONTINUE?
Just repeat Row 2 until you reach the desired length of your shawl.
HOW TO FINISH?
To begin the last row, ch 1 and work a sc in each stitch across the row.
To create the border, do not turn the work. You will work in the ends of rows across the side edge.
Begin by working *a sc, ch 1 and then work another sc around the turning chain of the next row. Ch 1 and skip the next sc row. Repeat the pattern from * all the way along the side edge of the last row and then ch 1.
Now, you will work along the opposite side of the first row. **Work a sc in the next chain and ch 1. Repeat the pattern from **across the edge. Create the border around the shawl and join with a slip stitch.
Chapter 3 Infinity Shawl

Start with a slip knot and then ch 150. Join with a slip stitch to the first chain.
ROW 1
Ch 4 (that counts as a dc and ch 1). Skip the first chain and work a dc in the second chain.
*Skip the next chain, ch 1 and dc into that second chain. Repeat the pattern from * all the way around until you get to the beginning.
HOW TO CONTINUE?
This is the pattern that you will have to repeat for the whole scarf until you get the desired length.
HOW TO FINISH?
Work a dc into the chain space. Each dc is separated by ch 1. Keep doing it until the scarf is wide enough.
To finish it off, ch 1 and slip stitch into a chain space. Weave the tails and thats it.
Chapter 4 Summer Berry Shawl


