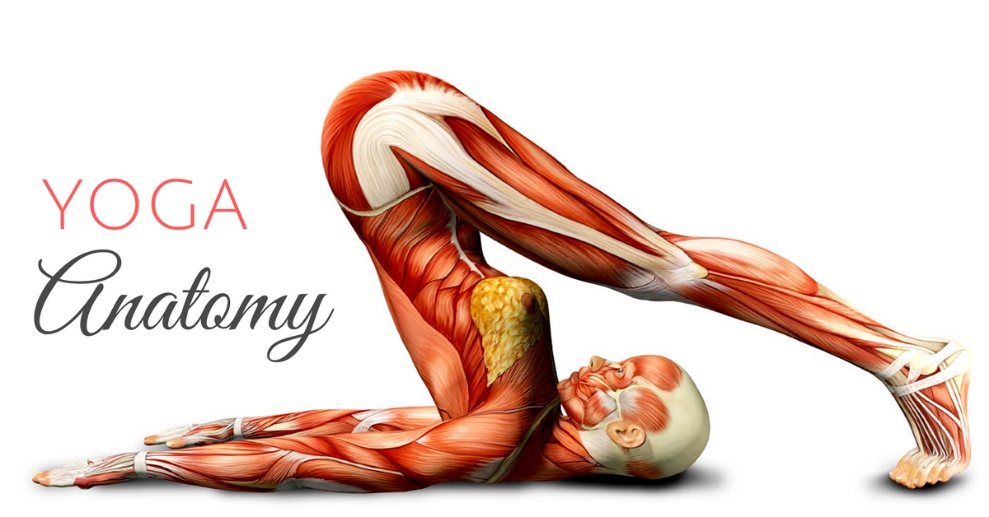
Yoga Anatomy
Teaching Yoga Essential Foundations and Techniques
A New View at Yoga Poses
Scott Thourson
Copyright 2020 Scott Thourson
All rights reserved.
ISBN: 9798656865364
DEDICATION
The author and publisher have provided this e-book to you for your personal use only. You may not make this e-book publicly available in any way. Copyright infringement is against the law. If you believe the copy of this e-book you are reading infringes on the author copyright, please notify the publisher at: https://us.macmillan.com/piracy.
Acknowledge
Poses by Anatomy
You don't need to know the names of all the muscles and bones to practice yoga but being familiar with some basic terms can help. If you dont have a background in anatomy (or if your memory just isnt what it used to be) this guide is your starting point.
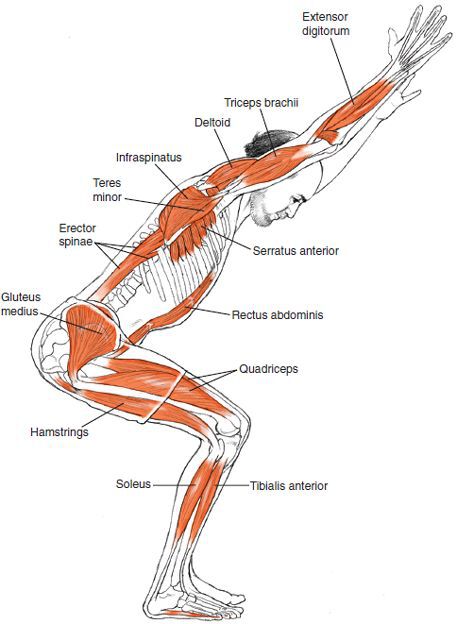
Chair Pose / Powerful Pose
Step by step
From Mountain pose / Tadasana
Exhale as you bend your knees and move your hips back as if you were sitting down on a chair. Draw your lower abdomen in and up to support your lower back
Send your hips back rather than your knees forward, so that you can still see your toes
Inhale as you raise your arms up around your ears and soften your shoulders
Keep reaching higher, while sitting lower for 5 to 10 breaths
To come back into in Tadasana, exhale, as you press your feet down to straighten your legs and then bring your arms down to your sides.
Beginners tips
Think about squeezing your legs together as if they are one to make them stronger. You can use a block or rolled up towel to practice this - imagine you are squeezing it and also trying to shoot it out behind you as you internally rotate the thighs
However, you can also bring your feet wider apart to make your base a little more stable if you need to
Press firmly through the feet to create more lift in the upper body. Keep the weight evenly distributed between the heels and the balls of the feet
Practice the action in the legs first with your hands on your hips or the back of a (stable) chair for support.
Benefits
Strengthens and stabilises the legs, ankles and feet
Strengthens the abdominal muscles and lower back
Opens and stretches the chest and shoulders
Improves confidence and focus
Utkatasana is a great pose in which to practise Mula Bandha and Uddiyana Bandha which will create lightness and also tone the pelvic floor muscles and lower abdomen.
Watch out for
Protect your knees: Double check that they dont come forward over the line of the toes. You should be able to see the toes.
If you have discomfort in your shoulders or neck, bring your arms wider apart and/or lower. They can be pointing straight out in front of you or down to the floor. Alternatively you could bend the elbows and point the fingertips upwards.
Make sure your lower belly is drawn back to the spine to protect your lower back. Try not to overarch the lumbar spine.
Variations
Bring your legs together and squeeze them into each other if you want to work on your leg strength - you can also squeeze a block or towel if it's more comfortable
Practise the pose with your feet hip-width apart or wider to create a more stable base, this is also a good variation to use if you are pregnant or if you have a larger body
Experiment with the arms in different positions: Clasp your hands behind your back for a shoulder stretch and then move dynamically into a forward fold (hands still clasped) and back again into Utkatasana
Or, bring your palms together into Anjali Mudra (prayer position, thumbs to chest) preparing for Parivrtta Utkatasana / Revolved Chair pose .
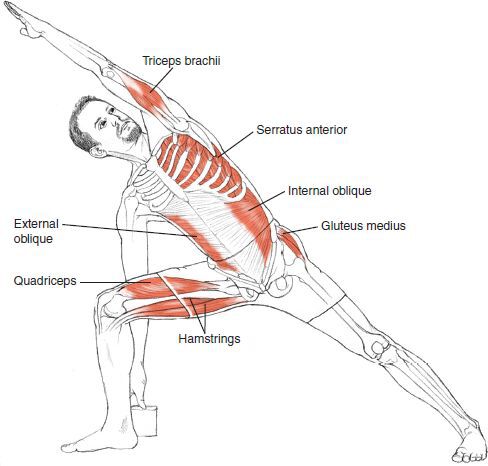
Extended Side Angle Pose
Step by step
Stand facing the long side of your mat with your feet about a leg distance apart.
Turn your right foot out so your toes are pointing to the short edge of the mat and turn your left toes in, about 45 degrees. You are looking for stability through both legs.
As you exhale, bend your right knee, thigh parallel to the floor, knee above the ankle
Take a deep inhale and firm your lower abdomen in and up.
As you exhale, extend your body over the right leg, and bring your right arm down, either with your elbow on your right thigh or place your hand on the floor to the inside or the outside of the right foot - whatever feels right for your body.
Reach your left arm over your head, next to the left ear,
Turn your palm so that you are bringing the little finger side of your hand to face the floor.
Extend from the outside of the left heel through the left fingertips and revolve the ribcage up towards the ceiling. If your neck allows it, you can look up from underneath the left armpit to the ceiling.
Hold this pose anywhere from 5 to 15 breaths.
To come out of this pose press actively into your feet, and on an inhalation strongly extend through the left arm as you come back up to straight.
Reverse the direction of your feet to do the same pose on the other side.
Beginner tips
Keep pressing the floor away with both feet, to find lightness in your spine.
Use a block or rest your forearm on your thigh if it helps.
Benefits
Watch out for
Try not to crunch the side waist as you bend. If this is happening rest your forearm on your thigh or use a block as suggested in the beginners' tips to keep your side waist long.
Pay attention to keep your bent knee stacked above the ankle, and pointing in the same direction as your toes.
If you have a shoulder injury, keep your top hand on your hip instead of lifting it up.
Variations
Try a dynamic variation of the pose, flowing from Extended side angle to Reversed Warrior on the exhalation, and back to Extended side angle on an inhalation.
The body's weight always tends to shift to the ball of your front foot. To counteract this tendency try lifting the ball of the front foot and feeling once again the anchor of your back foot. Resist the floor with your back foot while allowing the top of your back thigh bone to sink deeper into the hip. Then let the ball of the front foot rest back on the floor.
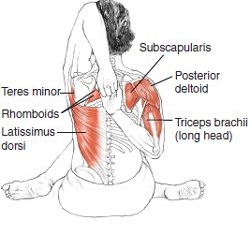
Cow Face Pose
Step by step


