• Complain

Cameron Rich - 3D Printed Science Projects

Here you can read online Cameron Rich - 3D Printed Science Projects full text of the book (entire story) in english for free. Download pdf and epub, get meaning, cover and reviews about this ebook. City: Berkeley;CA;New York;NY, year: 2017;2016, publisher: Apress, genre: Children. Description of the work, (preface) as well as reviews are available. Best literature library LitArk.com created for fans of good reading and offers a wide selection of genres:

Romance novel Science fiction Adventure Detective Science History Home and family Prose Art Politics Computer Non-fiction Religion Business Children Humor

Choose a favorite category and find really read worthwhile books. Enjoy immersion in the world of imagination, feel the emotions of the characters or learn something new for yourself, make an fascinating discovery.

Cameron Rich 3D Printed Science Projects
  • Book:
    3D Printed Science Projects
  • Author:
  • Publisher:
    Apress
  • Genre:
  • Year:
    2017;2016
  • City:
    Berkeley;CA;New York;NY
  • Rating:
    3 / 5
  • Favourites:
    Add to favourites
  • Your mark:
    • 60
    • 1
    • 2
    • 3
    • 4
    • 5

3D Printed Science Projects: summary, description and annotation

We offer to read an annotation, description, summary or preface (depends on what the author of the book "3D Printed Science Projects" wrote himself). If you haven't found the necessary information about the book — write in the comments, we will try to find it.

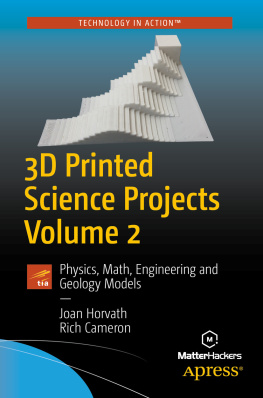
[Volume 1]. Ideas for your classroom, science fair, or home -- volume 2. Physics, math, engineering and geology models.

Cameron Rich: author's other books


Who wrote 3D Printed Science Projects? Find out the surname, the name of the author of the book and a list of all author's works by series.

3D Printed Science Projects — read online for free the complete book (whole text) full work

Below is the text of the book, divided by pages. System saving the place of the last page read, allows you to conveniently read the book "3D Printed Science Projects" online for free, without having to search again every time where you left off. Put a bookmark, and you can go to the page where you finished reading at any time.

Light

Font size:

Reset

Interval:

Bookmark:

Make
Joan Horvath and Rich Cameron 2016
Joan Horvath and Rich Cameron 3D Printed Science Projects 10.1007/978-1-4842-1323-0_1
1. 3D Math Functions
Joan Horvath 1 and Rich Cameron 1
(1)
CA, USA
Electronic supplementary material
The online version of this chapter (doi: 10.1007/978-1-4842-1323-0_1 ) contains supplementary material, which is available to authorized users.
Since so much scientific visualization starts with looking at underlying mathematics, we are beginning this book on 3D printing for science projects with a chapter on 3D printing mathematical functions. The basic models in this chapter are intended to be a starter set that you alter to 3D print whatever function you like, within the boundaries we will get to in a later section.
Math Modeling for 3D Printing
It seems like it should be easy to just put an equation into a program and have the printer draw it somehow, like some sort of 3D pen plotter. However, if a 3D printer head just tried to follow an equation, it would have no way of knowing how to avoid material that had already laid down, so we have to go about it in a bit more roundabout way.
3D Printing
3D printersrequire a several-step process from the first idea to a finished print. First, you need to develop a 3D model, as we will in this chapter. Models in this chapter (and most of the remainder of the book) are based on the free, open source 3D solid modeling program OpenSCAD ( www.openscad.org ). OpenSCAD allows you to encode geometrical models in a language that is sort of a subset of the C programming language. Good documentation is available by clicking the Documentation button on the OpenSCAD sites home page.
Then, other software takes this model and slices it into layers, which the printer will then create one at a time, typically from the bottom up. We will use the open source MatterControl host program throughout this book, available free from www.mattercontrol.com . Appendix A talks more about things you should know about OpenSCAD, MatterControl, and 3D printing in general.
Tip
This book presumes you are generally familiar with 3D printing practices. If not, you can learn how to use a printer from Joans previous book, Mastering 3D Printing (Apress, 2014) or our book 3D Printing With MatterControl (Apress, 2015). Unless we specifically note otherwise, prints in this book were created on a Deezmaker Bukito in polylactic acid (PLA) plastic, using the MatterSlice engine in MatterControl (although we could have used any software compatible with an open source printer).
Math Background
This chapter presumes you know what a function isa relationship among a number of variables. In this case, we are dealing with functions using three variables, which we will call x , y , and z . Function notation looks like this: z = f (x,y) . All that means is that our variable, z , can be computed for any given pair of values for the x and y variables. Having three variables means we can define shapes in three dimensions, with one variable corresponding to each dimension. Normally these three-dimensional shapes would be shown on a page with two-dimensional projections. Often, this is fine and you can see what is going on. Sometimes, however, it really helps to hold a 3D model in your hand and turn it this way and that. This chapter will give you the ability to do that for many types of functions.
Note
3D printing convention holds that x and y are in the plane of the platform that your model is being built up on, and z is vertical height above that. In other words, the bottom of the surfaces generated in this chapter is always the z = 0 plane. In this convention, you always have to transform what you are printing to have z greater than or equal to zero, since you cannot build under the platform. In other words, if you know that z would be negative for some values of x and y that you want to use, you may have to add an offset to your equation so that z is always greater than zero and remember that the offset is there when you think about what your model represents.
We will get you started with a model entirely in OpenSCAD that creates surfaces of functions z = f (x,y), where x and y are the plane of the 3D printers build platform, and z is the height of the surface above that plane. First we will show you how the basic 3D math model Rich has written and included here works, and what kind of functions you can print. Then we will show you a simple model that creates surfaces that might be a starting point for your own projects in OpenSCAD.
Alternatively you may have code you developed that produces a surface you would like to 3D print. It may not be practical to port that code to an OpenSCAD model. We will also show you an example in which we wrote a separate Python script that produces a file, which is then read into OpenSCAD and made into a surface. Finally we will give you some ideas about how you might use these tools as a teacher or as part of a student project.
Others (see links at Where To Learn More later in this chapter) have used more sophisticated mathematics modeling programs, but our desire here is to make this completely accessible and free so that you can get started without investing in software, at least at the beginning of your explorations.
Creating Surfaces Entirely in OpenSCAD
In this section we show you how to create a polynomial with a flat base. In the next section we show you what a print of a double-sided surface looks like using the same OpenSCAD code with different parameters. This model was written to be simple and easy to alter, which means that it does not check for complicated problems, like functions that go to infinity or other mathematically bad behavior. It does, however, let you input a function f (x,y) (as you can see in Listing ). It uses OpenSCADs polyhedron module to accomplish this.
Making a Smooth Surface with a Flat Bottom
Listing was scaled down to one-quarter scale.
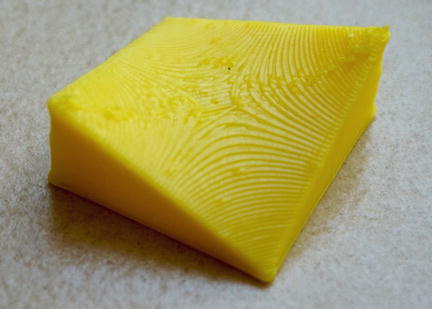
Figure 1-1 Saddle function with a flat bottom Printed at quarter scale so - photo 1
Figure 1-1.
Saddle function with a flat bottom. Printed at quarter scale, so each side is about 25 mm, or just under an inch long. Layer height was 0.2 mm
The values of x and y go from 0 to xmax and ymax respectively. A maximum of 100 points in each dimension ( xmax = 99 and ymax = 99 ) is allowed. The model will step in units of 1, which cannot be changed. If you want your model to step in smaller or larger increments, you will need to scale the variable in the equation.
For example, if in your original equation you had a function you wanted to increment by 0.02 in each step, replace the x in your original equation by (0.02 * x ) to accomplish the same thing when you increment by 1. Or if you want to step from 500 to 400 in the original function, replace the x in your original function with ( x 500) everywhere to accomplish the same thing. Be careful if variables are raised to a power, or are inside a function like cosine, that you do this scaling correctly and consistently.
Caution
Because we are creating a flat bottom, the equation being represented here is actually 0 <= z <= f (x, y ). As a result, z = f (x, y ) must be greater than zero everywhere for the flat-bottomed ( thick = 0 ) version. A model will still be produced if there are z values that are less than zero, but it will be an invalid model, and even if you manage to repair it, it wont print easily.
Next page
Light

Font size:

Reset

Interval:

Bookmark:

Make

Similar books «3D Printed Science Projects»

Look at similar books to 3D Printed Science Projects. We have selected literature similar in name and meaning in the hope of providing readers with more options to find new, interesting, not yet read works.


Reviews about «3D Printed Science Projects»

Discussion, reviews of the book 3D Printed Science Projects and just readers' own opinions. Leave your comments, write what you think about the work, its meaning or the main characters. Specify what exactly you liked and what you didn't like, and why you think so.