Hopkin, Bart, 1952
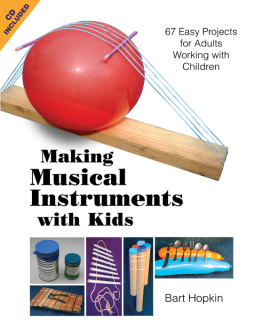
Making musical instruments with kids : 67 easy projects for adults working with children / Bart Hopkin. Tucson, Ariz. : See Sharp Press, 2009.
128 p. : ill.; 28 cm. + 1 audio CD.
ISBN: 978-1-93727-602-7
Summary: This is a book of easy-to-build, low-or-no-cost musical instruments that can be constructed by children under adult supervision, or, in some cases, by older kids without supervision. Examples of the instruments include washtub bass, driftwood marimba, thumb piano, bucket drums, and flowerpot bells: simple stuff, but stuff kids can have fun with.
1. Musical instruments Construction. 2. Musical instruments Construction Juvenile literature.
784.1923
TABLE OF CONTENTS
CD TRACK 1
INTRODUCTION
This book describes musical instruments simple enough for children to make. It is not written primarily for children though, but for adults who work with children. That includes parents, teachers, and others involved in the lives of young people. Its also for older kids who can read and follow the instructions, and for grown-ups whod like to have a little musical fun themselves. In the classroom and out, instrument-making is a hands-on learning activity, and this book will serve well as an instructional resource in that activity. But most importantly, this book is a guide to simple, enjoyable instrument-making for its own sake.
Heres the promise I made to myself when I decided to create this collection of childrens instruments:
*that the instruments included should
be simple and kid-buildable,
use available and affordable materials,
require no specialized or dangerous tools;
*and at the same time the instruments should be
playable by children, and
good sounding
Simple to make plus good sounding, it turns out, is an elusive combination but not an impossible one.
Over the years, many childrens instrument-making books have been published. There are also a lot of resources on the world wide web. Ive reviewed as much of this literature as I could get my hands on, and Ive brought the best of its collective wisdom to this book.
The simplest of the instrument plans in this book are suitable for preschool children, and the range of appropriate instruments extends through the primary and middle school years, and beyond. Many of the projects appear in both simple and more sophisticated forms, appropriate for kids of different ages and abilities. Younger children will be able to construct many of the more advanced projects if an adult performs just one or two of the steps for instance, pre-cutting a two-by-four with a handsaw.
The majority of the instruments use commonplace, low-cost, widely available materials. (In a few cases Ive suggested more specialized materials.) For instruments made from throwaways, it helps to start gathering the needed items in advance. Candidates for collecting include tin cans, plastic tubs such as margarine or yogurt containers, jars, bottles, corks, cardboard tubes, chopsticks, and various styrofoam forms.
Tuning is an open question with childrens instruments. You and your kids can have a wonderful time with random-pitch instruments, or with instruments that approximate standard scales only roughly. On the other hand, many of the instruments in this book are tunable, so there are good possibilities for those who wish to make tuned instruments as well. If thats one of your interests, be sure to read the chapter devoted to tuning (page 107).
For ideas on putting the instruments to use after you and your youngsters have made them, turn to the chapter starting on page 111.
Remember, too, to enjoy the sounds of the instruments on the accompanying CD.
Ready? Turn the page to begin.
ACKNOWLEDGMENTS
Several people read the manuscript for this book prior to publication, and their comments and suggestions have made this a far better book than it would otherwise have been. Among them, John Bertles, Robin Goodfellow and Katie Harlow all of them experts with loads of hands-on experience in instrument making with children gave most generously of their time and energy to help shape this book. My editor at See Sharp Press, Chaz Bufe, has been invaluable. His skill with the written word coupled with his knowledge of music make him the perfect overseer of a project such as this. Many more people too many to name have unknowingly contributed to this book by freely sharing with me their ideas about musical instrument making over the course of many years in this field. To all of these people, my sincere thanks.
BH
TOOLS
Many of the instruments in this book require no tools at all. Others require commonplace implements like scissors and rulers. A smaller number require common hand tools like a saw, screwdriver or hammer, and just a couple of the most advanced plans call for an electric drill (the least scary of power tools). Here are some suggestions.

A lift-off can opener
This can opener pops off can lids without leaving sharp edges.
Lift-off can opener: Theres a type of can opener that lifts the can lid off rather than cuts it out. It is safer and gives a more elegant-looking result than the old-fashioned kind. You can use the popped-off lids for various purposes, or even put the lid back on the can for neat temporary closure. The lift-off can opener is less widely available and more expensive than the ordinary type, but is worthwhile for projects with children. The Good Cook brand Monarch Series safe cut technology can opener from Bradshaw International is one model.

Hacksaw and carpenters saw
The hacksaw (above) is easiest for children, and can handle most small jobs.
Work table, vises and clamps: For instruments requiring cutting, having a vise to hold the work piece makes work with hand tools a lot easier and safer. For not too much money you can purchase a small vise which clamps to a table. Often a C-clamp can serve the same purpose.
Saws: Hacksaws are the most kid friendly of saws. Theyre relatively small, light and sturdy. The small teeth are unlikely to accidentally cut anyone and the blade is less likely than those of larger saws to catch and bind mid-stroke. For most of the projects in this book that require a saw, a hacksaw will do. Securing the work with a clamp or vise will make sawing easier for children.
Tubing cutter: Some instruments in this book use plastic or metal tubing. There is a type of tubing cutter that works by means of a cutting wheel, hand-operated in a rotary motion. It cuts plastic or metal tubing without creating dust or fumes. When it comes to making tubing instruments more manageable for kids, this easy-to-use tool is a great help. Once again, securing the work with a vise or clamp makes the cutting much easier.

Tubing Cutter
To cut tubing, place the tubing cutter around the tube at the cutting location, and gently tighten down the cutting wheel. Rotate the cutter around the tube, further tightening the wheel bit by bit, until the tube is cut.
Next page
