Getting Started
Introduction
I grew up as an only child and always loved to draw. My parents taught me at a young age to appreciate, respect, and love nature. I started learning about nature at summer camp in Pennsylvania, and being exposed to nature made me passionate about plants, animals, and insects. I decided early that I was going to be an Artist when I grew up.
My grandmother was a Girl Scouts leader, and she had a vast wealth of knowledge about the plant world. I was so amazed that she seemed to know the names of all the plants in her garden and on our walks in the woods. I thought I would never know as much as she did.
As a young college student, I was an art major and focused my studies on textiles. I learned to spin yarn on a spinning wheel, grow plants for natural dyeing, and weave fabric on an old-fashioned floor loom. For the first 20 years of my career, I worked as a production spinner and handweaver. I sold my handwoven clothing at art festivals and specialty stores around the United States. It was a labor of love, but after 20 years I wanted to devote my time to drawing and painting nature.
I enrolled in and completed a 200-hour certification in botanical illustration at the New York Botanical Garden. The program launched a new career that continues to feed a lifelong passion. Drawing plants has made me a gardener as well as a conservationist. Drawing nature requires acute observation. The more I see, the more I learn, and the more I want to convey in my paintings. I still feel like the child I was once was. The wonder of nature is all around, and I want to see it, experience it, and share it through my paintings. It is my hope that through my paintings I inspire people to love nature and want to protect it.
I have had the wonderful opportunity in my career to teach people how to draw. By studying with people like Betty Edwards, I learned that drawing is a skilland not all about having talent. Taking a subject and breaking it down step by step is the best way to learn how to draw. Whatever your story or background or artistic experience, you can learn how to see and illustrate the natural world around you.
In this book I introduce you to many styles and applications of drawing plant and birds. Many artists and art teachers work in a specific medium. I do not consider myself a purist. I enjoy working in a variety of mediums. I think combining different techniques can be challenging, rewarding, and fun. In this book I hope to inspire you not to be afraid to experiment. There are many ways to do any one thing, and the challenge is to find what works best for you. I hope you will be inspired to draw the beauty of nature!
Introduction to Drawing Supplies
Learning to draw and paint is a combination of mastering techniques and using the correct materials. Understanding the basics can prevent a lot of frustration later.
Selecting Drawing Paper
Paper Texture
Drawing paper is one of the most important aspects for hassle-free drawing. To create a wide range of tone (areas of light to dark) in a drawing, artists build up graphite in layers. The surface of the paper must have a tooth, or texture. The tooth of the paper creates hills and valleys that collect graphite. As layers are applied to the paper, it becomes darker. If the paper is too smooth, the graphite has nowhere to settle into and simply sits on top. The paper saturates quickly, and the result is a flat, monochromatic appearance. When the paper has a moderate amount of tooth, the results are three-dimensional and detailed. A lot of tooth results in a rough drawing with minimal detail. Paper is also available recycled, bright white, natural, and colored. I prefer to work with Strathmore drawing paper, medium-texture recycled.
Paper Thickness
All art papers, whether made for drawing, watercolor, colored pencil, or pastel, are classified by the thickness, or weight, of the paper. Below is a basic listing of how papers are categorized by weight and what they are best suited for.
25 lb. (approx. 40 gsm): This is the thinnest paper available and is usually found as tracing paper.
30-35 lb. (approx. 45-50 gsm): This is the typical weight of scrap or newsprint papers that tear easily.
50-80 lb. (approx. 75-130 gsm): This range is mostly used as sketching or practice paper. It is thick enough to work on with pencils, charcoal, or pastels, but usually too thin for ink, watercolor, or markers. This paper has no ability to hold liquid and often bleeds through to the other side.
90-110 lb. (approx. 180-260 gsm): This is a good all-around weight for drawing paper to use with graphite, colored pencil, charcoal, pastel, and light applications of fluid mediums, such as ink.
140-300 lb. (approx. 300-640 gsm): These weights are most often used for painting, rather than drawing.
Acid-Free
I recommend choosing, whenever possible, a paper that is listed as acid-free by the manufacturer. This kind of paper is made from cellulose pulp, which comes from wood, cotton, and other natural resources. Within the natural order of these plant-based materials, the pH level is on the acidic side. Acid breaks down paper over time, turning it yellow and disintegrating it. Acid-free papers have gone through a process that removes the acid. The paper is neutralized and is considered archival, which means it wont yellow, disintegrate, or fade over time. This will protect your drawings for a very long time.
Tracing Papers
Tracing paper is an inexpensive, translucent paper. It yellows quickly, tears easily, and is usually not acid-free. Tracing vellum is a heavier-weight tracing paper that is often available acid-free. I prefer tracing vellum, but the cost may be prohibitive, since it is more expensive than tracing paper. I use tracing vellum to create my compositions, correct drawing errors, and protect paintings during and after the painting process. All my compositions are created and finalized in multiple layers on tracing vellum, and I save them in a folder as an archive of the elements of the painting. I can also reuse the drawings in future compositions.
Watercolor Papers
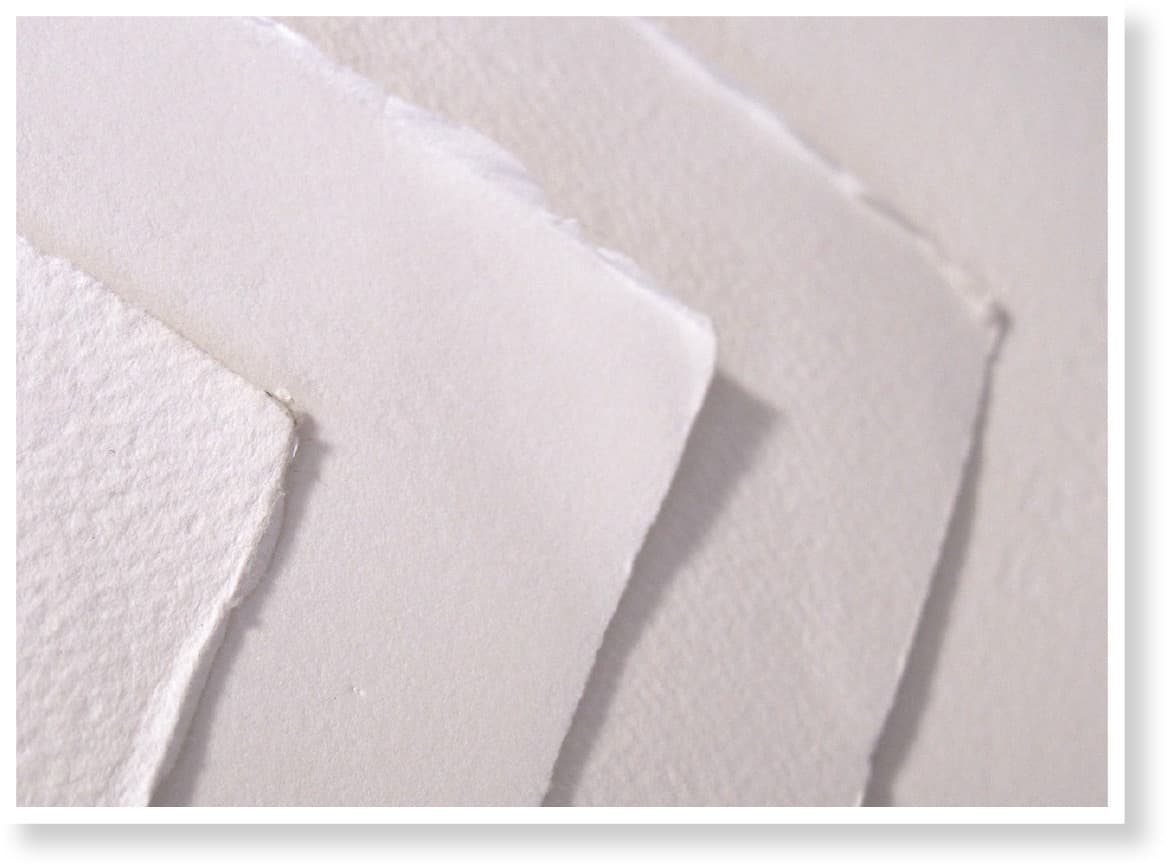
Watercolor paper is available in large sheets and blocks in different dimensions. There are three basic textures: hot-pressed, cold-pressed, and rough. Hot-pressed has the smoothest surface. Cold-pressed has a slightly bumpy texture. Rough, as the name implies, has the coarsest texture. The color of the paper can be white, off-white, or bright white. For beginners, I recommend cold-pressed, because it is easier to work on. Hot-pressed paper is more challenging, but the smooth surface allows for more details.


