Thank you for purchasing this Popular Woodworking eBook.
Sign up for our newsletter and receive special offers, access to free content, and information on the latest new releases and must-have woodworking resources! Plus, receive a coupon code to use on your first purchase from ShopWoodworking.com for signing up.
or visit us online to sign up at
http://popularwoodworking.com/ebook-promo
CONTENTS
INTRODUCTION
THE ART OF INLAY
CHAPTER 1
SIMPLE INLAID BOX
CHAPTER 2
KOA BOX
CHAPTER 3
PEN BOX
CHAPTER 4
TRIANGLE BOX
CHAPTER 5
BRACELET BOX WITH SPALTED MAPLE INLAY
CHAPTER 6
WALNUT BOX WITH SPALTED MAPLE INLAY
CHAPTER 7
CHECKERBOARD INLAY BOX
CHAPTER 8
SCULPTED PECAN BOX
CHAPTER 9
TEA CHEST
CHAPTER 10
JEWELRY BOX WITH HAND-CUT DOVETAILS
CHAPTER 11
EARRING & PIN CHEST
CHAPTER 12
INLAID WALNUT RING BOX
CHAPTER 13
TRIANGLE RING BOX
CHAPTER 14
LATHE-TURNED RING BOX
CHAPTER 15
HALF-TURNED BOX
CHAPTER 16
BRACELET BOX
CHAPTER 17
WEDDING RING MUSIC BOX
CHAPTER 18
WINTER WOODS BOX
CHAPTER 19
MENS JEWELRY BOX
CHAPTER 20
CHERRY JEWELRY CHEST
CHAPTER 21
LUCYS JEWELRY BOX
CHAPTER 22
ASH CHEST OF DRAWERS
CHAPTER 23
TRIANGLE TOWER
CHAPTER 24
TRIBUTE TO AMERICAN LINDEN
CHAPTER 25
RELIQUARY OF WOOD
APPENDIX A
WOODWORKING & CREATIVITY
APPENDIX B
SOME NOTES ABOUT SAFETY
FOREWORD
In 1996, I was contacted by David Lewis, acquisitions editor at F+W asking whether I would be interested in writing a book about boxes. At the time, I had published a couple articles in woodworking magazines and had been inspired by the books and philosophy of James Krenov, whom I sought to emulate in my work.
David had visited a small shop in my hometown of Eureka Springs and had discovered my small inlaid boxes for sale in a shop. Upon returning home to Cincinnati, he called to ask whether Id be interested in writing a book. I wanted to write a why-to book, like Krenovs not a how-to book. David and I found a compromise that combined projects with why-to sidebars that allowed me to share my own philosophy of woodworking in a context that empowered others to make beautiful boxes in their own shops.
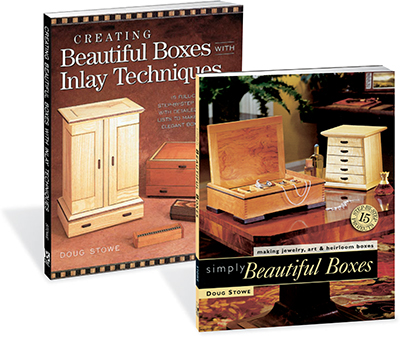
That conversation led to two best selling books, Creating Beautiful Boxes with Inlay Techniques, and Simply Beautiful Boxes. In the process of writing those first two books, I was transformed. I learned there is no better way to share philosophical ideas than through the shared making of beautiful and useful things. Starting out as a small town woodworker, I was given the opportunity to write for and teach a larger audience there is no better subject in the field of woodworking than making a wooden box.
You may invest just as much skill in a wooden box as in any larger project, and you can learn just as much. The materials are inexpensive, or can be derived from scrap. Boxes are perfectly suited to working in small spaces, too. So, in that light, boxes make ideal projects for beginning woodworkers.
25 of the box projects from those two books have now been compiled and are presented in this volume along with an appendix based on my original why-to sidebars (see ). As you choose projects from this book, keep in mind that the many of the boxes build upon the techniques learned from one another, and that vary in complexity and difficulty. So its a good idea to study the entire book before undertaking any particular project.
An important note about safety: Making boxes can involve working with small workpieces and making intricate cuts. Some of the photos in this book show machinery turned off and with guards removed as to show the intricacies of the cut. It is important to use every precaution when planning your cuts. Wherever possible use push blocks and other safety devices to minimize risk (especially if it is necessary to remove a machines guard in order to make a cut). See on page 189 for additional notes on safety and a pattern for my favorite push stick design.
I want to thank the editors of Popular Woodworking Books for helping me to keep these projects alive and available to readers and box makers of all ages. I also want to thank an earlier generation of editors and staff at F+W for encouraging me to write and share my ideas.
Doug Stowe
INTRODUCTION
THE ART OF INLAY
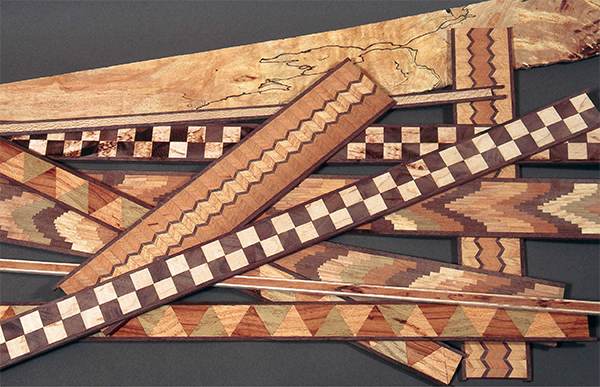
Before diving into the box projects in this book, its a good idea to take a look at inlay techniques. While you can purchase commercial inlays, nothing enhances a box and adds a personal touch better than inlay that youve created yourself. Inlay is perceived to be a more advanced woodworking technique requiring a great deal of patience and skill. For this reason, many woodworkers are reluctant to try it. However, it is easy to create your own inlays and use them to enhance your woodworking projects. Making inlay, for me, is a form of workshop play; an opportunity to experiment and see what I can come up with. The woods themselves, the colors, the patterns of grain, their various levels of reflectivity of light and their smells as they pass through the saw are a source of enjoyment for me. For some woodworkers, doing inlay work is a way they can demonstrate their woodworking expertise. Personally, I like to use my craftsmanship to give voice to the natural characteristics of the wood and use the inlay techniques to focus attention on the woods beauty rather than on my skill as a craftsman.
MAKING CHECKERBOARD INLAY
Preparing the Stock
Start by cutting 12" x 114" blocks of crotch walnut and fiddleback maple from 34" x 114" stock. Use the sliding cutoff table on the table saw, and a stop-block to maintain uniformity.
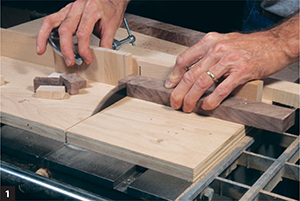
Use the cutoff box on the table saw and a stop-block to make sure all the pieces are the same size. The cutoff box is a simple jig that rides in the grooves in the table saw top allowing accurate cutting of parts.
Arrange and Glue the First Pattern
After the pieces are cut, arrange them in an alternating pattern walnut, maple, walnut fanning a long sting of patterned blocks. After you have organized the pattern, apply glue to all surfaces that contact other surfaces and then use a bar clamp to pull them tight, as shown in making the inlay for the simple inlaid box in . To keep them flat and straight, glue them up on a flat board, removing them from the board when the clamp is tight. Sight down the glued-up stock to ensure that the row of blocks is still straight, and shim the row out away from the bar or clamp it toward the bar, if necessary.

