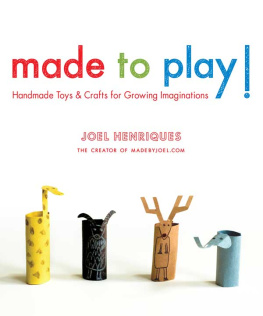
Handmade Toys and Crafts for Growing Imaginations
JOEL HENRIQUES
BOSTON & LONDON 2011
contents
Embroidered Pillow
Doll
PLAY WITH BUILDING TOYS,
CARS, AND TRUCKS!
Wall Hanging Paper and Wire
Sculptures
CONTENTS
acknowledgments
Special thanks to my wife and children for all of their love and inspiration. To my sister Andra, for telling me I should write a craft book. My sister Lori, for all of her support and expert advice. And everyone else in my entire family. Also, to my editor Jennifer Urban-Brown, for the opportunity, guidance, and encouragement.
introduction
Ever since my kids were born, Ive been fascinated by watching how they interact with objects. I started to appreciate how something like a small piece of Velcro on a teething bib would give their six-month-old minds and bodies something to explore for long periods of time. As they got older, I kept seeing examples of how simple toys often gave them more satisfaction and confidence than a toy that was too complicated. I was also amazed at how sophisticated their creativity would be when given the chance to have optional ways to play with a toy. The projects in this book combine my recent experience as a father with my lifelong love for toys, art, and simplicity. I hope they will provide you and the kids in your life a bit of fun!
you as a toy maker
These projects are all very adaptable. If you have your own design ideas, then try them! Change the size of a toy, or use different materials. For example, try making the portable zoo animals huge or the wood toys out of cardboard. Do whatever works best for you. Also, when crafting the toys in this book, try to relax about making a straight cut or sewing a straight linethe imperfections in handmade toys are what make them so special. And the real magic of these projects is the bonding process while creating or presenting them.
MY FAVORITE MATERIALS
This book includes projects made from wood, wire, fabric, and paper. Here are some of the tools and materials I prefer.
Beeswax Polish. I use a great all-natural polish by Three BEEautiful Bees. Just rub it into wooden toys with your fingers. The polish is great for the toys and your skin! I dont polish all of my wooden toys with beeswax, as sometimes I like the feel of raw wood. However, if I know its going to be an outdoor toy, or sucked on by a baby, then I always put beeswax on it to protect the wood.
Paint Pens. I use non-toxic Painters Opaque Paint Markers by Elmers. Theyre great for fabric and cardboard, and also for decorating wood toys.
Acrylic Paints. I use a non-toxic acrylic paint by A2 Chroma, which is perfect for making kids toys.
Sandpaper. I use fine 150-grit sandpaper, followed by a super-fine 400 grit. The 400 grit makes the wood very smoothperfect for little hands.
Scroll Saw. Scroll saws are great for cutting out small toys. I have a very old one, and you
can often find them used. Jigsaws also work well to make detailed cuts, and even a simple hand coping saw could be used to make the projects in this book.
Sew-on Velcro. I prefer sew-on Velcro as opposed to sticky-back adhesive Velcro, which will gum up your sewing machine. Remember when sewing Velcro to projects that opposite sides of the Velcro (loop on one piece and hook on the other) must be showing in order for the Velcro to attach to itself.
Transfer Paper. If you would like to transfer any of my template designs, I recommend buying a roll of graphite transfer paper. You can find it at art supply or craft stores. The graphite erases like a pencil and washes out of fabric. To use it, tear off a piece (one piece can be used over and over) and place it face down on your fabric, wood, or paper, then lay the template over it and trace over the template with a pen or anything pointed.
When using graphite transfer paper with fabric, youll need to trace with something thats not too sharp, so it doesnt poke through the paper and onto the fabric. You can use the back of a plastic paintbrush, or even a pen lid. The tracing tool just needs to press the graphite into the fabric; it doesnt need to draw.
Wire. I love making things from wire. Its inexpensive and very satisfying. I prefer steel wire, usually 18 to 24 gauge (18 is thicker, 24 is thinner). You can buy rolls of wire at hardware stores or most craft stores. Another favorite wire Ive been using is floral wire, either cloth wrapped or plain. Packs are available at craft stores. Sometimes I use steel welding rod, a very sturdy and inexpensive option. Look for it at a welding supply store. I often use ER 308L as its not too thick, which makes the rod fairly easy to bend. Keep in mind that its important to wear safety glasses when bending wire.
Woodburner. Ive had a woodburner since I was nine years old. Its a nice, non-toxic way to decorate wood toys. You can purchase a woodburner at most hardware or craft stores. Just be careful, because woodburners get very hot!
YOU AS A TOY MAKER
portable zoo animals
This portable zoo has been my sons favorite restaurant toy for over a year. He loves animals, and these folded paper versions are fun to stand up and arrange on the table. Also, they fold flat and store nicely in a mint tin.
materials
Paper (A sturdy paper works best, but any paper will do.)
Pen
Scissors
Templates (see )
- Draw the outlines for your animals using the templates or your own designs. (See on how to transfer the templates.) My animals are 2" to 4" in size, but you could make them any size you like.
- Cut out each animal.
- Draw designs on the animals, again following the templates or coming up with your own designs.
- Gently fold the animals in half to stand
them up.
MADE TO PLAY
PLAY ZOO!

