
Dedication
To my mother and my aunt Judy for inspiring me as a child, and to my three daughters for continuing to inspire me as an adult.
Acknowledgments
This book would not have been possible without the love and support of my husband. Thank you, Tom.
Special thanks to Susanne Woods, for her encouragement, and all the wonderfully talented people at Stash Books who were integral to this process, including but not limited to Amy Marson, Lynn Koolish, Gailen Runge, Alice Mace Nakanishi, Jenny Davis, and Kristy Zacharias. Much praise also to Christina Carty-Francis and Diane Pedersen for the beautiful photographs, and Zinnia Heinzmann for her work on the illustrations.
I am especially grateful and indebted to Carolyn Aune, my technical editor. I could not have done this without you! Your feedback and assistance have been invaluable.
Last, but not least, thank you to my pattern testers and helpers: Beth Webber, Genia Orlova, Lori Hamor, Audrey Hemesath, Simi Denson, and Andrea Maayeh.
preface
Ten years ago, I would never have imagined I would be writing a sewing book about dolls and toys. I was busy working at an office full time and had never used a sewing machine. After my oldest daughters first birthday I took a break from my first career to begin my second, at home, raising my kids. During this time of bleary-eyed joy and sleepless nights I found myself, like many others in this position, yearning for a creative outlet.
When I took up being a stay-at-home mom I thought about drawing, a childhood passion, but then considered learning how to sew because it seemed like a more practical choice. I purchased an inexpensive sewing machine and started following various sewing blogs and message boards to learn about fabric, patterns, and sewing techniques, and gather inspiration from the many creative talents online.
Around the same time, my older sister made a doll for my daughter. I was especially touched, and naturally I thought back to our childhood and a topsy-turvy Goldilocks doll that our mother had made for us. I remember with vivid detail every feature of that doll, from Goldilocks pale butter-yellow cotton yarn hair and ice-blue embroidered eyes to her floppy arms and neck. Mama Bears red gingham dress and Papas pale blue denim overalls are crisply etched in my mind. I can almost feel the bears dark brown fur and can picture perfectly the exact shape and size of their features. I remember being in awe of that doll and thinking it was one of a kind because my mom had made it. I was equally impressed by my sisters handwork, but ultimately the love and time put into making the toy is the gift that truly resonates most with me.
It wasnt long before I made my first doll from a popular Waldorf pattern and began my own toymaking hobby. I made several more dolls and toys from my own and others basic patterns before discovering vintage doll patterns from the 1940s. I loved the nostalgic look and feel of these dolls. After sewing some of the old (and sometimes finicky) patterns, I eventually decided to draft one of my own, incorporating various features that I preferred. This pattern was the first version of Sadie, Mae, and Elsie ().
Over the past few years, I have received countless requests for this pattern and general doll-making advice. While eager to share the pattern here, Im equally excited to share fifteen additional projects that I feel complement the doll and provide a sweet, vintage-inspired collection of toys. May they lead to fond memories for the little ones in your life!
introduction
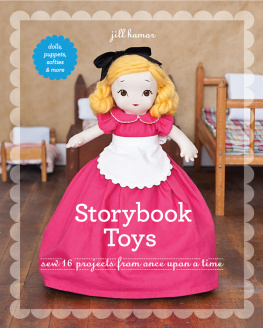
In this book you will find a collection of sixteen projects that are reminiscent of some of my favorite handmade, mid-century toys. All the projects were inspired by toys depicted in vintage greeting cards, childrens picture books, photographs of old toys, or images of vintage toy patterns.
This book is organized into five sections:
Tools and Techniques highlights general information and sewing basics.
Illustrated Hand-Stitch Glossary provides a quick reference for the hand stitches used.
All About Faces and Hair covers more indepth techniques for faces and hair that can be applied la carte to the later projects.
Dolls contains eight doll projects, including dolls for all sewing levels.
Toys includes eight nostalgic toys, including a pajama bag, a roly-poly duck, and a sweet cuddly bunny.
Although many of these toys take several hours of work, there is something for everyone. Projects such as Cottontail, Spot, and Humpty can be finished in an evening, while otherssuch as Sadie, Mae, and Elsie; the Jack and Jill Marionettes; and Topsy-Turvy Goldilocks and the Three Bearswill take a few days to complete. The end result, however, is worth the effort; you will have personally created an heirloom-quality toy to be passed down for generations to enjoy.
While detailed instructions are included for each project (for those who prefer to follow a pattern), I envision this book as a collection of ingredients to make and customize your own creations. There is a step-by-step section on customizing faces and hairstyles, and each project contains suggestions for alternative ways to construct each toy. These sections, called Variations, are just a sampling of the dolls and toys that are just waiting to be made. Use your imagination and, most of all, have fun!
how kids can help
As the mother of three young girls, I hear Can I help? quite often (while sewingnever when cleaning). Though sometimes it is cumbersome, I try my best to involve my girls in every toy-sewing project, even if their part is as simple as helping me stuff a doll or choosing what fabrics to use. Since the toys I make are mostly for my kids, its especially helpful to have their input. Each project includes suggestions on involving children, so you can pass along your sewing skills to a new generation.

tools and techniques
T his chapter highlights the tools and techniques suggested for completing the projects in this book. If you sew, you likely have almost all the tools and materials you need to start making a toy or two.
Tools
The following are some of the basic tools that youll need to have on hand.
Sewing machinenothing fancy, just a basic sewing machine
Scissorscraft scissors for paper, sharp scissors for fabric, and small scissors for detail work
Tape measure
Assorted pins and needlesfor hand sewing and embroidery
Iron
Doll needlesextra-long needles, in sizes ranging from 3 to 7, for sewing through stuffed areas and accurately placing features
Stuffing fork, knitting needle, wooden spoon, paintbrush (with bristles trimmed down to approximately  ), chopsticks, or other stuffing tool
Water-soluble and air-erasable markers
Threadgeneral-purpose sewing thread as well as upholstery thread for attaching limbs and hair, and stringing marionettes
Seam ripper
Optional, but recommended:
Freezer paper
Hemostatsa surgical tool with alligator teeth and a locking handle, useful for stuffing hard-to-reach areas and turning doll parts right side out
Lightbox
Pinking shearsuseful for finishing seam allowances
Selecting Materials




 ), chopsticks, or other stuffing tool