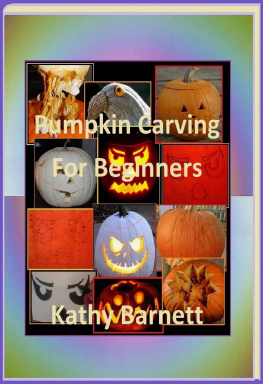

Pumpkin Carving For Beginners
Introduction
F rightfully scary, creepy, funny and adorable pumpkin faces are so much fun to carve. Using your imagination and heart in creating your own is exciting.
Included are tips on how to buy a healthy pumpkin. Learn how to keep your pumpkin fresh. Are you a beginner and have never cleaned out the inside of a pumpkin? Don't worry. This book will show you.
With step-by-step instructions, you will learn how to carve faces free-handed. Even learning how to use store bought or hand made stencils are included.
This book contains many pictures of wonderfully decorated pumpkins that will help your imagination roll with creativity.
Display gorgeous birds and geese that you created from gourds is a great way to begin the fall season all the way from Halloween through Thanksgiving. Make your own!
Thank you.
If you have any comments or questions about any of my books, please email me at .
Table of Content
. Tips on Buying a Healthy Pumpkin
A. Size, Shape, Condition and Stem
2. Cleaning Out Your Pumpkin's Innards
A. Step-by-Step Instructions
3. Carving Pumpkin Lids into Shapes
4. Carving Pumpkin Faces
A. Step-by-Step Instructions
B. Free Handed
C. Stenciling
5. Pumpkin Faces Glowing In the Dark
A. Frightful Faces Staring
B. Watchful Scary Faces
C. Weird and Wacky
D. Creepy Faces Glaring
E. Witches and Goblins Abound
F. Multiple Pumpkin Designs
6. Paint Your Pumpkin
A. Entirely with One Color
B. Scary, Funny, Silly and Cute Faces
7. Making a Goose and a Bird Out of Gourds
A. Step-by-Step Instructions
1. Tips on Buying a Healthy and Usable Pumpkin
P umpkins can be used for carving or cooking. When choosing the one you want to purchase keep in your mind what you are going to use it for.
Carving and cooking pumpkins: Similarities
1. The pumpkin should have a smooth texture without any soft, dark spots or bruising. Showing these signs tells you that the pumpkin is old and will deteriorate faster. If baking a pie or cooking soup, the fresh ones will contain quality nutrients. The older ones will most likely be deficient.

E ven if a pumpkin has only one or two dark or soft spots, deterioration has already begun. It should not be bought.
The pumpkin in this photo is very fresh. Even though there are light tan and cream colored markings and scratches on the outer skin, it is a perfect pumpkin for a jack-o-lantern.
They were probably made when growing on its vine or during transportation. If you touch them they will fill hard with no deterioration.


D o not get these spots mixed up with scratches, scars and other natural indentations. Black or dark coloration means deterioration in these types of pumpkins-gourds.
Some of the natural marks may even stick out higher than the smoothness of the skin. This is perfectly fine. To me, these markings add personality.

. Before purchasing your pumpkin put your finger on it and push in just a tad. If the pumpkin skin does not give in a little the skin is very hard (I am not referring to soft spots). The pumpkin should be hard but not that much, not like a piece of wood. Cutting or slicing through it can be very difficult.
3. Make sure that there is a stem on top. It does not have to be very big or long. If the stem is not there water can seep into the place where it use to be. This will cause softness and decay. Your pumpkin will most likely rot faster instead of staying fresher longer.

A lso, look and tap the area where the stem and pumpkin meet. Make sure there are no discolorations or softness. Carefully grab hold of the stem and slightly wiggle the stem to make sure that it does not move.
4. The pumpkin should not be carried by its stem because it can break or loosen. This will cause faster deterioration from water seeping inside.
Carrying the pumpkin this way can harm it. Grasp firmly on the sides and tote.

. Its size depends on how big you want your creative face to be or how much you want to cook. The cleaning and carving takes longer than with a smaller pumpkin. If eating the pumpkin for pies, stews or soups, how much pumpkin do you really want to eat? Choose the size for what you are going to use it for.
Pumpkins for carving
1. A carving pumpkin should stand straight up with very little wobbling, if any at all. Look for one that has a flat bottom.
2. Give it a good ole light thump. A slightly hollow sound should be heard. If not, pick it up. A heavy pumpkin for its size lets you know that the walls inside are thick. Thick walls hurt the brightness of the candle light. The light from your design carving will not show through as much.
3. Try to purchase rounder pumpkins instead of the oblong and taller ones. Oblong shapes have a tendency to be stringier. Cutting precise details can be a lot more difficult.

Cleaning Out Your Pumpkin's Innards
. Before carving it is important to wash off as much bacteria on the pumpkin's outer skin as possible. This can cause contamination in the inside while carving and quicken the decay.
Clean the pumpkin with a mixture of one tablespoon of bleach and one gallon of water. If you do not have bleach softly wash with soapy water and rinse the pumpkin thoroughly. Dry it completely.
2. Set the pumpkin in a place where there is plenty of room for you to scoop out the inside, design and carve your pumpkin. Sit some newspapers underneath the bottom and around your work area. Cleaning pumpkins can be messy.
3. Use a carving utensil and carefully cut into the upper portion with its point. Carve a circle around the top. The closer to the top that you cut, the smaller the opening will be. This is important because you have to have enough room for your hand or spoon to fit inside to scoop the seeds and pumpkin strings out. Always carve away from yourself.

. After the circle has been carved for the top, take the carving utensil and push it back into the section that was just cut. Carefully push down on the handle a little. This should cause the rest of the utensil to go upward (the part that is in the pumpkin). When this happens it will pull the top upward enough for your fingers to take it off.
Next page
