 PUBLISHER: Amy MarsonCREATIVE DIRECTOR: Gailen RungeEDITOR: Lynn KoolishTECHNICAL EDITOR: Debbie RodgersCOVER/BOOK DESIGNER / ILLUSTRATOR: Kerry GrahamPRODUCTION COORDINATOR: Zinnia HeinzmannPRODUCTION EDITORS: Jessica Brotman and Jennifer WarrenPhotography by Diane Pedersen, unless otherwise notedPublished by FunStitch Studio, an imprint of C&T Publishing, Inc., P.O. Box 1456, Lafayette, CA 94549 IM BORED. WHAT CAN I DO? Dont panic. This is a book just for you, packed with exciting sewing adventures that you will love. Explore all the fun of learning a new craft and trying new materials. Then experiment on your own.Be sure to play the games and work the puzzles as you go.
Besides being fun, they will help you to remember important information.Work page by page through the book, discovering new skills with each project.Ask your Helper Star when you dont know what to do next. A Helper Star is anyone who knows more about sewing than you do. It may be your mother or father, your grandparent, an older brother or sister, or even a friend.You are ready to begin. Enjoy your first adventure into the world of sewing. You can teach yourself!
 A NOTE TO HELPER STARS The Helper Stars job is to be available for extra help. The younger the beginning sewist, the more help he or she will need.
A Helper Star is anyone who knows more about sewing than the new sewist. One area where you can help is winding and inserting the bobbin, as this procedure varies from machine to machine. Be sure to have the sewing machine manual for easy reference. ABOUT THIS BOOK The Im bored, what can I do? syndrome can strike fear in the hearts of parents. Dont despair! Dont panic! Youre holding the answer in your hands. The Best of Sewing Machine Fun for Kids will jump-start the creativity in any child.
It is packed with exciting games and activities that kids will love to do. Our panel of experts (kids ages 717) suggested, tested, and approved each and every one. The goal of each activity is to have a successful skill-building experience and to develop sewing selfconfidence. Materials needed are inexpensive and easy to find around the house or wherever sewing, fabric, or craft supplies are sold. There are puzzle pages and patterns in this book that are meant to be traced. If you prefer, you can download and print them at http://tinyurl.com/11173-patterns-download.
We recommend that children learn to sew on a full-size sewing machine that is in good repair. A child is ready when he or she has enough coordination to handle scissors, small pins and needles, and can sit comfortably at the machine with feet flat on the floor. If the child is not tall enough at a regular table, find a shorter table or raise the foot pedal. The new sewist should also be responsible enough to know about the safe use of the iron and sewing machine. See Safety First! before starting. The Best of Sewing Machine Fun for Kids and a little encouragement will open the door to a lifetime of creative adventure.
Creative kids are happy kids!  LETS GO! Find these seven parts on your sewing machine. Once you have found them, you are ready to start your journey into the creative land of sewing.
 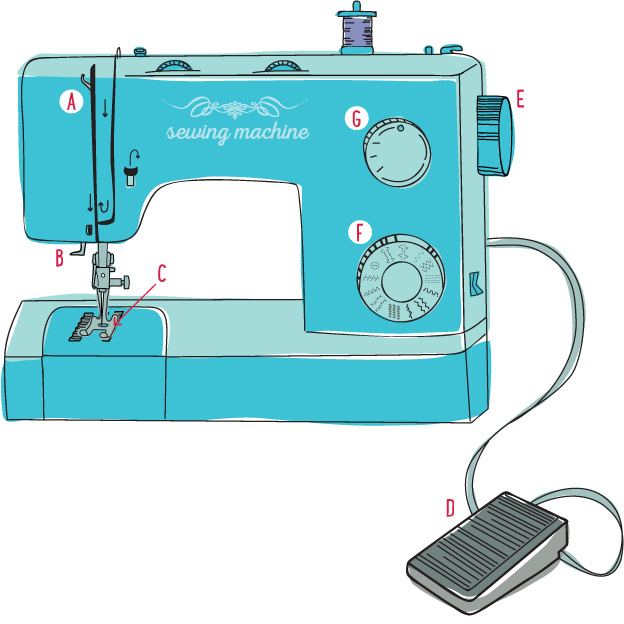 A Thread Take-Up Stop and start with this lever in its highest position to keep your needle from unthreading. B Presser Foot Lifter It is usually located on the back of the machine. Use it to raise and lower the presser foot. Raise it to insert or remove fabric. C Foot Pedal When lowered, it surrounds the needle and holds the fabric in place while you sew. D Presser Foot Press it with your foot to make the machine go and to control speed. D Presser Foot Press it with your foot to make the machine go and to control speed.
Raise your foot to stop. E Flywheel The flywheel, located on the right-hand side of the machine, turns as the machine goes. By turning the flywheel toward yourself, you can raise and lower the needle to place it exactly where you want it. F Stitch Width Selector Adjust this dial or lever on the front of the machine to change a straight stitch to a zigzag stitch. Use a straight stitch for the projects in this book unless told otherwise. G Stitch Length Selector This changes the length of your stitch.
All activities in this book use a mediumlength stitch, which is halfway between the smallest number and the largest number. Adjust the dial or lever for this stitch length now. SAFETY FIRST! Find ten unsafe things in this picture. To download and print this page, refer to About This Book. To check your answers, see Puzzle Answers. 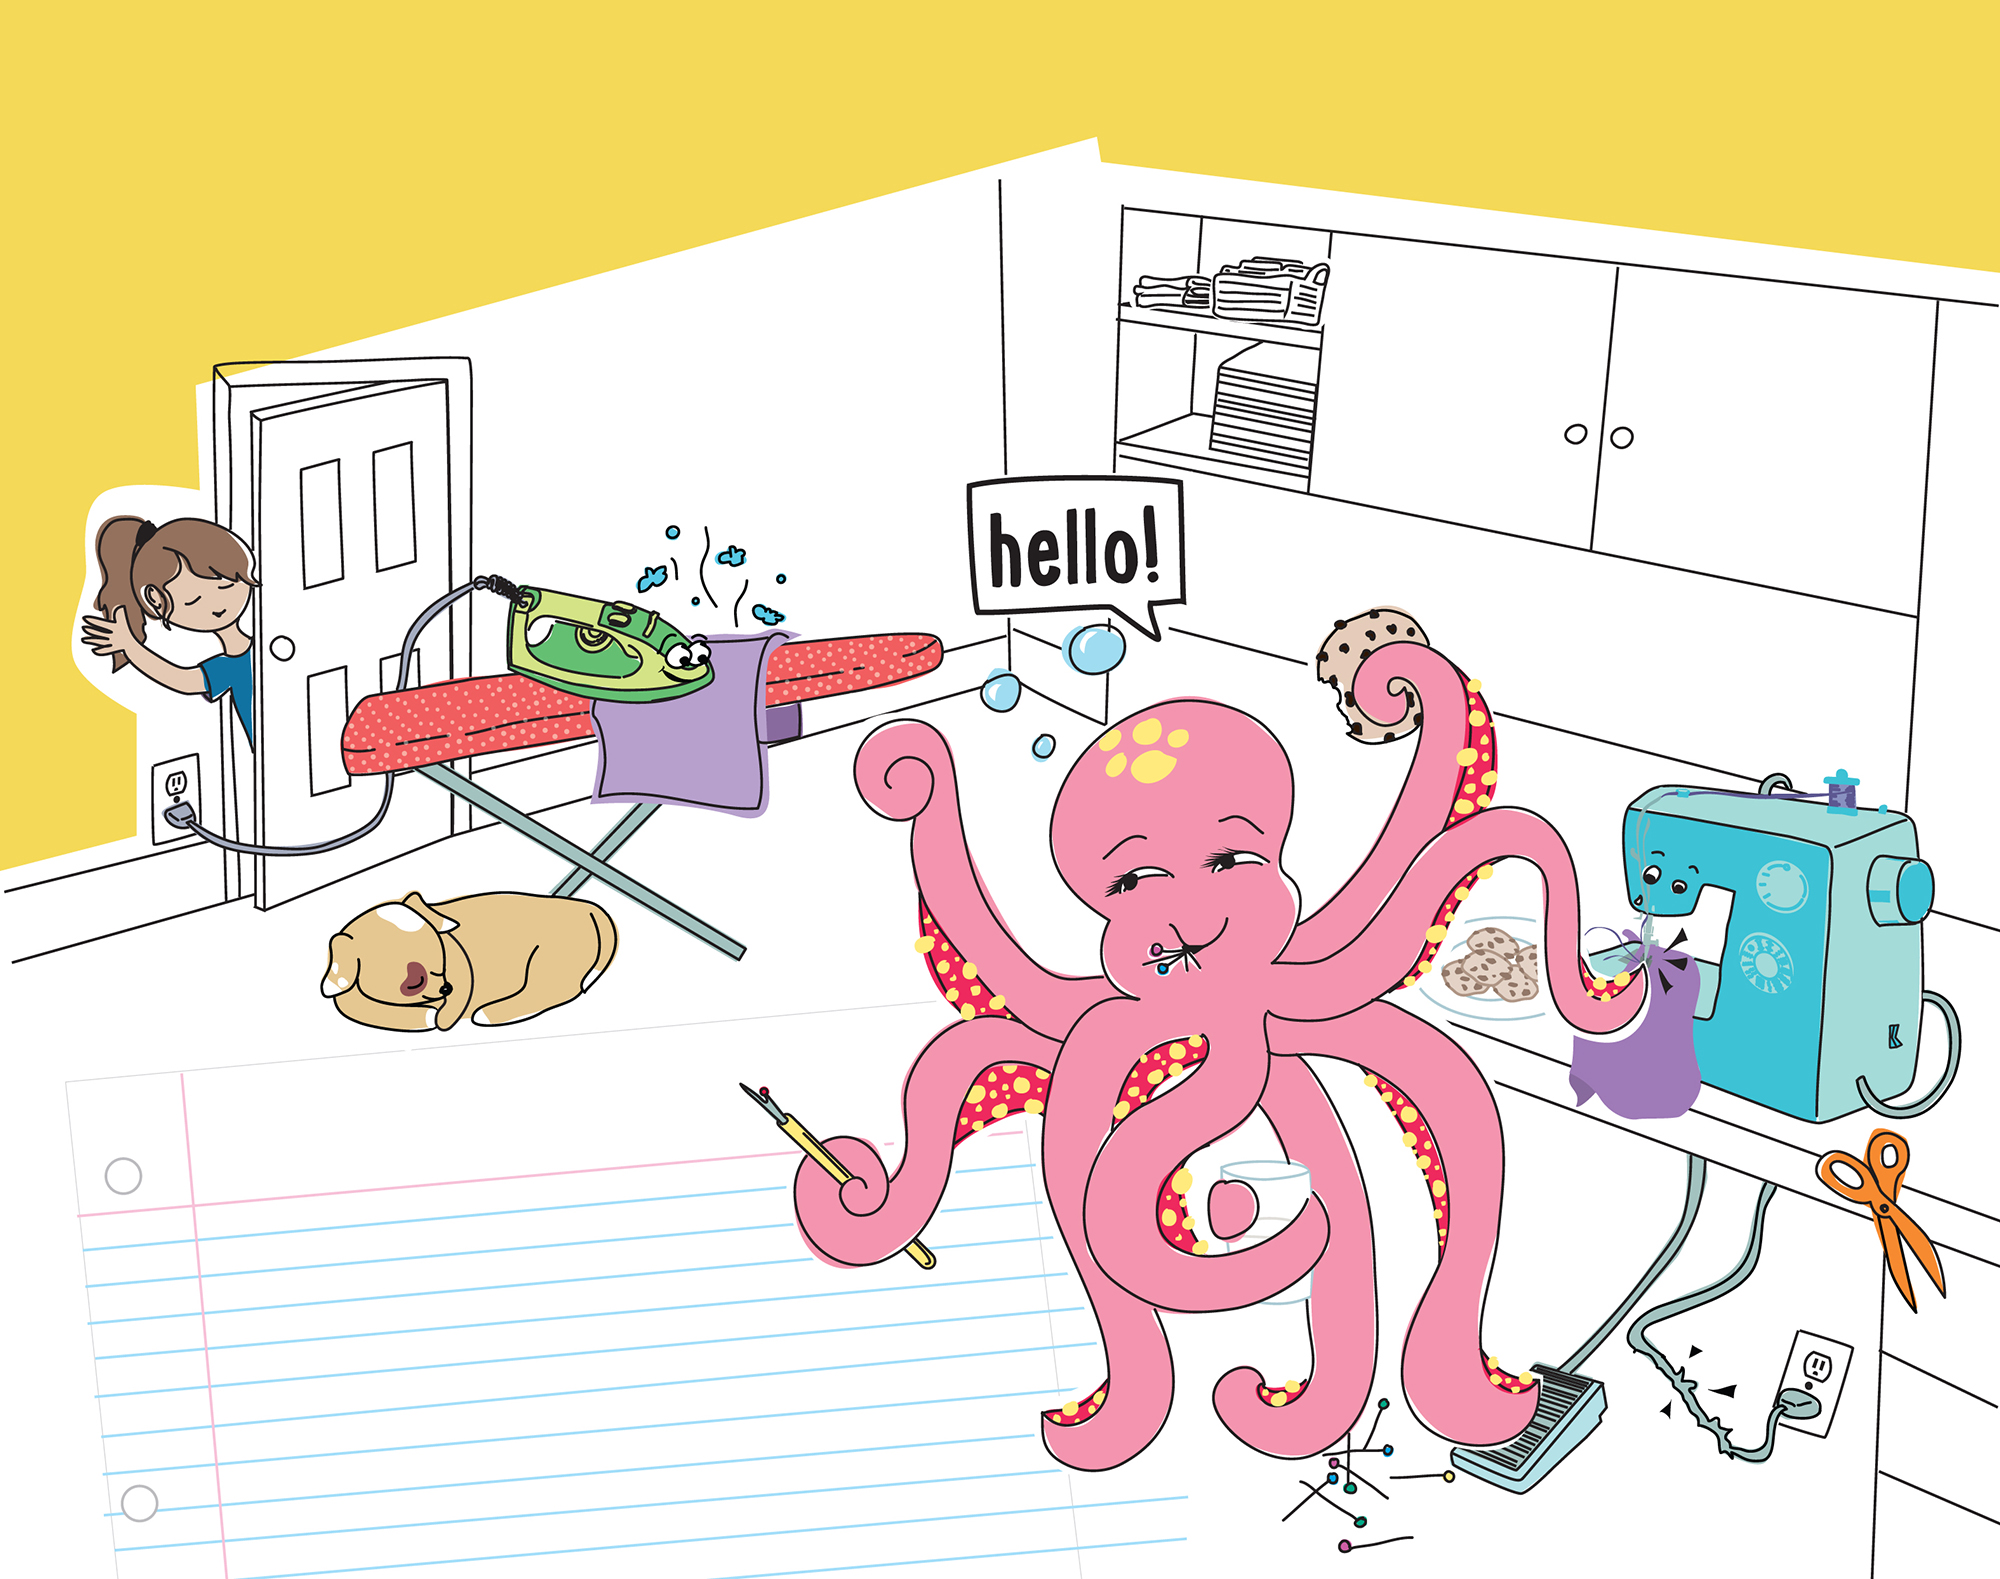 For all printable patterns or digital content: http://tinyurl.com/11173-patterns-download DISCOVER STITCHING
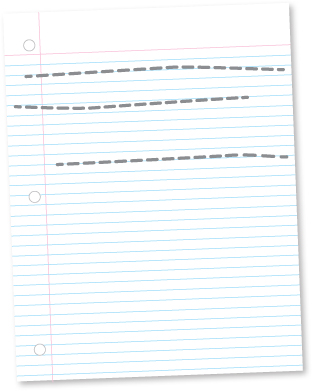
  Experiment by stitching without thread on notebook paper lines. Learn to control the speed and smoothness with a little practice.

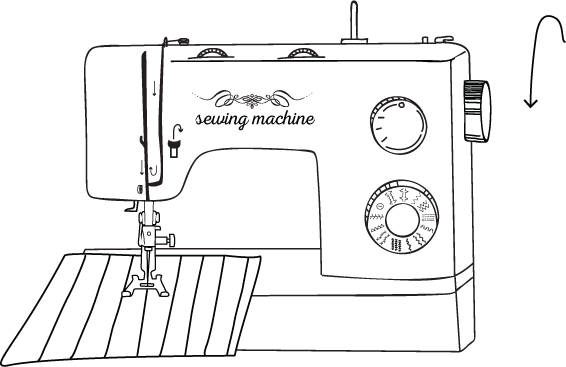 Remove all the thread from your machine.
Plug it in and turn it on. Raise the presser foot by raising the presser foot lifter. Put a piece of notebook paper under the presser foot. Lower the needle onto a line by turning the flywheel toward you. Turn the paper so you will be able to stitch along the line. 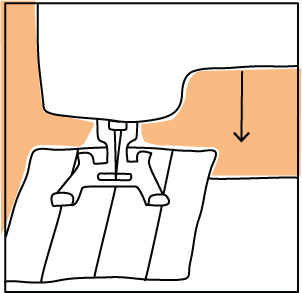
 Turn the flywheel toward you and gently step on the foot pedal to start the machine.
 Turn the flywheel toward you and gently step on the foot pedal to start the machine.
As your machine begins to stitch along the line, take your hand off the flywheel. Lightly guide the paper by making a triangle with your hands to frame the stitching area. Let the machine take the paper. Do not pull or pushjust guide. 
Next page


 PUBLISHER: Amy MarsonCREATIVE DIRECTOR: Gailen RungeEDITOR: Lynn KoolishTECHNICAL EDITOR: Debbie RodgersCOVER/BOOK DESIGNER / ILLUSTRATOR: Kerry GrahamPRODUCTION COORDINATOR: Zinnia HeinzmannPRODUCTION EDITORS: Jessica Brotman and Jennifer WarrenPhotography by Diane Pedersen, unless otherwise notedPublished by FunStitch Studio, an imprint of C&T Publishing, Inc., P.O. Box 1456, Lafayette, CA 94549 IM BORED. WHAT CAN I DO? Dont panic. This is a book just for you, packed with exciting sewing adventures that you will love. Explore all the fun of learning a new craft and trying new materials. Then experiment on your own.Be sure to play the games and work the puzzles as you go.
 A NOTE TO HELPER STARS The Helper Stars job is to be available for extra help. The younger the beginning sewist, the more help he or she will need.
 LETS GO! Find these seven parts on your sewing machine. Once you have found them, you are ready to start your journey into the creative land of sewing.
  A Thread Take-Up Stop and start with this lever in its highest position to keep your needle from unthreading. B Presser Foot Lifter It is usually located on the back of the machine. Use it to raise and lower the presser foot. Raise it to insert or remove fabric. C Foot Pedal When lowered, it surrounds the needle and holds the fabric in place while you sew. D Presser Foot Press it with your foot to make the machine go and to control speed. D Presser Foot Press it with your foot to make the machine go and to control speed.
 For all printable patterns or digital content: http://tinyurl.com/11173-patterns-download DISCOVER STITCHING
  Experiment by stitching without thread on notebook paper lines. Learn to control the speed and smoothness with a little practice.

 Remove all the thread from your machine.
 Turn the flywheel toward you and gently step on the foot pedal to start the machine.