A BEGINNERS GUIDE TO MINI FARMING
J.D.ROCKEFELLER
~~~
Smashwords Edition
Copyright 2015 by J.D. Rockefeller. All RightsReserved.
No part of this publication may be reproduced,distributed, or transmitted in any form or by any means, includingphotocopying, recording, or other electronic or mechanical methods,or by any information storage and retrieval system without theprior written permission of the publisher, except in the case ofvery brief quotations embodied in critical reviews and certainother non-commercial uses permitted by copyright law.
Smashwords Edition, License Notes
This ebook is licensed for your personal enjoymentonly. This ebook may not be re-sold or given away to other people.If you would like to share this book with another person, pleasepurchase an additional copy for each recipient. If youre readingthis book and did not purchase it, or it was not purchased for youruse only, then please return to your favorite ebook retailer andpurchase your own copy. Thank you for respecting the hard work ofthis author.
Table of Contents
Introduction
More and more people these days are producingtheir own foods right at home. The reasons are simple.Home-produced foods are healthier as well as cheaper than what youwill get at your nearest supermarket.
If you have a small backyard in your house,you can easily plan your own mini farm. Yes, you can actually builda small farm on that vacant plot of land at the back of yourhouse!
You can plant your own vegetables, fruits,and herbs. You can also build a chicken coop and raise your ownchickens for eggs and meat. Some simple bit of planning can helpyou raise your own food and you would probably rarely have to buyvegetables, fruits and eggs from the supermarket again.
How? Read this book and find out how you canstart your own mini farm right in your backyard. You will learn howto make your own raised bed and your compost. You will learn how tofertilize and irrigate your crops. Find out about how to controlpests and diseases in your small backyard farm. Also, learn aboutraising your own chickens and enjoying freshly laid eggs as well asmeat right from your home!
So, lets get started!

Chapter1 - What is mini farming?
All you need is a small plot of land. Itdoesnt matter how small it is. You just need some land to getstarted with your mini farm. More and more people around Americaare going for these small kitchen gardens or mini farms and you cando it too.
Mini farming is all about having your ownsmall farm. Here you can grow your own vegetables. You can have asmall coop and raise chickens and poultry. If you have a lawn, itcan be turned into a small garden with beautiful flowers. Fruitsand nut trees can be planted.
You can even do rainwater harvesting. If youare producing enough food (more than what you need), you can evenharvest the produce and then can it for later use or sell it toothers.
When you grow your own food, there are somebenefits that come along with it. You can choose to eat fresh foodsrather than the ones packaged and frozen in the supermarket.
For example, you can wait for your tomatoesto ripen and it can go straight onto your table. On the other hand,tomatoes you buy from the supermarket are harvested when green andthen allowed to ripen. This is why home-grown tomatoes always tastebetter than store-bought ones. They are also more nutritious.
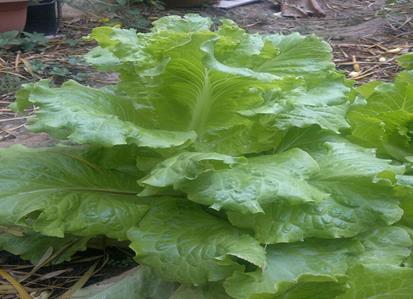
Photo 1: Plant your own vegetables in your minifarm
Another biggest advantage of these mini farmsis that you save a lot of money. For example, when you build yourown flock of chickens, you can rest assured of a regular supply ofeggs. So, you only make a one-time major investment while buyingchickens.
In short, if you have a plot of land that isserving no purpose, turn it into your own farm. Food produced atyour home is more nutritious, healthier, and inexpensive.

Chapter2 - Building Raised Beds for Your Mini Farm
Raised beds are quite useful for gardenerswho have limited space available. Since excess moisture drainseasily, raised beds are not that much affected by the cold springrains. So, you can start planting your crops earlier as compared toplanting directly on the ground.
The temperature of the soil in raised beds isalso about 8-13 degrees higher than the ground. This means you canlengthen your growing season with the use of raised beds.
Gardeners can build their own raised bedsquite easily. All you need is to decide which wood you want to use,how high you want it to be, and would you like to make the entirething by yourself or get some pre-made structures as well.
Take a look at the following points and getstarted with your own raised bed.
What is the best place for a raisedbed?
Most plants need about 4-6 hours of sunshineeach day. So, select an area in your backyard that gets plenty ofsunshine throughout the day.
What kind of wood to use?
Cedar is the most commonly used wood forgarden beds since it does not rot easily. Western red cedar is themost common choice.
What are ideal measurements for the raisedbed?
The most common height for a raised bed isabout 11-12 inches or two stacked boards of 2 x 6-inch boards. Youcan keep the raised beds as low as 6 inches or as high as 36inches. The higher the bed, the more soil it will need to fill.
Make sure to include cross-supports,especially for higher and longer beds, so that it doesnt putexcessive pressure on the sides and tilts them outward. The idealwidth would be 4 inches and the ideal length about 8 feet or 96inches.
How to make your raised bed?
If you are using two 6 inches high cedarboards, you will need to construct two boxes and then place themone on top of the other. Start by cutting four 4 feet pieces forthe ends of the box. Drill holes at the points where the screwswould go in. Attach the two 8 feet pieces to the 4 feet piecesusing polymer coated deck screws (use 3 in each corner). Repeat theprocess for the next box.
Clear the area where you want to place yourraised bed. Place the first cedar box. Cut a 1 x 2 piece cut to24 length to use as a corner piece. Make six such pieces. Insertfour of the pieces at the corner about 6 inches into theground.
Attach the box to these four corner pieces.Place the second box on top of the first. Attach the second boxwith the corner pieces. Place the other two corner pieces in themiddle to provide some additional support to the raised bed.
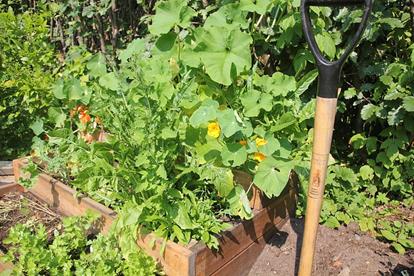
Photo 2: Use raised beds to extend growing season inyour mini farm
How to fill your bed?
Your raised bed is ready and now you need tofill it up with soil. Use your garden soil to fill the raised bed.Remove rocks, if any, by passing the soil through a mesh. If youdont have soil available, you can buy it at your local gardencenter. Add peat, lime, rock phosphate, compost, and fertilizer inthe soil. Spray it with some water. Your raised bed is ready toplant.

