• Complain

T. Kishore - Learn Autodesk Inventor 2018 Basics: 3D Modeling, 2D Graphics, and Assembly Design

Here you can read online T. Kishore - Learn Autodesk Inventor 2018 Basics: 3D Modeling, 2D Graphics, and Assembly Design full text of the book (entire story) in english for free. Download pdf and epub, get meaning, cover and reviews about this ebook. year: 2017, publisher: Apress, genre: Computer. Description of the work, (preface) as well as reviews are available. Best literature library LitArk.com created for fans of good reading and offers a wide selection of genres:

Romance novel Science fiction Adventure Detective Science History Home and family Prose Art Politics Computer Non-fiction Religion Business Children Humor

Choose a favorite category and find really read worthwhile books. Enjoy immersion in the world of imagination, feel the emotions of the characters or learn something new for yourself, make an fascinating discovery.

T. Kishore Learn Autodesk Inventor 2018 Basics: 3D Modeling, 2D Graphics, and Assembly Design
  • Book:
    Learn Autodesk Inventor 2018 Basics: 3D Modeling, 2D Graphics, and Assembly Design
  • Author:
  • Publisher:
    Apress
  • Genre:
  • Year:
    2017
  • Rating:
    3 / 5
  • Favourites:
    Add to favourites
  • Your mark:
    • 60
    • 1
    • 2
    • 3
    • 4
    • 5

Learn Autodesk Inventor 2018 Basics: 3D Modeling, 2D Graphics, and Assembly Design: summary, description and annotation

We offer to read an annotation, description, summary or preface (depends on what the author of the book "Learn Autodesk Inventor 2018 Basics: 3D Modeling, 2D Graphics, and Assembly Design" wrote himself). If you haven't found the necessary information about the book — write in the comments, we will try to find it.

Get started with the basics of part modeling, assembly modeling, presentations, and drawings in this step-by-step tutorial on Autodesk Inventor fundamentals. Next, this book teaches you some intermediate-level topics such as additional part modeling tools, sheet metal modeling, top-down assembly features, assembly joints, and dimension and annotations.

Engaging explanations, practical examples, and step-by-step instructions make this tutorial book complete. Once you have read Learn Autodesk Inventor 2018 Basics you will be able to use Autodesk Inventor for 3D modeling, 2D drawings, finite element analysis, mold design, and other purposes, just like a design professional. You will gain all the basic information and essential skills you need to work in Autodesk Inventor immediately.

What Youll Learn

  • Carry out virtual 3D modeling for your next 3D printing projects

  • Design molds for 3D printing and other projects

  • Generate 2D drawings

Who This Book Is For

Novice users of Autodesk Inventor.

T. Kishore: author's other books


Who wrote Learn Autodesk Inventor 2018 Basics: 3D Modeling, 2D Graphics, and Assembly Design? Find out the surname, the name of the author of the book and a list of all author's works by series.

Learn Autodesk Inventor 2018 Basics: 3D Modeling, 2D Graphics, and Assembly Design — read online for free the complete book (whole text) full work

Below is the text of the book, divided by pages. System saving the place of the last page read, allows you to conveniently read the book "Learn Autodesk Inventor 2018 Basics: 3D Modeling, 2D Graphics, and Assembly Design" online for free, without having to search again every time where you left off. Put a bookmark, and you can go to the page where you finished reading at any time.

Light

Font size:

Reset

Interval:

Bookmark:

Make
T. Kishore 2017
T. Kishore Learn Autodesk Inventor 2018 Basics
1. Getting Started with Autodesk Inventor 2018
T. Kishore 1
(1)
Hyderabad, India
This chapter covers the most commonly used features of Autodesk Inventor.
In this chapter, you will do the following:
  • Understand the Inventor terminology
  • Start a new file
  • Understand the user interface
  • Understand different environments in Inventor
In this chapter, you will learn some of the most commonly used features of Autodesk Inventor. In addition, you will learn about the user interface.
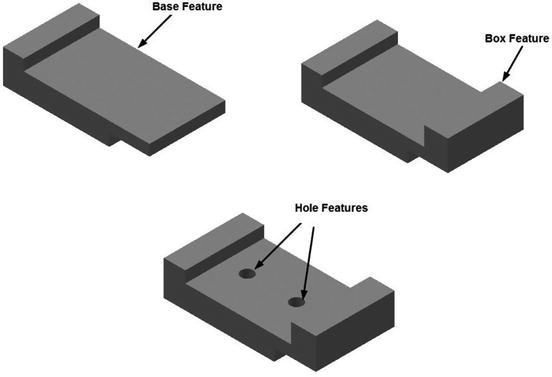
In Autodesk Inventor , you create 3D parts and use them to create 2D drawings and 3D assemblies. Inventor is feature-based . Features are shapes that are combined to build a part. You can modify these shapes individually.
Most of the features are sketch-based A sketch is a 2D profile and can be - photo 1
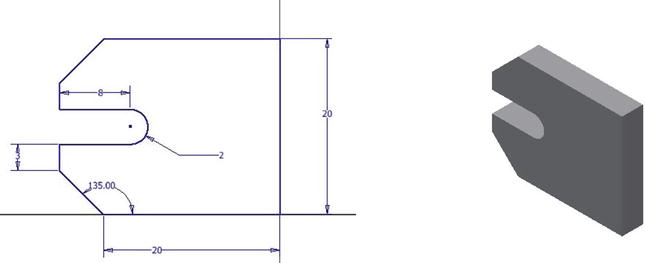
Most of the features are sketch-based. A sketch is a 2D profile and can be extruded, revolved, or swept along a path to create features.
Inventor is parametric in nature You can specify standard parameters between - photo 2
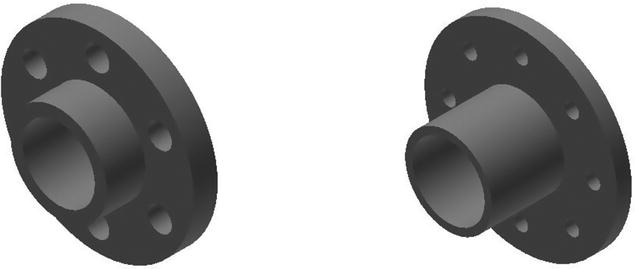
Inventor is parametric in nature . You can specify standard parameters between the elements. Changing these parameters changes the size and shape of the part. For example, see the following design of the body of a flange before and after modifying the parameters of its features:
Starting Autodesk Inventor To start Autodesk Inventor follow these steps - photo 3
Starting Autodesk Inventor
To start Autodesk Inventor, follow these steps:
  1. Click the Start button on the Windows taskbar .
  2. Click All Programs .
  3. Click Autodesk Autodesk Inventor 2018 Autodesk Inventor 2018 .
  4. On the ribbon, click Get Started Launch New .
  5. In the Create New File dialog, click the Templates folder located at the top-left corner. You can also select the Metric folder to view various metric templates.
  6. In the Part Create 2D and 3D Objects section, click the Standard.ipt icon.
  7. Click Create to start a new part file.
Notice these important features of the Inventor window :
Exploring the User Interface Various components of the user interface are - photo 4
Exploring the User Interface
Various components of the user interface are discussed next.
Ribbon
The ribbon is located at the top of the window. It consists of various tabs. When you click a tab, several tools appear. These tools are arranged in panels. You can select the required tool from a panel. The following sections explain the various tabs of the ribbon available in Autodesk Inventor.
The Get Started Ribbon Tab
This ribbon tab contains tools such as New, Open, Projects , and so on.
The 3D Model Ribbon Tab This ribbon tab contains the tools to create 3D - photo 5
The 3D Model Ribbon Tab
This ribbon tab contains the tools to create 3D features, planes, surfaces, and so on.
The View Ribbon Tab This ribbon tab contains the tools to modify the display of - photo 6
The View Ribbon Tab
This ribbon tab contains the tools to modify the display of the model and user interface.
The Inspect Ribbon Tab This ribbon tab has tools to measure the objects It - photo 7
The Inspect Ribbon Tab
This ribbon tab has tools to measure the objects. It also has analysis tools to analyze the draft, curvature, surface, and so on.
The Sketch Ribbon Tab This ribbon tab contains all the sketch tools The - photo 8
The Sketch Ribbon Tab
This ribbon tab contains all the sketch tools .
The Assemble Ribbon Tab This ribbon tab contains the tools to create an - photo 9
The Assemble Ribbon Tab
This ribbon tab contains the tools to create an assembly . It is available in an assembly file .
The Presentation Ribbon Tab This tab contains the tools to create the exploded - photo 10
The Presentation Ribbon Tab
This tab contains the tools to create the exploded views of an assembly. It also has the tools to create presentations , assembly instructions, and animations of an assembly .
The Drawing Environment Ribbon Tab In the Drawing environment you can create - photo 11
The Drawing Environment Ribbon Tab
In the Drawing environment , you can create print-ready drawings of a 3D model. The ribbon tabs in this environment contain tools to create 2D drawings .
The Place Views Ribbon Tab
This ribbon tab has commands and options to create and modify drawing views on the drawing sheet.
The Annotate Ribbon Tab This ribbon tab has commands and options to add - photo 12
The Annotate Ribbon Tab
This ribbon tab has commands and options to add dimensions and annotations to the drawing views.
The Sheet Metal Ribbon Tab The tools in this tab are used to create sheet metal - photo 13
The Sheet Metal Ribbon Tab
The tools in this tab are used to create sheet metal components .
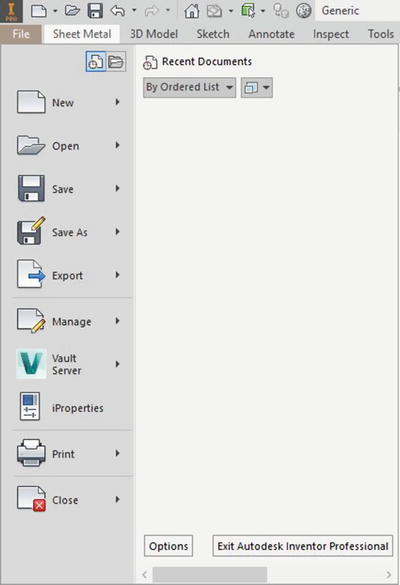
File Menu The File menu appears when you click the File tab located at the - photo 14
File Menu
The File menu appears when you click the File tab located at the top-left corner. This menu contains the options to open, print, export, manage, save, and close a file.
Quick Access Toolbar This is available at the top left of the window It - photo 15
Quick Access Toolbar
This is available at the top left of the window . It contains the tools such as New, Save, Open , and so on.
You can customize this toolbar by clicking the down arrow on the right side of - photo 16
You can customize this toolbar by clicking the down arrow on the right side of this toolbar.
Next page
Light

Font size:

Reset

Interval:

Bookmark:

Make

Similar books «Learn Autodesk Inventor 2018 Basics: 3D Modeling, 2D Graphics, and Assembly Design»

Look at similar books to Learn Autodesk Inventor 2018 Basics: 3D Modeling, 2D Graphics, and Assembly Design. We have selected literature similar in name and meaning in the hope of providing readers with more options to find new, interesting, not yet read works.


Reviews about «Learn Autodesk Inventor 2018 Basics: 3D Modeling, 2D Graphics, and Assembly Design»

Discussion, reviews of the book Learn Autodesk Inventor 2018 Basics: 3D Modeling, 2D Graphics, and Assembly Design and just readers' own opinions. Leave your comments, write what you think about the work, its meaning or the main characters. Specify what exactly you liked and what you didn't like, and why you think so.